Veloren: An Owner's Manual
This manual is the primary source of documentation for Veloren, both for users and for developers. It aims to document the features of Veloren, the manner in which it is developed, and describe the inner workings of both the game and the engine. It also aims to discuss future plans the development team has for Veloren.
 | Taken by @bidgehop
 | Taken by @bidgehop
 | Taken by @bidgehop
What is Veloren?
Veloren is a multiplayer voxel RPG written in Rust. It is inspired by games such as Cube World, Legend of Zelda: Breath of the Wild, Dwarf Fortress and Minecraft.
 | Taken by @ogzzmert
Veloren is fully open-source, licensed under GPL 3. It uses original graphics, music and other assets created by its community. Being contributor-driven, its development community and user community is one and the same: developers, players, artists and musicians come together to develop the game.
What status is the project currently in?
After rewriting the engine from scratch (old game can be found here) we're now at a stage where multiple features are introduced quite rapidly.
Who develops Veloren?
Veloren is developed by a community of volunteers that have one unifying aim: creating a bright, colourful, fun world that can be explored and interacted with in unique and interesting ways.
Website
The Veloren website contains blog updates, developer information and download links. You can find it at veloren.net
Discord
The Veloren community (both developers and players) are most active on the Veloren Discord server. You can join the server using the link below:
Social Media
We're on YouTube and Reddit, and don't forget to follow us on Mastodon.
Download
Visit veloren.net to find all available options.
Veloren for Players
Thank you for being interested in playing Veloren!
If you want to kickstart your playthrough you can read through the Getting Started guide on the Veloren Wiki.
As the game updates at least once a week we recommend using Airshipper, the official Veloren launcher.
Enjoy your journey!
Veloren for Players
This section of the book will explain basic game concepts for players and general tooling.
Note: Please keep in mind that Veloren is not even in alpha yet and gameplay can't be considered fully fledged out. Some gaming aspects mentioned are still heavily in development.
Reporting Bugs
- First thing to do will be to check our GitLab issues if this bug is already known.
- If not create an issue with the
Bug templateand try to describe the bug as good as possible, include screenshots if needed. - Upload the log file for additional information which can help us identify the issue. See below how to get logs. (Note: make sure no sensitive information is included in the log files)
- Submit the issue
Tip: Incase you do not want to create an GitLab account you can join our Discord
and report the bug in #bugs-and-support.
Collect Logs
If you encounter problems with Veloren, we might ask you for logs or a trace. This tutorial shows you how to collect the logs, depending on your operating system, and the way you have installed Veloren.
By default Veloren server and Voxygen will both produce logs.
They are printed in the terminal/cmd and to a file, called voxygen.log.<todays_date>. It even prints where the file is located to terminal/cmd:
Nov 25 01:40:14.388 INFO veloren_voxygen::logging: Setup terminal and file logging. logdir="/mnt/games/cargo-build/debug/userdata/voxygen/logs"
By default the granularity is INFO, but please provide logs on TRACE level (as shown below).
Search for a message called Tracing is successfully set to TRACE to verify TRACE level is enabled.
Linux and macOS
Airshipper
- Start Airshipper with
-vvargument. - When the game starts it will print to the terminal the location of the log file. Check Airshipper page.
Compiled
-
Start voxygen with
TRACElevel in terminal:RUST_LOG="trace" ./target/debug/veloren-voxygen # or RUST_LOG="trace" cargo run -
Copy trace from terminal or the log file mentioned above.
Windows
Airshipper
- Opening a CMD.
On Windows press
Windows key + R. Then typecmdand hitenter. - Type
airshipper run -vvand hit enter. - Run the game (till you encounter the problem).
- The logs should be located in
%Appdata%/airshipper/profiles/default/userdata/voxygen/logsOr check Airshipper page.
Compiled
Git Bash
-> See Linux/Compiled above
Cmd
- Open a CMD.
- Go to your veloren folder with the
cdcommand, e.g.cd C:\Users\<Your Username>\Desktop\veloren. - Write
set RUST_LOG=trace&& veloren-voxygen.exeand hit enter (exactly like here, without whitespace before&&) - The logs will now be printed to the CMD and the folder
userdata\voxygen\logsor%appdata%\veloren\.
Collecting info for graphics bugs
Sometimes it can be useful to collect extra information when debugging graphics issues. This info is not always needed so this mainly serves as a reference to point users to when the information would be helpful.
wgpu API trace
-
Create a folder that to hold the trace. (e.g.
wgpu-trace)mkdir wgpu-trace -
Run the game with the environment variable
WGPU_TRACE_DIRset to the new folder. (the path can be absolute or relative)-
Linux
WGPU_TRACE_DIR="./wgpu-trace" airshipper start -
Windows
    set "WGPU_TRACE_DIR=./wgpu-trace"
    airshipper start
-
-
Reproduce the bug/crash and then exit the game (the trace will be larger if this takes a while).
-
Zip up the trace folder for easy sharing.
For more details about wgpu's API tracing see https://github.com/gfx-rs/wgpu/wiki/Debugging-wgpu-Applications#tracing-infrastructure
Dx12/Dx11 debug layer output
First, check that you are using the dx12 or dx11 graphics backend.
Using DebugView++
- Force the debug layer on for Voxygen (Note: if you compiled the game yourself without
--releasethen this step can be skipped):- Run
dxcpl. - Click "edit list".
- Add
veloren-voxygen.exeand click ok. - Make sure "Force On" is selected in the debug layer section.
- Click "Apply".
Warning: Enabling debug layers adds extra overhead, make sure to follow the last step to disable them again.
- Run
- Setup DebugView++:
- Download the latest
DebugView++.exeversion from this page: https://github.com/CobaltFusion/DebugViewPP/releases. - Download the filter settings here: View.xml
- Run
DebugView++.exe. - Open filter settings screen with
F5. - Click "Load" button, select the downloaded filter settings file, click "Open", and then click "Ok" to close the filter settings screen.
- Download the latest
- Start voxygen (with the dx backend has issues) and run until the crash/error occurs.
- In DebugView++, press
Ctrl + Sto save the current view containing all the debug messages from voxygen. - Share the saved file.
- Run
dxcplagain and remove voxygen from the list.
Using Visual Studio
- Install visual studio https://visualstudio.microsoft.com/downloads/.
- Force the debug layer on for Voxygen (Note: if you compiled the game yourself without
--releasethen this step can be skipped):- Open visual studio.
- Go to Debug > Graphics > DirectX control panel.
- Click the
Edit List...button.. - Add
veloren-voxygen.exeto the list (be sure to remove this when finished). - Change the Debug Layer setting to Force On.
- Click apply and exit the control panel.
- Open the Voxygen executable as a project (original instructions):
- In visual studio: File > Open > Project.
- Navigate to veloren-voxygen.exe, select it, and click open.
- Run the project (green arrow and or option under the Debug menu).
- Reproduce the issue.
- Visual studio will have a section labeled "Output" with the output of the graphics debug layer and other random stuff (this can be shared via copy-paste).
Changelog
The changelog can be found in the repository, and in the Airshipper launcher.
Roadmap
Veloren's development process is open-ended and guided by its community - new features get added when there is consensus amongst contributors. There is a constant process of re-evaluation and incremental improvement, with contributors working on the features that most interest them. This inherently makes roadmapping a bit of a challenge.
With that in mind, the goal of this roadmap is to provide a rough idea of where Veloren is headed, while also trying to explain why things are the way they are, and why some features are still unclear. We want different aspects of the game to work alongside each other, creating interesting synergies and cohesive gameplay. Therefore, you will see similar subjects addressed in different parts of the roadmap.
In general, providing launch dates for particular features is not feasible, because Veloren does not have a game studio developing it.
Instead, improvements to Veloren are:
- done on a volunteer basis
- given in the spirit of open source
- made by individuals whose time and motivation can vary greatly, based on any number of factors
Table of contents
Existing Features Expansion/Rework
Durability
How durability works
Every piece of equipment, consisting of armor and weapons, starts off with 12/12 charges of durability with each death reducing said charge by 1. Durability has no effect on the stats of the equipment for a vast majority of charge, with the player only seeing a reduction in stats once the armor reaches 4/12 durability and steeply continues to decline the closer it gets to 0/12. Once a piece of equipment reaches 0/12 durability the item will still be usable, however, due to the steep decline in stats it becomes unviable for combat. A player can repair their damaged items at repair benches found in towns, costing Velorite and the primary material at lower levels.
Why do we want durability?
Durability is an important death penalty as it hinders players from continuously zerg-rushing entities that exceed their abilities in order to obtain high-ranking items.
Future plans for durability
Durability is a relatively new mechanic within the world of Veloren and thereby lacks polish. With the current implementation of the mechanic being unclear and frustrating for a lot of players, we are looking at a few tweaks that would make it more accessible and understandable for the players. The planned changes consist of:
- Reducing the maximum durability to 8.
- Making all repairs free.
- Adding an option to reinforce durability, temporarily raising the maximum durability by eg. 6 on every
reinforcement
- Each reinforcement would cost extra materials (velorite + primary materials).
- Reinforced durability cannot be repaired.
- UI Changes:
- Make the durability section of the death screen more explanatory (and flash!).
- Add a durability bar below damaged items.
Additionally, we would like to incorporate more Points of Interest in the open world of Veloren such as Inns or other resting locations which allow you to repair your items outside of towns.
For more information, feel free to contact us on the Veloren Discord.
Pets and Mounts
Pets and Mounts have both been introduced in the game for a while now. However, they are far from being a complete system. We plan to rework them sometime in the future, but most of the mechanics wanted for pets and mounts have to be discussed to know where we are headed. It is quite a complex topic, as there have been many variants of pets in games we take inspiration from. There is no set plan for how they will work, and it will probably take time for them to get a proper rework. Those are some of the questions and debates we have surrounding the system:
- Should pets and mounts die permanently? If yes, how do we make them more resistant and less superficial?
- How should we implement the orders that we give? Should it be a skill tree? Should it be only related to combat? Etc.
- How do we distinguish battle pets from regular pets?
For more information, feel free to contact us on the Veloren Discord.
Vehicles (Airships, Ships, Trains, Carriages, etc.)
When asked about fast travel, we answer that there will be no teleportation. Instead, we have decided that we want to add faster means of travel, aka vehicles. The 100% confirmed means of travel are Airships and Ships. Carriages and trains are still on the discussion table, or at least we aren’t 100% sure how they will operate aesthetically or technically. The decision to not have instant travel is to protect the economy and incentivize players to explore. Flights/Rides will take less time but will not be instant. Because of that, we also want to make sure those travels aren’t chores, so we want to have enough potential activities to do on them notably by having crafting stations and other players/NPCs to talk/trade with. As for ownership, there is no set decision yet on how it will be implemented for technical and gameplay reasons. Some questions we ask ourselves are for example: “How accessible should such a vehicle be?” “Won’t it be weird if everyone has their own ship/airship?” “What do we do about a vehicle when its owner logs out?” etc. For more information, feel free to contact us on the Veloren Discord.
Food
Currently, food serves as a healing mechanic, but we plan to change it to a “long-time buff”.
Economy
We plan to have a complete economy that touches upon every single aspect of the game. That’s to say all mechanics will be directly or indirectly impacted by the economy. The ideal goal is to reach a point where players and NPCs can impact the economy without breaking it, while also ensuring no artificial resources are spawned. This means that we want all resources and coins to be actually traded and not appear out of nowhere. This will allow the game to have coherent/developed shortages, supply and demand pricing, price competition, market control, market regulations, regions of influence, trade routes, externalities, etc. While this is extremely promising, it is also extremely complex and hard to pull off, therefore, it will take a lot of time and tweaking to reach a stable and believable stage. For more information, feel free to contact us on the Veloren Discord.
World Sim
In Veloren’s description, Dwarf Fortress is listed as one of the inspirations, and world sim is where most of that inspiration will go. Currently, we have rtsim, which is a system that keeps track of things that change over time in the world. This ranges from NPCs to how many resources are left in a chunk, so understandably this will have a big effect on the whole game. One quite important goal with rtsim is that we don’t want there to be too much of a difference, for simulated things, whether a chunk is loaded or not. This also means we don’t want different kinds of resources to be created from nothing when a chunk is reloaded, this also has the effect of making grinding not viable. There are more things we want to keep track of here though. We want to keep track of wildlife populations, of NPCs inventories while unloaded (maybe at a lower resolution). We also want to make NPCs actually work, some examples might include hunters affecting the wildlife population, or herbalists affecting resource counts in chunks when they pick things up. For more information, feel free to contact us on the Veloren Discord.
Dungeons
Dungeons are currently under rework, with the Gnarling Fortress and the Adlet Caves being the first two dungeons to be reworked. The future dungeons rework/addition include Sahagin Dungeon, Haniwa Tombs, Myrmidons Dungeon, Cultist Dungeon, Dwarven Mine, Vampire Dungeon, etc.
The objective is to make the dungeons more unique in how they look, how they play, and how the player interacts with them. We want dungeons to feel more tied to the world of Veloren, where there is interaction between the dungeon inhabitants and the world. For that, we aim at answering the following questions: Why is this dungeon here, what is its importance in the region, what are their motivations, and what will happen if they are defeated? (etc.) Therefore, we want those dungeons to feel “organic”, that’s to say they are an actual part of the world, and they interact with it. For that, the dungeons will not have instances, as this is incompatible with the “organic” part of it. The organic element of it also means that when a dungeon is cleared, we want to have the possibility that another group can settle in that particular dungeon. The tricky part is to find a balance between the availability of said dungeon and avoiding having grindy dungeons.
Additionally, in regards to content and balancing around dungeons we would like dungeons to be a more niche aspect of combat which requires a group of individuals to complete. This, of course, means that there will be both content designed for solo players and grouped players so as to not trivialize the completion of said content. For those playing single-player or those that find it difficult to form groups with other individuals, we offer the opportunity to team up with NPCs either by gaining favor or purchasing them for wares (See NPC Companions part of the roadmap).
For more information, feel free to refer to the following chapters of the roadmap: Horizontal Progression, Quests, NPCs Companions, and Instances. You can also contact us on the Veloren Discord.
Skill Trees
For now, Sword and Axe have received a Skill Tree rework (Note that it is not definitive, there will be modifications later to balance all weapons). Hammer, Bow, Staff, Sceptre, and General skill trees will also receive a rework. However, the discussions for those have either not begun, or are still in the very early stages. Therefore it is currently not possible to give more information about those without creating unstable expectations. For more information, feel free to contact us on the Veloren Discord.
Respawn
Respawns will receive a rework, to propose a more interesting and meaningful part of gameplay. However, there are no concrete plans yet, only a few areas around the mechanic that are being discussed on Discord. First, we might replace campfires with shrines/magic stones to give another use to campfires (cooking for example). Then, with the dungeon reworks (See Dungeon part of the Roadmap), respawn points might also be removed from dungeon entrances. Finally, we want to make the respawn points interactive, meaning that you would have to purposely select it as your spawn point (by pressing E). For more information, feel free to contact us on the Veloren Discord.
Combat animations
One feedback we receive a lot is about the animations in Veloren, more precisely the combat animations. They will most likely be reworked one day, but as things stand, the persons working on animations are not 3D animators per se. Therefore, most animations can be considered as placeholder for now, until someone gets to rework them. One important thing to note is that we do animations through code (Sam/Slipped explains). The downside is that many animators are only used to working with 3D rigging. For more information, feel free to contact us on the Veloren Discord.
Planned Features
Quests
Quests are one of the main features we want that is still missing from the game. The reason for that is that we don’t want traditional quests that reset and have no direct ties to the events of the world. As you may have seen in the world sim section, we want quests to be generated with that system (RT Sim2), where quests are generated based on an actual need in the world. For that, we need to procedurally generate the quest objective based on a set of variables. As an example, let’s say a region has been attacked by wolves and the sheep and farm have been damaged. The local population would want someone to deal with that, but they would also need enough money to pay the hunter. This simple example can be developed for all kinds of quests, from a microenvironment to a macroenvironment, thus leading to complex quest lines and many opportunities to complete those quests. As you may suspect, this takes a lot of time, as other systems need to be developed beforehand. There will be a first iteration for quests, where we set up the structure and develop an MVP. For more information, feel free to contact us on the Veloren Discord.
Tutorial
Rest assured, a better tutorial is planned. However, there are many reasons why the current tutorial is lacking. First, it was developed a while ago, when the game loop was different from the current one, meaning that it may be wrong in some aspects. It does give valuable information, but could vastly be improved. That being said, it would be a lot of work for very little to rework the tutorial now. Indeed, as we are in the pre-alpha stages, the game is evolving very fast, and from one week to another, a completely new feature can be introduced. Therefore, it is better for us to wait until we have developed the core of the gameplay to our liking before building a new tutorial. For more information, feel free to contact us on the Veloren Discord.
Horizontal Progression
We plan on moving away from vertical progression and focusing more on its horizontal counterpart when designing player-based progression. The charm of a horizontal system is that it allows for every encounter to carry some weight of danger even when returning to, what would be described as, earlier areas of content. That is not to say that the player will never get stronger as it is important to have some degree of verticality to help work the players through earlier stages of the game whilst learning game mechanics and other fundamental systems that will set up for a large portion of the game that is horizontal. To expand on this, Veloren will see three tiers of verticality and two tiers of horizontalness when viewing gear. These tiers are described as T1, T2, T3A, and T3B, with the latter two being horizontal variants of one another in which the B variant acts as a more niche version of the A while still being just as strong and viable to use.
Although there is a degree of verticality, as mentioned before, a large portion of the game focuses on aspects in which verticality is trivial. Instead, we encourage and would like to see a player’s ability to deal with difficult situations by having a large amount of game understanding and experience in dealing with said challenge under their belt. Additionally, we would like to encourage group plays for more treacherous entities found in the overworld, with only the most experienced being able to solo group-oriented content with a great deal of content and resources (See NPC Companions part of the roadmap).
For more information, feel free to contact us on the Veloren Discord.
New Weapons
Shields, Daggers, Spears/Polearms, Crossbows, and more magical weapons (grimoires, elemental gauntlets, etc.) are all planned. They will be worked on when the current weapons have all received their rework. Guns are up for discussion (Think pirate guns rather than modern guns). Some other questions include the addition of throwing weapons, and having ammunition for ranged weapons. For more information, feel free to contact us on the Veloren Discord.
Recipes
We plan to have recipes in the game to expand crafting gameplay. As of right now, all crafts are unlocked at the start, which lessens the sense of exploration and progression. Having recipes will add a deeper layer to the crafting system by tying it to other mechanics, such as quests for example. The development of this feature is in its early stages, so a lot of details and implementation plans still need to be discussed. For more information, feel free to contact us on the Veloren Discord.
Jobs and Professions
Veloren will have jobs and professions with a wide variety. So far, we have only planned the mechanic, but we have no concrete plan of execution for it. Some of the jobs would include Alchemy, Cooking, Blacksmithing, Hunting, Mining, Wood Cutting, Trading, etc. For more information, feel free to contact us on the Veloren Discord.
NPC Companions
One of the fundamental premises of Veloren is that players are no different from the inhabitants of the world. This means that humanoid NPCs should be continuously interacting with the world in a similar fashion to players in an attempt to breathe life into the game. As players are capable of teaming up with one another we wish to see adventuring NPCs form parties with one another and players. This can be done by either gaining the favor of an adventurer NPC or hiring them for wares.
Why is this wanted?
Aside from the aforementioned pros it provides for the world it also is an incredibly important premise for the sake of combat-related balance. A large portion of entities will be created under the assumption that it will take a group of humanoids to slay the beast. This allows individuals playing on single-player to experience the same kind of content as those in multiplayer, in addition to individuals playing on multiplayer that find it difficult to form a party with others and/or prefer playing by themselves.
For more information, feel free to contact us on the Veloren Discord.
Storage and Banking
Banking is a desired feature within the future of the game. We would like to see major banks have some sort of bank that allows them to store non-perishable items in them for a cost. These items can be removed at other banks in other cities as long as they have the corresponding resources to do so. An example of this would be If the player were to submit X-troll hide in town A’s bank and were to then travel to town B, they may not be able to withdraw troll hide if the town has a lack of trolls in their vicinity, and subsequently lack the material in their bank stock.
Such a system is desired as it provides content, coherence in the world of Veloren, and roleplaying opportunities. In Veloren we would like to provide a variety of choices for how one interacts with the world. This can range from roleplaying as a noble adventurer to partying with a band of crooked thugs intent on robbing the town’s local bank.
For more information, feel free to contact us on the Veloren Discord.
Housing
We definitely want a way for players to have a more settled presence in the world of Veloren. Therefore, housing is planned to be a mechanic, but there is currently no concrete plan of execution because it relies on core systems that are not complete yet. Some of the questions we currently have are:
- How can we make it persist with map changes?
- How to tie it to our rtsim2 system?
- How do we set up the real estate market?
For more information, feel free to contact us on the Veloren Discord.
Server Federation
Eventually, we’d like to have a ‘federation’ system for Veloren servers, which would allow trusted servers to enable character transfer (and perhaps other aspects of economy sharing & communication) between one another. Note that, in general, there is no good way to authenticate the world or player data generated by third-party servers, so all servers in a federation must trust one another to act in a legitimate manner. Note that this is a long-term feature with no specific implementation plan or timeline, so is unlikely to happen soon. For more information, feel free to contact us on the Veloren Discord.
Reputation system (RTSim)
Our goal is to have a reputation system using RTSim in which the actions of the players are remembered by NPCs and can affect the world around them. This system is currently in its early stages, where NPCs will remember and attack you if you have killed an NPC in the past hour and have been sighted. We plan to extend the system to create more scenarios that reinforce the coherence of the world. For example, reputation could allow a player access to a faction restricted areas, or give them the possibility to interact in a particular quest because of their past actions. This would greatly reinforce the roleplay elements in the game as every action would have potential consequences. For more information, feel free to contact us on the Veloren Discord.
World Map
We definitely plan to have a bigger map, with bigger biomes, and more biome types. However, there are two main reasons why we are currently not doing it. First, some of the worldgen tools and systems are not developed or optimized, which would currently damage the quality of the landscape and the performance. Such improvements take a lot of time and research. Secondly, gameplay-wise, Veloren is not ready to be much bigger in scale map-wise: we need to have more connections between regions, more activities in the overworld, better means of travel, and overall more reasons to travel.
We plan to expand the map to 262x262 km^2 and to have oceans and continents rather than only one big landmass. Some of the additional biomes include oceans, badlands, plains, swamps, more types of forests such as bamboo, more magical/fantasy biomes, etc.
For more information, feel free to contact us on the Veloren Discord.
Factions, Kingdoms, and Wars
Thanks to rtsim2, we want to have organic factions/kingdoms that will be able to take part in power struggles between each other and within themselves. Therefore, the diplomatic map will evolve with time because of the actions of the actors of Veloren. Note that this is a very long-term planned mechanic and that core mechanics will need to be developed and expanded before such a feature makes its appearance in the game. For more information, feel free to contact us on the Veloren Discord.
Mods and Plugins
We definitely want mods and plugins in the game. Some of the decisions we make may not be to the liking of everyone, that’s why we think it’s important that everyone can freely and easily modify the game on their side. The open-source aspect of the projects will enhance the modding potential of the game. The #learning channel in our Discord is also open for anyone who has questions regarding coding or any aspect of the game or programs we can help with.
Some ideas for plugins are that they enable (in ascending complexity):
- adding new models (armor), graphics, ron based stats to the game
- adding new animations, weapon skills, NPCs, structures (ships)
- logic behavior for sprite interaction (far future) I would like plugins to get downloaded from the server on the connection (but locally cached to cut down initial bandwidth).
Our devs working on plugins would also like to use wasm component model technology (WASI preview2) to enable plugins in Rust, C/++, Python, JavaScript, and perhaps more languages. This will enable servers to differentiate even more with different game content.
For more information, feel free to contact us on the Veloren Discord.
Discussed Features
Inventory rework
The current inventory system is heavily affected by the introduction of new items, as it is slots based. It favors having stacks of items while limiting the diversity of materials. There are talks of switching to a weight-based system, which would remove the item introduction constraint, and allow for a deeper/more meaningful inventory management. However, no set conclusion has been reached yet so a lot of the details are still to be discussed. For more information, feel free to contact us on the Veloren Discord.
Building
The majority of core developers, if not all, do want some kind of building system. Therefore, it is safe to assume that a building system could see the light of day. However, there are a lot of questions surrounding such a mechanic, as it is first and foremost an RPG. First, free building will not be a thing (See Free Building part of the roadmap). However, this is the only thing that is certain for the official version of the game regarding the building. Some of the questions we have regarding building include terrain persistence between maps, accessibility of the mechanic, ties to the world, level of freedom, and more. Note that this is a long-term feature. For more information, feel free to contact us on the Veloren Discord.
Fog of War and Better Map gameplay
Currently, the map shows every dungeon and region on the map. We don’t intend to keep it that way as it damages exploration and discovery quite heavily. Fog of War is more than likely planned, but the details regarding its implementation have not been discussed yet. Some of the questions we have concern the gameplay loop around map discovery, that’s to say we need to discuss the various ways the player will be able to discover the map and mark the different sites. For more information, feel free to contact us on the Veloren Discord.
Non-Planned Features
Instances
Instances are not compatible with a lot of core systems we have planned. Because we want to have organic dungeons (see the dungeon part of the roadmap), we can’t have instances on top of that, as it would affect the world coherence and the synergies of the core systems. Moreover, we believe that different actors should be able to impact the evolution and development of a dungeon. To conclude, instances can work in a traditional raid dungeon system, but this is not what we have planned for dungeons. For more information, feel free to contact us on the Veloren Discord.
Teleportation
Fast travel is a mechanic we do not want to see in Veloren as it trivializes a lot of planned systems such as the world’s economics. Teleportation implies the ability to instantaneously bring certain rare materials from one end of the world to another. For an economic system that relies on the notion of scarcity of supply depending on the environment, and thereby the subsequent increase in cost, this mechanic would oppose it in its entirety. Although fast travel is not desired, we would like to see fast_er_ travel such as airships, trains, sea-fairing ships, and a variety of mounts to still allow for both world coherence and to encourage the exploration of the wonderful world of Veloren which will be peppered in a large array of points of interests. For more information, feel free to contact us on the Veloren Discord.
Free building
Free building in a way similar to Minecraft isn’t something that is compatible with the style of game Veloren aims to be. First, we have a finite map, so the map would quickly be filled with a huge population. Then, we want to keep the coherence of the world, both aesthetically and gameplay-wise, that’s to say we want to conserve the art direction and quality, while also preventing profanity through free building. Then, we need to tie those buildings to civilization and our rtsim2 feature, which is most likely incompatible with such a mechanic as free building. It’s worth mentioning that the game is first and foremost a RPG, not a survival/sandbox building game like Minecraft is. For the world to be coherent and the RPG elements to stay at the core, we can’t really allow free building in the main game mode. (By main game mode we mean that people are free to create other game modes where free building could work. Think of creative/god mods in other games as potential game modes. For more information, feel free to contact us on the Veloren Discord.
Singleplayer characters in Multiplayer
Because everyone is an admin in single-player, we can not allow single-player characters to transfer to the official MP server, as it could quickly destroy the economy and the balance of the game. There are plans to have a server hierarchy, where you can go to a server “below” the one you are currently on in terms of “server trust”, but cannot go up. This would allow players to keep their characters in single-player no matter the fate of a server. However, such a feature takes a lot of time and isn’t planned for the short term. You can also check the Server Federation explanation for more details. For more information, feel free to contact us on the Veloren Discord.
Vanity Slots and Transmogrification
We do not want a vanity system as we would like the player/NPC to be able to tell how strong an entity is based on visible equipment. We also don't want it simply for roleplaying purposes. If a player wants to look a certain way for roleplay, they should also bear the consequences of that decision. On another note, if players really want to change their look, they can do so on their side by replacing the .vox files of the item in question. That way, it will only be visible to them and it won’t impact the experience of other players. For more information, feel free to contact us on the Veloren Discord.
Development Philosophy
🔭 Wide scope
Veloren's world is large and extensive and we encourage many different ways to play the game, as well as diverse elements that enrich the experience. There is no single, specific goal or focus and we believe it would hurt the wider community if one was introduced.
🗽 Player freedom
Where possible, avoid 'invisible walls' (both literal and metaphorical) that arbitrarily break consistency and limit what players can do. If limitations need to exist for technical, balance, gameplay, or moderation reasons then attempt to find in-world justification for those limitations.
🧩 Modularity and extensibility
Where possible and where doing so does not place dramatic limitations on future development, Veloren should attempt to be modular such that disparate components of the project can be reused and integrated into diverse settings. Where possible, features should be small, self-correcting, rugged, and able to operate in diverse environments (a great example of this is the Controller/Agent/CharacterState code, which generalises to all players, NPCs, and even non-sentient entities).
🫱🏼🫲🏾 Community-driven
Development should occur in dialogue with the community. While Veloren is inevitably steered by those most active members, it is important to take into account feedback from the periphery: less active developers, moderators, artists, players, as well as third parties such as downstream consumers of the software produced by the project. Veloren should actively resist attempts to turn the project into a for-profit venture, with fundraising and finance used wisely with the primary aim of enhancing the core project, player experience, and upstream/downstream projects.
🗺 Teleological
Veloren emphasises gameplay and systems that emerge out of the application of simple, physically-based rules where possible. Systems should be simple, interconnected, self-balancing, and simple in isolation: complex and interesting behaviour should emerge through the interaction between systems rather than arising due to complexity within any single system.
Game Questions
- Is there a death punishment?
- Is there voxel building?
- Is the map infinite?
- Is there fast travel?
- Can we have cosmetic armor above actual armor?
- Will there be flying mounts?
- Is there a roadmap?
- Will the game release on Steam?
- Will we have shields?
- How to donate?
- Will we be able to build in the game?
- How do I become a moderator?
- Will Veloren contributors add NFT and crypto to the game?
- Will the game ever have paying content?
- Can I use boats or airships
- Will dungeons change?
- When will the “X” feature come out?
Technical Issues/Questions
- Airshipper crashes on launch.
- Game crashes on launch.
- Cannot connect to the server.
- Game is lagging.
- What software do you use for models?
- How to download the game on macOS and Linux?
- How to host a server?
- Will there be mods?
- Is there any account panel on the website?
- Can I add an email to my account to change my password?
- How frequently is the game updated?
- How to change account password
- Can I transfer my character between servers?
- "Veloren is open-source and community-driven" How do you plan to overcome the problem of going in too many directions at the same time?
Answers
Is there a death punishment?
Yes, players lose durability on their gear when dying.
Is there voxel building?
There is some destruction - you can mine ore chunks and certain kinds of rock with a pickaxe.
Building isn't intended to be a major part of the game though and is currently only available for server admins and in singleplayer mode through commands. You can read more about it here.
Is the map infinite?
The map is finite, and will stay that way. There are many reasons to have a finite map, for one it allows us to do advanced simulation (erosion, economy, etc.). Which creates a more meaningful and consistent world. That doesn't mean that we can't have a big world though.
Is there fast travel?
Faster travel is planned: airships are now (2026-07-04) functionally stable, ships will someday be usable for inter-town travel, and there could be other means of transport as well (underground trains, etc.). The contributors tend to not lean towards fast travel in a sense of instant teleportation, as this tends to deter exploration, and may affect the economy and the coherence of the world, as trade goods could be transported freely.
Can we have cosmetic armor above actual armor?
The contributors tend to not want cosmetic armors that would appear above an actual armor as it would affect immersion with NPCs but also regarding PvP. We want the players and the NPCs to be able to judge the strength of an opponent based on their look (gear), cosmetic armors would go against that. On the other hand, we do plan to have gear only for the look, like an urban outfit you could wear in cities. It would replace your armor and not appear above it.
Will there be flying mounts?
The contributors are divided on this matter but the common agreement is that flying mounts could make certain parts of the game skippeable (air travel with airships notably), but we do think that with the right approach and balance flying mounts could be a thing in the long term.
Is there a roadmap?
Yes! You can find it on this page.
Will the game release on Steam?
We do plan to have a Steam release in the future but it won’t happen until we think there is enough content for it to be ready for Steam. We believe that a Steam release could turn away some players permanently if they are not satisfied with the first version they play. Moreover, as of right now, the game is not meant to be played by many, as it’s in pre-alpha. Many players would have demands and expectations that exceed the ones of a pre-alpha content which could harm the good development of Veloren in some ways.
Will we have shields?
And other types of weapons? Yes, shields and other weapons are planned, but we will only start working on them after the modular weapons and skill overhaul updates are out, as we want the current weapons to be where we want them to be before working on new ones.
How to donate?
You can support Veloren here: https://veloren.net/donate. All donations go into server upkeep and management.
Will we be able to build in the game?
Yes and no. Currently, building is possible on some servers meant for it or in singleplayer with the build mode. But, in the long-term, we don’t plan to have building as free as it is on Minecraft for example, as it could affect the RPG element of Veloren. Free building would affect real time simulation. Another reason is that, unfortunately, not every build made by the players would fit with the art style of the game, which could affect the experience of other players. However, it’s not impossible that you may be able to customize the inside of your house in a town or city with premade assets.
Will Veloren contributors add NFT and crypto to the game?
Simply put, no. We do not want to add any form of crypto nor be tied to it. If you see cryptos or NFTs linked to Veloren, please be advised that it’s not an official part of the game and that we are not responsible for what you do with it.
Will the game ever have paying content?
No. Everything made by the official team will be free. We want every user to have the same gaming experience.
Can I use boats or airships?
Now you can travel with airships! Right now boats are still glitched, but in the future, we plan to have travel means with ships too.
Airshipper crashes on launch
Airshipper doesn't work for some people, you could try updating your graphic drivers. But you can still open the game by using Airshipper in the console via the command
airshipper run.
Will dungeons change?
Yes. Dungeons are currently being reworked. It is a process that takes time as we want every dungeon to be unique in gameplay and experience.
When will the “X” feature come out?
We do not know. Every Veloren contributors works on the game during their own time, meaning that there is no way to know how fast something will be merged in the game.
Game crashes on launch
- With Airshipper you can switch graphics mode by pressing the cogs next to the play button. If none of the graphic modes you can select work, you could try to update your video drivers. Otherwise your GPU might be too old to run Veloren 😔
- If you start the game through console you can switch graphics mode by setting the WGPU_BACKEND environment variable to either
dx12,dx11orvulkan.- In Windows cmd:
set WGPU_BACKEND="vulkan"- In PowerShell:
$env:WGPU_BACKEND="vulkan"- On macOS and Linux:
export WGPU_BACKEND="vulkan"Then running the game through
airshipper run
Cannot connect to the server
For some people switching DNS server fixes this problem. Here is a guide.
In the worst case you'd have to use a VPN to connect to the server.
Game is lagging
- If you have latency issues, it can help to enable "Lossy terrain compression" and lower View Distance in Graphics settings. Note: The game server is hosted in Germany so expect high latency if you're geographically far away.
- If you have fps issues, the best settings to change are:
- Cloud Rendering Mode to Cheap
- Shadow Rendering Mode to None
- Fluid Rendering Mode to Cheap
- Select a lower Internal Resolution
- Put Bloom and Point Glow at 0%.
If you're still having issues with fps you could try enabling the BareMinimum experimental shader. Here is a guide how to enable experimental shaders.
What software do you use for models?
We use MagicaVoxel, you can download it here: https://ephtracy.github.io/ However, you can also use other apps if you feel like it (Goxel, etc) but some features we use might not be available.
How to download the game on macOS and Linux?
Mac: Steps to run Airshipper on Mac
- Download Airshipper for mac
- Open the zip to get the file
- Open terminal and write chmod +x ~/Downloads/airshipper-macos/airshipper
- Double click the file
- Enable running in system preferences>Security & Privacy>Allow Linux: You can download the Linux Airshipper here: https://veloren.net/download
How to host a server?
Suggest to take a look at this and following the steps of the Hosting Guide. If there's anything you don't understand don't be afraid to reach out to the devs on Discord and ask for help through our multitude of channels, such as #support.
Will there be mods?
Yes. This game is open source, meaning that anyone can fork the project to make a mod with their own vision. We plan to have many mods in this game!
Is there any account panel on the website?
We have an account page to create acount, change password, change username, and delete account.
Can I add an email to my account to change my password?
For now (2022-06-07) it is impossible to add email to account. There has been discussion regarding optional Email verification.
How frequently is the game updated?
We should have an update every Thursday, but the amount of content in each update depends on what has been worked on in the week, which will vary quite often. We also have official releases that cover more content than the weekly updates to keep every player informed.
How do I become a moderator?
Becoming a mod is relatively natural.
If someone is a long term, talkative, and active player in discussion then they're likely to be recognized by the current community and the moderators too. If the devs need more moderators to handle the influx of players then they'll privately reach out to them and ask if they'd like to become one.
How to change account password?
You can change it on the account page.
Can I remove my account?
In theory you can currently remove your account. Certain devs can remove it (AngelOnFira) but it is difficult task that we attempt to dissuade people from requesting account deletion. There is absolutely no drawback towards keeping an account, all the passwords are encrypted. We hash it once client-side with the auth domain as a salt using argon2id and then once again server-side with a randomized 256-bit salt. The client-side pre-hash is to prevent third party authentication servers from discovering potentially reused user passwords If you decide to keep your account then it simply means that you can log onto it whenever you'd like.
Can I transfer my character between servers?
You currently cannot transfer characters as there's no proper way of trusting the player to not give themselves items (whether in the game or through source code) which would effect the official server. We may eventually add a way to bring your multiplayers character to single player or allow the option for server hosts to let character transfers.
"Veloren is open-source and community-driven" How do you plan to overcome the problem of going in too many directions at the same time?
The Veloren contributors use an organized system through its Discord and GitLab to restrict what content gets added into the main game. This allows the dev team to progress and polish the game to the degree they want. Additionally, because of its FOSS nature we expect, and even encourage, Veloren to be forked. Modders will be able to make the necessary changes to the code of the game then present to the community to try and snag the some players while also continuously adding new code from the main to the fork as long as it stays within GPL3 guidelines. We've already seen this happen with a popular Chinese server created by Evan Meek, who has heavily modded and changed the game, adding new entities, abilities, and tons more!
Airshipper
Airshipper is a cross-platform Veloren launcher taking care of keeping Veloren up to date. Due to our frequent updates it is the recommended way of installing Veloren.
Download
Visit the download page to download Airshipper.
Files
Airshipper stores its files in the following directories depending on your operating system:
| OS | Path |
|---|---|
| Windows | %appdata%/airshipper |
| Linux | ~/.local/share/airshipper |
| Linux (Flatpak) | ~/.var/app/net.veloren.airshipper/data/airshipper |
| macOS | ~/Library/Application Support/airshipper |
Airshipper will support profiles in future and and already stores the game files in a profile called default.
Logs, screenshots, assets are all located in the userdata directory inside a profile.
Troubleshooting
If Airshipper does not open or display correctly, you can use the CLI by
-
Opening a terminal
On Windows press
[Windows] + [R]. Then typecmdand hitenter. -
Type
airshipper runand hit enter -
Enjoy the game.
Voxygen - 3D client frontend
Voxygen is Veloren's official 3D frontend. It's the frontend that almost all users interact with Veloren though, although alternatives do exist. However, almost all documentation about Veloren assumes that Voxygen is the client frontend in use.
Voxygen is designed to be user-friendly and intuitive.
settings.ron
Voxygen's configuration file can be found in the userdata directory.
Gamepad Controls
Voxygen supports inputs via a gamepad or game controller. Unfortunately, inputs are not yet configurable through a GUI,
but settings.ron can be edited manually via the controller section.
Experimental shaders
Voxygen has several experimental shaders that can be enabled via the graphics.render_mode.experimental_shaders option.
Please note that these shaders come with no guarantees: they may be completely broken, mutually-incompatible, or may melt your GPU. Please do not report rendering bugs if you have them enabled (unless you are quite sure that the bug has nothing to do with the shaders).
Experimental shaders are explicitly not a feature of the game. They may be removed, break, or change at any time and without warning. They exist purely as a way for developers to try out new rendering ideas and as a fun extra for experienced players.
Experimental shaders can be enabled by adding them to the relevant section. For example, to enable the Brickloren
and NoNoise shaders:
(
    ...
    graphics: (
        ...
        render_moder: (
            ...
            experimental_shaders: [Brickloren, NoNoise],
            ...
        ),
        ...
    )
    ...
)
The order of the shaders is irrelevant.
You can find a list of all available experimental shaders here.
Commands
All commands that can be executed in-game are listed below, note that many commands require Admin or Moderator permissions. Arguments surrounded by <> are required, [] indicates an optional argument.
Note: The tables below are auto-generated from the commands within the Veloren source code using the command
cargo cmd-doc-gen.
Server Commands
| Command | Description | Requires | Arguments |
|---|---|---|---|
| /adminify | Temporarily gives a player a restricted admin role or removes the current one (if not given) | Admin | <player> [role] |
| /airship | Spawns an airship | Admin | [kind] [destination_degrees_ccw_of_east] |
| /alias | Change your alias | Moderator | <name> |
| /area_add | Adds a new build area | Admin | <name> <kind> <xlo> <xhi> <ylo> <yhi> <zlo> <zhi> |
| /area_list | List all build areas | Admin | |
| /area_remove | Removes specified build area | Admin | <name> <kind> |
| /aura | Create an aura | Admin | <aura_radius> [aura_duration] [new_entity] [aura_target] <aura_kind> [aura spec] |
| /ban | Ban a player with a given username, for a given duration (if provided). Pass true for overwrite to alter an existing ban. | Moderator | <player> [overwrite] [ban duration] [message] |
| /battlemode | Set your battle mode to:
| [battle mode] | |
| /battlemode_force | Change your battle mode flag without any checks | Admin | <battle mode> |
| /body | Change your body to different species | Admin | <body> |
| /buff | Cast a buff on player | Admin | <buff> [strength] [duration] [buff data spec] |
| /build | Toggles build mode on and off | ||
| /campfire | Spawns a campfire | Admin | |
| /clear_persisted_terrain | Clears nearby persisted terrain | Admin | <chunk_radius> |
| /create_location | Create a location at the current position | Moderator | <name> |
| /debug_column | Prints some debug information about a column | Admin | <x> <y> |
| /debug_ways | Prints some debug information about a column's ways | Admin | <x> <y> |
| /delete_location | Delete a location | Moderator | <name> |
| /destroy_tethers | Destroy all tethers connected to you | Admin | |
| /disconnect_all_players | Disconnects all players from the server | Admin | <confirm> |
| /dismount | Dismount if you are riding, or dismount anything riding you | Admin | <entity> |
| /dropall | Drops all your items on the ground | Moderator | |
| /dummy | Spawns a training dummy | Admin | |
| /explosion | Explodes the ground around you | Admin | <radius> |
| /faction | Send messages to your faction | [message] | |
| /give_item | Give yourself some items. For an example or to auto complete use Tab. | Admin | <item> [num] |
| /goto | Teleport to a position | Admin | <x> <y> <z> [Dismount from ship] |
| /group | Send messages to your group | [message] | |
| /group_invite | Invite a player to join a group | <player> | |
| /group_kick | Remove a player from a group | <player> | |
| /group_leave | Leave the current group | ||
| /group_promote | Promote a player to group leader | <player> | |
| /health | Set your current health | Admin | <hp> |
| /into_npc | Convert yourself to an NPC. Be careful! | Admin | <entity_config> |
| /join_faction | Join/leave the specified faction | [faction] | |
| /jump | Offset your current position | Admin | <x> <y> <z> [Dismount from ship] |
| /kick | Kick a player with a given username | Moderator | <player> [message] |
| /kill | Kill yourself | ||
| /kill_npcs | Kill the NPCs | Admin | [radius] [--also-pets] |
| /kit | Place a set of items into your inventory. | Admin | <kit_name> |
| /lantern | Change your lantern's strength and color | Admin | <strength> [r] [g] [b] |
| /light | Spawn entity with light | Admin | [r] [g] [b] [x] [y] [z] [strength] |
| /lightning | Lightning strike at current position | Admin | |
| /location | Teleport to a location | <name> | |
| /make_block | Make a block at your location with a color | Admin | <block> [r] [g] [b] |
| /make_npc | Spawn entity from config near you. | ||
| For an example or to auto complete use Tab. | Admin | <entity_config> [num] | |
| /make_sprite | Make a sprite at your location | Admin | <sprite> |
| /make_volume | Create a volume (experimental) | Admin | [size] |
| /motd | View the server description | ||
| /mount | Mount an entity | Admin | <entity> |
| /object | Spawn an object | Admin | <object> |
| /permit_build | Grants player a bounded box they can build in | Admin | <area_name> |
| /players | Lists players currently online | ||
| /portal | Spawns a portal | Admin | <x> <y> <z> [requires_no_aggro] [buildup_time] |
| /region | Send messages to everyone in your region of the world | [message] | |
| /reload_chunks | Reloads chunks loaded on the server | Admin | [chunk_radius] |
| /remove_lights | Removes all lights spawned by players | Admin | [radius] |
| /repair_equipment | Repairs all equipped items | Admin | |
| /reset_recipes | Resets your recipe book | Admin | |
| /respawn | Teleport to your waypoint | Moderator | |
| /revoke_build | Revokes build area permission for player | Admin | <area_name> |
| /revoke_build_all | Revokes all build area permissions for player | Admin | |
| /rtsim_chunk | Display information about the current chunk from rtsim | Admin | |
| /rtsim_info | Display information about an rtsim NPC | Admin | <npc index> |
| /rtsim_npc | List rtsim NPCs that fit a given query (e.g: simulated,merchant) in order of distance | Admin | <query> [max number] |
| /rtsim_purge | Purge rtsim data on next startup | Admin | <whether purging of rtsim data should occur on next startup> |
| /rtsim_tp | Teleport to an rtsim npc | Admin | <npc index> [Dismount from ship] |
| /safezone | Creates a safezone | Moderator | [range] |
| /say | Send messages to everyone within shouting distance | [message] | |
| /scale | Scale your character | Admin | <factor> [reset_mass] |
| /server_physics | Set/unset server-authoritative physics for an account | Moderator | <player> [enabled] |
| /set_motd | Set the server description | Admin | [locale] [message] |
| /ship | Spawns a ship | Admin | [kind] [Whether the ship should be tethered to the target (or its mount)] [destination_degrees_ccw_of_east] |
| /site | Teleport to a site | Moderator | <site> [Dismount from ship] |
| /skill_point | Give yourself skill points for a particular skill tree | Admin | <skill tree> [amount] |
| /skill_preset | Gives your character desired skills. | Admin | <preset_name> |
| /spawn | Spawn a test entity | Admin | <alignment> <entity> [amount] [ai] [scale] [tethered] |
| /sudo | Run command as if you were another entity | Moderator | <entity> <[/]command> [args...] |
| /tell | Send a message to another player | <player> [message] | |
| /tether | Tether another entity to yourself | Admin | <entity> [automatic length] |
| /time | Set the time of day | Admin | [time] |
| /time_scale | Set scaling of delta time | Admin | [time scale] |
| /tp | Teleport to another entity | Moderator | [entity] [Dismount from ship] |
| /unban | Remove the ban for the given username | Moderator | <player> |
| /version | Prints server version | ||
| /waypoint | Set your waypoint to your current position | Admin | |
| /weather_zone | Create a weather zone | Admin | <weather kind> [radius] [time] |
| /whitelist | Adds/removes username to whitelist | Moderator | <add/remove> <player> |
| /wiring | Create wiring element | Admin | |
| /world | Send messages to everyone on the server | [message] |
Voxygen Client Commands
| Command | Description | Requires | Arguments |
|---|---|---|---|
| /clear | Clears all messages in chat. Affects all chat tabs. | ||
| /experimental_shader | Toggles an experimental shader. | [Shader] | |
| /help | Display information about commands | [[/]command] | |
| /mute | Mutes chat messages from a player. | <player> | |
| /unmute | Unmutes a player muted with the 'mute' command. | <player> |
References
All the parameters that can be used in the commands that can be executed in-game are listed below.
| Parameter | Description | Link |
|---|---|---|
ai | spawned entity has an agent/ai, true/false | |
alignment | wild, enemy, npc, pet | code reference |
amount | number | |
area_name | name of an area | |
args... | additional parameters, e.g. in /sudo player tell Hello, how are you? args... would be Hello, how are you? | |
ban duration | duration of the ban, e.g. 3d2h30m | |
battle mode | "pvp" (player vs player) or "pve" (player vs environment) | |
block | name of block | blocks |
buff | Name of Buff; be careful, docs use CamelCase and command expects snake_case, e.g. docs: "IncreaseMaxHealth" command: "increase_max_health" | docs reference |
[/]command | e.g. give_item or /give_item | |
confirm | "confirm", to confirm | |
destination_degrees_ccw_of_east | ||
duration | duration in seconds | |
enabled | boolean, true/false | |
entity_config | path to the entity starting from veloren.assets.common.entity with . as separator of directory names; with the prefix common.entity.! e.g.: common.entity.dungeon.fallback.boss | folder with the entities |
faction | String of Characters, e.g. "Hello" | |
hp | Health Points as number | |
item | path to the item starting from veloren.assets.common.items with . as separator of directory names; with the prefix common.items.! e.g.: common.items.armor.assassin.belt | folder with the items |
kit_name | name of a kit, e.g. debug | definition of the kits |
message | String of Characters, e.g. "Hello" | |
name | String of Characters, e.g. "Hello" | |
num | number | |
object | name of the object | definition of objects |
overwrite | set to true to overwrite previous ban | |
player | Name of Player's Character | |
preset_name | path to the skillset starting from veloren.assets.common.skillset with . as separator of directory names; with the prefix common.skillset.! e.g.: common.skillset.preset.max.sceptre | folder with the skillset |
radius | a number to define the radius, has to be higher than 0 and lower than 512 | |
r, g, b | red, green, blue; numbers used to define a color | |
role | "admin" or "moderator" | |
skill tree | name of a skill tree, e.g. general | skill tree names from code |
sprite | name of the sprite | definition of sprites |
strength | number | |
time | options: midnight, night, dawn, morning, day, noon, dusk or %H:%M format e.g. 12:21 | code reference |
username | username of a player | |
xhi | point x on hi | |
xlo | point x on lo | |
x | point x | |
yhi | point y on hi | |
ylo | point y on lo | |
y | point y | |
zhi | point z on hi | |
zlo | point z on lo | |
z | point z |
Userdata Folder Structure
The userdata folder unifies all player and server configuration in a single place, which should be transferrable between different Veloren installations from v0.8 onwards.
The folder will be next to your Veloren executable, or in your repository's root if self-compiling. See where Airshipper stores files if using the launcher.
- voxygen
- logs
- voxygen.log.<date of log>
- settings.ron
- profile.ron
- logs
- singleplayer
- saves
- db.sqlite
- server_config
- settings.ron (Some entries ignored)
- description.ron
- whitelist.ron (Ignored)
- banlist.ron (Ignored)
- admins.ron (Ignored)
- saves
- server
- saves
- db.sqlite
- server_config
- saves
- server-cli
voxygen/settings.ron
Contains settings for Voxygen, Veloren's official 3D client frontend.
This file is almost entirely configurable through Voxygen's in-game settings UI. For more information, see here.
The main thing not accessible from main game menus is gamepad keybindings, which can only be changed by directly editing the file.
profile.ron
Contains hotbar information per-character and per-server. Should never need to be manually modified.
server/server_config/settings.ron
This file is intended for manual editing, and should never be overwritten by the game. If the file is in an invalid state, the server will emit a warning in including the position of the error, create a settings.template.ron file full of the default values, and start up with all default values.
| Setting | Description | Default value |
|---|---|---|
gameserver_protocols > Tcp > address | A List of addresses that the game server will listen on. Supports TCP and QUIC, as well as both IPv4 and IPv6. Note that clients will use the port 14004 by default. Changing the port will require to specify it in the client too. | "0.0.0.0:14004" |
auth_server_address | When using Some(<value>): The value is the IP address or domain the game server and client will use. If you want to disable authentication, you replace Some(...) with None. | Some("https://auth.veloren.net") |
query_address | Address used to query the server. For example by AirShipper to quickly display the player counts and other server info without fully connecting to it. | Some("0.0.0.0:14006") |
max_players | Maximum number of players connected to the game server. | 100 |
world_seed | Seed number used to setup the random generation of the world. | 130626853 |
server_name | Displayed server name. | "Veloren Server" |
day_length | Length of an in-game day in real-world minutes. | 30 |
map_file | Sets which map to load. See here for allowed values. | None |
max_view_distance | The maximum view distance that clients may request. Useful for low-RAM servers. | Some(65) |
max_player_group_size | The maximum party size players can have, for purposes of XP sharing and ignoring friendly fire. | 6 |
client_timeout | Amount of time to wait before disconnecting a client who cannot successfully connect. | (secs: 40, nanos: 0,) |
max_player_for_kill_broadcast | When using Some(<value>), value is the maximum number of online players where the server will send a death message/notification to the global chat or region. Some(...) can be replaced with None if you never want to globally broadcast death messages in chat. | None |
calendar_mode | Should be left on Auto. Configures the calendar to be used by the server for date-based server events. Other options include None, Timezone(<timezone>) where timezone is a chrono_tz::Tz, or Events([<calendar_event>]) where calendar_event is a list of CalendarEvent. | Auto |
gameplay > battle_mode | Can be Global(mode) or PerPlayer(default: mode), where mode can be PvP or PvE and will be given to each player on join. The difference between Global and PerPlayer is that PerPlayer enables /battlemode command. | Global(PvP) |
gameplay > explosion_burn_marks | Defines whether or not explosion burn marks by players are shown in the world. | true |
moderation > banned_words_files | List of files containing words to be censored. None are distributed by default. | [] (Empty array) |
moderation > automod | To enable the auto moderator. If set to true, players will be subject to automated spam/content filters. | false |
moderation > admins_exempt | Exempt admins from the auto moderator. | true |
world > start_time | The number of in-game seconds after the in-game epoch (12 AM on the first day of the Veloren calendar) that the server should begin at. This value only affects the first server startup. The default is 9 AM since 9 hours * 60 (minutes per hour) * 60 (seconds per minute) = 32400 (seconds) | 32400 |
server/server_config/description.ron
Contains the introductory chat message clients get when entering the server, as a quoted string. Can be multiple lines.
Example:
"This is the best Veloren server"
server/server_config/whitelist.ron
Contains a list of whitelisted account IDs, and is considered disabled if empty. Heavily recommended to use the /whitelist add/remove in-game command, rather than manual editing.
Example: Result of using /whitelist add Treeco and /whitelist add treeco2.
[
    "6f15b915-074f-f78d-df88-34fb33e4e13f",
    "3445349e-d03c-64bf-6ecf-a15806275a1f",
]
server/server_config/banlist.ron
Contains a list of banned accounts, and reasons. Heavily recommended to use the /ban and /unban in-game commands, rather than manual editing.
Example: Result of using /ban Treeco General nuisance and /ban treeco2 alt account.
{
    "6f15b915-074f-f78d-df88-34fb33e4e13f": (
        username_when_banned: "treeco2",
        reason: "alt account",
    ),
    "3445349e-d03c-64bf-6ecf-a15806275a1f": (
        username_when_banned: "Treeco",
        reason: "General nuisance",
    ),
}
server/server_config/admins.ron
Contains a list of admin account IDs. Heavily recommended to use admin add/remove from the server's TUI, rather than manual editing. There is no in-game command to permanently add admins, for security reasons.
Example: Result of using admin add Treeco.
[
    "ee193d08-8f5a-4862-a279-1a8c4bd357f3",
]
If you have the TUI disabled or are otherwise unable to use it, you can instead use the server CLI to add/remove admins.
Example:
veloren-server-cli admin add Treeco
server-cli/settings.ron
The settings in this file govern the warning period the server gives for automatic shutdowns for updates.
| Setting | Description | Default value |
|---|---|---|
update_shutdown_grace_period_secs | The amount of time between the server warning players that it is about to perform a shutdown and the actual shutdown. This provides players a chance to find a waypoint to save their progress. Note that this applies to not just updates, but shutdowns as well. | 120 |
update_shutdown_message | The message that will be shown to players before a server restart occurs. | "The server is restarting for an update" |
web_address | Address and port on which the game server will expose Prometheus metrics. | "0.0.0.0:14005" |
web_chat_secret | Secret API header used to access the chat API. If set to None, the API is unreachable. Can be set to Some("<secret API header>"). | None |
ui_api_secret | Public secret API header used to access the UI API. If set to None, the API is reachable by localhost only. Can be set to Some("<secret public API header>"). | None |
shutdown_signals | List of shutdown signals to use to shutdown the server. | [SIGUSR1,] |
Hosting a Veloren Server
Introduction
At its core Veloren is split into 2 components, a client (veloren-voxygen) and a server (veloren-server-cli).
In singleplayer mode, the game starts a server listening on a random port in the background and connects to it automatically.
In multiplayer mode however, Veloren also uses an authentication server (veloren-auth).
This allows players to register just once on our website, and log into any server with the same account, similar to for example Minecraft.
How to use this guide
- Follow one of the Setup Guides:
- Head over to the Configuring The Server page to learn how to set it up according to your needs and preferences.
- (Optional) Generate a custom world.
Available Setup Guides
Choose the instructions for the runtime platform on which you want to run Veloren:
- Running a Server on Your PC
- Running a Server using Docker (For Dedicated Servers)
- Running a Server on a Raspberry Pi
Hosting a Server on Your Computer
If you want to play with your friends and do not have a dedicated server, follow these instructions to set one up on your computer.
Playing over LAN
Note: This will only work when everyone is connected to the same Local Area Network (generally that means the same WiFi network or router).
- Start the server
- Find your local IP address and share it with your friends. They will need to enter it in-game to join the server.
- Have fun!
Playing over the internet
Note: You will need access to your router and knowledge about port forwarding.
Tip: If you are unable to set up port forwarding, there exist programs such as ZeroTier, Netbird or Hamachi, which allow a limited amount of users to connect to a local server through the internet.
- Forward port
14004TCP and UDP on your router. - Start the server
- Find your public IP address and share it with your friends. They will need to enter it in-game to join the server.
- Have fun! :)
Note: If you need your computer's local IP address for port forwarding, refer to the Finding your local IP address section below.
Starting the server
Using the server provided by Airshipper
This is a good option if everyone playing uses Airshipper.
- Find your game installation folder.
- Go into
profiles/default. - Launch
veloren-server-cli[.exe].
Using a custom server executable
This is a good option if you want to play an older release or a custom version.
- Open the folder with extracted game files.
- Make sure you have the
assetsfolder in the same place as the server executable. - Launch
veloren-server-cli[.exe].
Finding your local IP address
Tip: Generally local IPv4 addresses have the form of
192.168.xxx.xxxor, more rarely,10.xxx.xxx.xxx. For IPv6 addresses, local ones generally start withfe80:
On Linux and macOS
- Open the Terminal.
- Type
ip addr || ifconfigand press enter. - You will see all of your computer's IP addresses, grouped by network card/interface.
Interface names starting witheare generally ethernet while ones starting withware generally wireless. Lines starting withinetandinet6show IPv4 and IPv6 addresses respectively. If there are multiple addresses in one line, only the first is important.
For example,lois the loopback interface with a127.0.0.1IPv4 address and a::1IPv6 address.
Likely, the first address which doesn't belong to the loopback interface is what you are looking for.
On Windows
- Open CMD (type
cmd.exeinto the start menu and press enter). - Type
ipconfigand press enter. - You will see all of your computer's IP addresses, grouped by network card/interface.
Lines starting withIPv4 addressorIPv6 addressshow the respective address types. Likely, the first address which isn't127.0.0.1or::1will be what you are looking for.
Windows Firewall (Optional)
If you use windows firewall, open cmd as admin and write those commands, and press enter. It will automatically add rules to the windows firewall. Remember to configure your router firewall accordingly too.
netsh advfirewall firewall add rule name="Veloren 14004" dir=in action=allow protocol=TCP localport=14004
netsh advfirewall firewall add rule name="Veloren Metrics" dir=in action=allow protocol=TCP localport=14005
Hosting a server using Docker
If you want to run a dedicated Veloren server 24/7 follow this.
Note: We assume general command line and docker-compose knowledge. You will need
dockeranddocker-composeinstalled on the server. You will likely also need root access to access docker.
Note: The Docker version of the server will not run on systems that use an ARM CPU (see issue 1799 on our gitlab for updates).
Tip: Check out the Docker Compose file reference for more information about the
docker-compose.ymlfile.
Setup
Note: The default
docker_compose.ymlwill automatically keep the game server updated to the latest weekly release.
- Create a folder for the server data and
cdinto it. - Download the sample
docker-compose.ymlfrom the repository into the folder.
wget https://gitlab.com/veloren/veloren/-/raw/master/server-cli/docker-compose.yml - If needed, open the following ports in your firewall:
14004(TCP/UDP, required): Gameserver14005(TCP, optional): HTTP metrics14006(UDP, optional): Query server protocol
- To create and start the containers, run
sudo docker-compose up -d.
If you modify thedocker-compose.ymlfile, you'll need to run that command again for it to take effect. - Add moderators/admins by following the instructions below
Note: If you used the provided docker-compose file, you can use
veloren-game-server-masterin place of<CONTAINER_ID>in the following instructions.
Monitoring and maintenance
- To restart the server, run
docker-compose restart. - To view logs, run
docker logs <CONTAINER_ID>. - To access the server's configuration files, open the
userdatafolder automatically created next todocker-compose.yml.
Running commands inside the docker container
The game server has a CLI interface that can be used to run commands for tasks such as adding admins and moderators. The steps for accessing this interface while the server is running inside Docker are outlined below:
- Run
docker attach <CONTAINER_ID>(rundocker psto find the ID of the game server container, then if the ID is for examplee002d350ab26, rundocker attach e002d350ab26). - You can now run server CLI commands. To see the available options type
helpand press enter. - Once you are done, to escape press Ctrl+p followed by Ctrl+q.
Tip: To add an admin or mod, use
admin add <USER> <ROLE>.<ROLE>can be eitheradminormoderator.
Tip: To gracefully shutdown the server for maintenance with 2 minute countdown, use:
shutdown graceful --reason "Shutting down for maintenance :)" 120
Note: Logging output from the server can break up the visualization of command input but this can be ignored and broken up commands will still work.
You are done!
Building the Veloren Server for Raspberry Pi
The model of Raspberry Pi you have and the operating system your Pi is running can significantly impact your installation steps and Veloren's performance on your Pi. For the best performance, we recommend using the Raspberry Pi model 4 or 5, and a 64-bit OS like Ubuntu Server, which is available through the Raspberry Pi Imaging utility. You can also use the 64-bit version of Raspberry Pi OS.
Note: The amount of RAM on the Pi does not matter. Even the official Veloren server uses well under 2 GiB of memory most of the time.
Cross-compiling or not
Cross-compilation means setting up a toolchain for the Raspberry Pi's instruction set on a separate computer in order to compile the Veloren server binary which you then copy onto the Pi.
Direct compiling is preferred if:
- You don't want to install and set up as many things on your computer
- You want to be up and running in fewer steps
Cross compiling is preferred if:
- You have a computer setup for development
- You want the compilation step to be faster
Note: Even with cross-compilation it is necessary to clone the
assetsfolder from the code repository onto the Pi as these files are not compiled into the server binary.
Direct Compiling
Log in to your Pi using SSH.
ssh <username>@<ip> and enter password
Install the Rust programming language on the Pi if it's not already installed.
curl --proto '=https' --tlsv1.2 -sSf https://sh.rustup.rs | sh
Install Git LFS in order to download the audio and visual assets along with the source code.
sudo apt install git-lfs
Git clone the Veloren codebase. You may need to generate SSH keys on your Pi for your GitLab account.
git clone https://gitlab.com/veloren/veloren.git
Compile the server binary from the code in the Veloren directory.
cd veloren
cargo build --bin veloren-server-cli --release
Run the server binary, optionally with -h or --help to see the list of arguments you can supply.
./target/release/veloren-server-cli
Note: Compilation on a Raspberry Pi 4 running Ubuntu Server 64-bit can take around 30 minutes for an optimized build.
Note: Remember to replace <username> by your own username and <ip> by the IP address of your Raspberry Pi!
Note: The process itself is resource heavy. Maybe still consider cross compiling. RAM usage can go over 8G, so you may consider creating a swap (although swap slows down the entire compilation process)
Note: If you experience an error when compiling
wasmer-vm, you will need to disable plugin support by removingplugins = ["server/plugins"]fromserver-cli/Cargo.toml.
Cross Compiling
Installing Dependencies
Install the following dependencies on the cross compiling machine:
- git
- git-lfs
- cargo (which is installed along with Rust)
- docker
NOTE You also need to install any dependencies your OS requires that are mentioned on the compiling page.
Once those are installed add cargo to your path. Next, add your account to the Docker group that should have been created, logout and log back in so you'll be recognized as a part of it. After that start the docker service.
The following is required on the Raspberry Pi:
- git
- git-lfs
On Pi OS git should already be installed. git-lfs can be added with the following command:
sudo apt install git-lfs
Preparing the Raspberry Pi
First we need to clone the Veloren git repository.
git clone https://gitlab.com/veloren/veloren
Next we can reset the repository to the state of the last stable release. To do that we have to find out the git hash of that version. This can be found on https://gitlab.com/veloren/veloren/-/releases. The git hash is the sequence in the bottom left corner of the release. This step can be skipped if you want to play with the very latest updates.
cd veloren
git checkout <git hash>
Next we have to create some folders to later put the binary in.
mkdir target
mkdir target/release
Next, we need to add an environment variable to our .profile.
nano ~/.profile
In the last line of this file, add the line export VELOREN_USERDATA="$(pwd)/userdata"
Lastly, we reload our environment to use the new variable
. ~/.profile
Cross Compiling the code
Again we have to clone the Veloren repository to our cross compiling machine, reset it to the state of the latest stable release and setup git-lfs.
git clone https://gitlab.com/veloren/veloren
cd veloren
git checkout <git hash>
git lfs install
cargo install cross
The install command will be different depending on which OS you have running on the Raspberry Pi.
If you are using a 64-bit OS like Ubuntu Server with an ARMv8 instruction set, run the command:
cross build --target aarch64-unknown-linux-gnu --bin veloren-server-cli --release
If you are using the 32 bit version of Raspberry Pi OS, and using ARMv7 instruction set for backwards compatibility reasons, run the command:
cross build --target armv7-unknown-linux-gnueabihf --bin veloren-server-cli --release
Note: You may need to register an account on docker hub and run the
docker logincommand in the terminal to access the Docker image required for cross-compilation.
When the compilation process has finished, we can move the binary to the Raspberry Pi. If you have SSH enabled on your Raspberry Pi, you can use the scp command.
scp target/<instruction_set>/release/veloren-server-cli <username>@<ip>:~/veloren/target/release/veloren-server-cli
Note:
<instruction_set>refers to eitheraarch64-unknown-linux-gnuorarmv7-unknown-linux-gnueabihf, whichever one you used to compile. Remember to replace <username> by your own username and <ip> by the IP address of your Raspberry Pi!
Creating a systemd service
On the Raspberry Pi we can now create a systemd service for the server. To do that, create a service file with the content below.
sudo nano /etc/systemd/system/veloren-server.service
Note: If you cross-compiled the binary, add an environment variable to the
Servicesection:Environment="VELOREN_USERDATA=/home/veloren/target/release/userdata"
[Unit]
Description=Veloren Server
After=network.target
StartLimitIntervalSec=0
[Service]
Type=simple
User=<username>
WorkingDirectory=/home/<username>/veloren
ExecStart=/home/<username>/veloren/target/release/./veloren-server-cli

[Install]
WantedBy=multi-user.target
Now our service is ready and can be started.
sudo systemctl start veloren-server.service
To watch how the server starts and to see debug info, you can use the following command.
sudo journalctl -f -u veloren-server.service
In case you want to start the server every time the Raspberry Pi boots, you can enable the service.
sudo systemctl enable veloren-server.service
Monitoring the server
When the server is running, you can watch your Pi's performance with tools like htop or set up a Prometheus server to scrape metrics from your Veloren server at the addresshttp://<ip>:14005/metrics.
Connecting to it
For information on connecting to the server from the local network, or remotely, see the On your PC page.
Configuring The Server
Whichever route you chose for hosting the server, you might want to configure it. This section contains an explanation of all the config files related to a Veloren server, their purposes and contents.
The userdata folder structure
After running veloren-server-cli for the first time, a userdata folder will be created, containing all of it's configuration and data. It's contents will look like this:
userdata
├── server
│   ├── saves
│   │   └── db.sqlite
│   └── server_config
│       ├── admins.ron
│       ├── banlist.ron
│       ├── description.ron
│       ├── settings.ron
│       └── whitelist.ron
└── server-cli
    └── settings.ron
server/server_config
This folder is the most interesting to us. It contains various important configuration files.
Tip: To add an admin or mod by username, type
admin add <USER> <ROLE>into the server console.<ROLE>can be eitheradminormoderator.
admins.ron
This file contains a list of UUIDs of players with administrator privileges.
You need access to server console to modify this file.
Example:
[
    "f60e23c6-345c-449b-b05a-e431d53fc65c",
]
banlist.ron
This file contains the list of banned players, and associated information about each ban.
Server admins can use in-game commands to modify this file.
Example:
V2((
    uuid_bans: {
        "7ea1a4cd-3002-4fe6-957e-4483f3fda3e7": (
            current: (
                username_when_performed: "YuriMomo",
                action: Ban((
                    reason: "No testing bugs on this server >:(",
                    info: Some((
                        performed_by: "5a7bfd12-0683-d94f-7081-4eb9e67b7d43",
                        performed_by_username: "zesty",
                        performed_by_role: Admin,
                    )),
                    end_date: None,
                )),
                date: "2025-08-26T11:31:31.952326295Z",
            ),
            history: [],
            expired: false,
        ),
    },
    ip_bans: {
        "127.0.0.1": (
            current: (
                uuid_when_performed: Some("7ea1a4cd-3002-4fe6-957e-4483f3fda3e7"),
                action: Ban((
                    reason: "",
                    info: Some((
                        performed_by: "5a7bfd12-0683-d94f-7081-4eb9e67b7d43",
                        performed_by_username: "zesty",
                        performed_by_role: Admin,
                    )),
                    end_date: None,
                )),
                date: "2025-08-26T11:31:31.952326295Z",
            ),
            history: [],
            expired: false,
        ),
    },
))
description.ron
This file contains the server description (also known as 'Message Of The Day' (MTOD)), and server rules.
Both support localisation. If the user's locale matches one of the entries, they will see the corresponding localised entry for both.
If the
rulesfield is set toSome("...")rather thanNone, users will see the rules when they first join the server, with a mandatory 'accept' button (any changes to the rules will also cause them to be shown to users again).The
default_localefield determines which set of descriptions users are shown if their locale does not match any of those present in the file (by default, this field is"en"i.e: English).Server admins can use in-game commands to modify this file.
Example:
V2((
    default_locale: "en",
    descriptions: {
        "en": (
            motd: "This is the best Veloren server",
            rules: None,
        ),
    },
))
settings.ron
This is the file containing most of the configuration options.
Most fields are self-explanatory, but more information can be found here.
You need direct access to the server files to modify this file.
Example:
(
    gameserver_address: "0.0.0.0:14004",
    metrics_address: "0.0.0.0:14005",
    auth_server_address: Some("https://auth.veloren.net"),
    max_players: 100,
    world_seed: 25269,
    server_name: "Veloren Alpha",
    start_time: 32400,
    map_file: None,
    max_view_distance: Some(65),
    banned_words_files: [],
    max_player_group_size: 6,
    client_timeout: (
        secs: 40,
        nanos: 0,
    ),
    spawn_town: None,
    safe_spawn: true,
    max_player_for_kill_broadcast: Some(20),
)
Note: While you can use a custom auth server, if you do it, players will see a security warning when connecting to your game server.
Note: While you can disable authentication completely, it would allow anyone to log in using any username, including as a server admin.
Explanations of non-obvious options:
- Some values use the
Optiontype, which means they can either be set to eitherSome(value)orNone.max_player_for_kill_broadcastmight sound scary, but it only prevents chat spam by only sending death messages of others to their group and nearby players if the set player count is exceeded. Setting it toNonemeans the server will never broadcast kill messages globally.
whitelist.ron
If this file is not empty, only players whose UUIDs it contains will be able to join the server.
Server admins can use in-game commands to modify this file.
Example:
[
     "f60e23c6-345c-449b-b05a-e431d53fc65c",
]
server/saves
This folder contains the server database.
server-cli
This folder only contains the settings.ron file with the following contents:
(
    update_shutdown_grace_period_secs: 120,
    update_shutdown_message: "The server is restarting for an update",
)
It allows you to customize the waiting time before restarting to update the server, and the message it uses when warning players about that. This is only used by the Docker hosting method.
Building
Veloren is primary an action-adventure RPG rather than a sandbox building game. Despite this, it does provide some features that allow for limited in-game building.
Build Mode
Build mode can be enabled with the /build command. When enabled, players can add (Right Click), remove (Left Click)
and pick (Middle Click) blocks in build regions for which they have permission. Build mode is not considered a canonical
part of the Veloren experience. It is a fun feature to use if you wish to experiment with the game's features.
Regions
By default, there is a region that covers the entire world named world. You can enable permissions for it with
/permit_build world (this requires admin permissions).
The vox_spawn branch
There exists a highly experimental branch called vox_spawn. It adds a client-side command that hooks into build mode
and uses it to "3D print" (row by row) .vox models into the game
world. Generally, this process is fairly quick and all but the largest models typically take less than a minute to fully
spawn in. If you're an admin wanting to spawn structures into your world, it might be worth designing the structures
with a voxel modelling tool first and using vox_spawn to spawn them into the world to avoid the structure being lost
forever if the chunk unloads.
Persistence
By default, Veloren does not persist changes made to the world. Unloading a chunk will lead to any changes made to it being lost. However, as of 2021-08-14, Veloren has an experimental persistence system built into the game. It is not enabled by default.
Enabling
To enable persistent building, the persistent_world feature must be enabled when compiling the game (this is enabled
by default). In addition, the server must have the experimental_terrain_persistence flag set to true in the server
settings.ron file (this also works for singleplayer). This flag does not exist in the settings file by default and
must be added manually by the server owner.
Once enabled, you will see a log entry in the server console (or the main game console if in singleplayer) on startup, as well as a message when toggling build mode.
Important Information
The experimental terrain persistence is not an officially supported feature. While some attempts are made to not arbitrarily break things between subsequent updates, this is not a guarantee and it is quite possible that updates may corrupt, delete, or otherwise break persisted terrain data at any time. Additionally, no stability guarantees are made (although you can still report bugs relating to the feature): enabling the feature may result in crashes, instability, lag, etc.
The experimental terrain persistence feature is not simply unfinished: it is a stop-gap until a proper, more restricted player-oriented building system is developed. It is not intended to evolve into such a system, nor is it intended to be compatible with it: it exists only to facilitate server admins adding minor customisation to their servers, to be enjoyed by players, until such a time at which a reliable, forward-compatible, player-oriented building system is developed.
As one might expect, updates to the game can often subtly (or not so subtly as the case may be) break persisted terrain data. For example, significant changes to world generation may result in structures built with the system appearing at the wrong altitude, clipping inside of other generated structures, or perhaps even overridden/removed entirely. As before, no guarantees are made about this. If world generation changes significantly or you switch out the map file, the best thing to do is probably to remove the terrain directory and start afresh.
How does it work?
On server startup, the terrain persistence system creates the {DATADIR}/terrain/ directory if it does not exist
already where {DATADIR} is the server's data directory (userdata/singleplayer/ or userdata/server/, in most
cases). This directory can be changed using the VELOREN_TERRAIN environment variable.
The feature hooks into various actions performed as the game runs: newly loaded chunks will have persisted changes
applied on top of them, and unloaded chunks will have their changes persisted to disk. Any modifications made via either
build mode or the /make_sprite and /make_block commands will be recorded. The same does not apply to other kinds of
block modification: blocks mined with the pickaxe or discolored/destroyed with explosions will not be recorded. This
means that players are not able to permanently damage structures spawned in by server admins.
See the original merge request for more detailed technical information.
What is it for?
As mentioned, the terrain persistence system is not intended to be player-facing. Build mode is neither intuitive nor well-integrated into the rest of the game. We do not account for it in any of the game's existing mechanics, and it is even possible to cause the server and clients to crash, lag, or freeze if building at an altitude that is too high or low.
We intend terrain persistence to be a way for server admins to customise the experience of the server for players with pre-built structures that may be interacted with. Below are a few ideas to get you started:
-
Gliding courses demarcated with pillars and hoops for glider racing
-
A custom spawn zone complete with crafting stations and meeting areas for players
-
Mining challenges (using mineable blocks like
WeakRockand ores) that players can partake in. Because mining is not persisted, any mined blocks will naturally regenerate when the chunk reloads! -
Custom mazes and climbing/jumping challenges for players with rewards in the form of chests/ores/etc.
-
Pixel artwork and sculptures dotted around the world for players to find
-
Visual customisations to existing world structures like towns and dungeons that make them more interesting to explore
-
PvP or PvE arenas for players to battle monsters and each other in an environment where others can watch
If you do something neat with this feature, feel free to tell us! It might even get featured in the weekly blog!
Environment Variables
Veloren uses special environment variables to affect game behaviour. Environment variables should be set before starting the game, search for tutorials on how to do it in the web.
NOTE: this list is incomplete, and needs to be expanded.
VELOREN_ASSETS
Optional variable to point to veloren assets directory. Not needed if you use Airshipper, but may be useful in more more exotic scenarios.
VELOREN_ASSETS_OVERRIDE
Variable to add directory with assets overrides. Recommended if you want to modify some files, for example different weapon textures.
Linux example:
env VELOREN_ASSETS_OVERRIDE="/home/user/veloren/override_assets/" airshipper run
If you have $VELOREN_ASSETS_OVERRIDE/voxygen/voxel/weapon/caladbolg.vox with
your modified version of caladbolg.vox, it will be used instead of main
caladbolg.vox file in veloren assets.
WGPU_BACKEND
May be helpful if your game crashes for no reason. Alternatively, you can choose it in Airshipper GUI.
Possible values:
- "vulkan"
- "metal" (macOS only)
- "dx12" (Windows only)
- "dx11" (Windows only)
- "primary"
- "opengl" (not supported at the time of writing)
- "secondary"
- "all"
Generating or loading a custom world
-
Open your singleplayer or server's settings file. See here.
-
Set your custom
world_seed, andmap_filetoSome(Save(())). -
Launch your game as normal, whether you're doing it through singleplayer or the server cli.
-
The generation process can take a significant length of time, with little indication that it's running properly. 10 minutes on a good CPU is expected, for standard-sized worlds. Eventually, it will load into the new world.
-
The world will be saved in a
mapsfolder, as a binary file. Setmap_filetoSome(Load("maps/<filename>.bin")),, else it will try to regenerate it each time.
map_file Options
| Value | Description |
|---|---|
None | Loads the default world map, located in the assets/world/map folder. |
Some(Generate(([options]))) | Generates a new world, using world_seed, and starts the server using it. Does not save the resulting world file. |
Some(Save(([options]))) | Same as with Generate, but will save the world as a binary file in a maps directory. |
Some(Load("maps/example.bin")) | Loads a map from file |
Generation Options
The options above can be filled out to change the size of generated maps, and to change the scale of mountains within them. Options you do not wish to change can be left blank, and will be replaced by defaults, however you must keep the spare braces. Manually writing out the default set of options would give Some(Save((x_lg: 10, y_lg: 10, scale: 2.0))).
World size
x_lg and y_lg give the binary logarithm of the number of chunks along each axis of the world, that is, x_lg: 10 results in a world 2^10=1024 chunks wide.
Each increment doubles length, and each decrement halves it. Rectangular worlds are fully supported, however each doubling of each dimension also roughly doubles world generation time and RAM consumption, which can quickly get out of hand.
A maximum of 14 is supposed to be supported in each dimension, giving a square world 524 km across, roughly equivalent to the United Kingdom in area, but it would look pretty bad due to the current lack of tectonics simulation, which becomes more important at larger scales. 13x13 is the largest so far attempted.
World scale
scale simply changes the scale of mountains, landmasses, etc. A value of 4.0 grants a roughly Earthlike scale, although a larger-than-default world is recommended for this. Going beyond 4.0 is not considered supported, but generally works. As a guide, the tallest mountains will be a little taller than this value, in kilometres.
Loading a pre-generated map with a specific seed
Navigate to your server's or singleplayer settings file like shown here.
In there
- Change the world seed, e.g.
world_seed: 40382, - Change
map_fileto something like
map_file: Some(Load("userdata/server/maps/map_1624935538562.bin")), - Optionally you can also set a spawn town:
spawn_town: Some("Elden"),
Make sure to use the correct file path (from the root of your veloren folder) and filenames!
There needs to be a , behind all of these inputs or the server will use the fallback settings template file.
Note: The file path used in this example requires the creation of an additional folder called "maps" inside the userdata/server folder.
Map Viewer
If you are able to compile, you can also try an example map generator and viewer application. Run the following command from your local repository, depending on preferred terminal.
Unix-like:
RUST_LOG="info,veloren_world=debug" cargo run --release --example water
Windows, cmd:
set RUST_LOG=info,veloren_world=debug&& cargo run --release --example water
Windows, PowerShell:
$env:RUST_LOG="info,veloren_world=debug"; cargo run --release --example water
By default it will load the default world from the assets folder. Input a custom seed here, and change two lines below if you want to generate or load a different world.
This method will indicate progress through world generation, progressing from Erosion iteration 0 through to 99, and so is recommended for larger worlds.
Once the map loads, the default view shows temperature and humidity overlays. Press T and H to disable them, respectively, and M to enable real map colours. F4 will take a screenshot.
The map viewer is somewhat unresponsive, so you may need to hold keys for a moment for them to take effect.
Troubleshooting
If loading a custom world fails or the default map is still loaded, double check you haven't mistyped any of the settings. A common mistake is forgetting to place one of the trailing commas inside the settings .ron file(s).
Troubleshooting
Veloren runs on many operating systems, architectures, GPUs, and system configurations. Sometimes, things don't work!
This page contains a list of common problems and solutions.
Use the links below to navigate to the section most relevant to you. You can also use the search functionality at the top of the page to search for keywords.
If you've found a solution to a problem that wasn't mentioned here, you can contribute to this section!
If you can't find a solution to your problem here, you can ask for help from the community:
If you think you've encountered a more serious bug, you can report the bug on GitLab.
⛔ Crashes
Although we try to ensure that Veloren is as stable as possible, there are a small number of things that can cause the game to crash. Thankfully, many of these are fixable!
Airshipper won't start (or crashes on startup)
Possible solutions:
Compatibility Mode
Airshipper can run in a mode where the user interface does not appear, known as 'compatibility mode'. In this mode, Airshipper will automatically download and run the latest version of Veloren for you.
-
On Windows, compatibility mode can be used with the dedicated 'Airshipper: Compatibility Mode' icon
-
On all platforms, entering
airshipper runinto your console will start Airshipper in compatibility mode
Veloren (Voxygen) crashes on startup
Possible solutions:
-
Switch to another graphics backend
-
Try disabling audio
🎨 Graphics
Veloren requires that your computer supports one of the following:
- DirectX (Windows only, version 11.2 or above)
- (note: recent versions of Airshipper require DirectX 12, but compatibility mode should still work)
- Vulkan (Windows and Linux only, version 1.2 or above)
- Metal (Mac OS only)
If your computer does not support one of these, you may not be able to run the game.
Drivers
Running Veloren might require that you update your graphics drivers, or install them if you do not already have them.
-
If running Windows, you can follow this guide to update your graphics drivers
-
If running Linux, you can follow this guide to install Vulkan drivers. Please note that many distributions do not have Vulkan drivers pre-installed: the fact that other games run fine is not an indication that you have Vulkan drivers installed!
-
If running Mac OS, you may need to perform a system update to obtain the latest drivers
Graphics Backend
On some platforms, Veloren can be run using one of several different graphics APIs.
You can switch between the available graphics backends in the Airshipper Settings.
- On Windows, the following graphics backends are supported:
- DirectX 11
- DirectX 12
- Vulkan
- On Linux, only Vulkan is supported (however, Veloren has been known to run well through WINE using backends supported on Windows, so this may be an option for you)
- On Mac OS, only Metal is supported
If you're running Airshipper in compatibility mode, you can still change the graphics backend by
running airshipper config into your console. You will be presented with a menu that will allow you to configure
Airshipper's settings in a similar manner to the GUI.
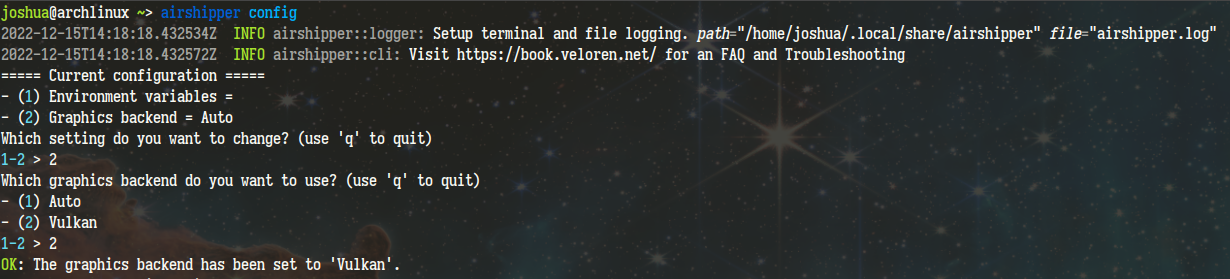
In older versions of Airshipper, you can still change the graphics backend by opening the file
airshipper_state.ron in a text editor. Toward the bottom of the file is the following line:
wgpu_backend: Auto,
You can replace Auto with one of DX11, DX12, Vulkan, or Metal
(depending on your operating system). Please note that this field is case-sensitive.
Airshipper is missing UI elements or flickers when moving the mouse
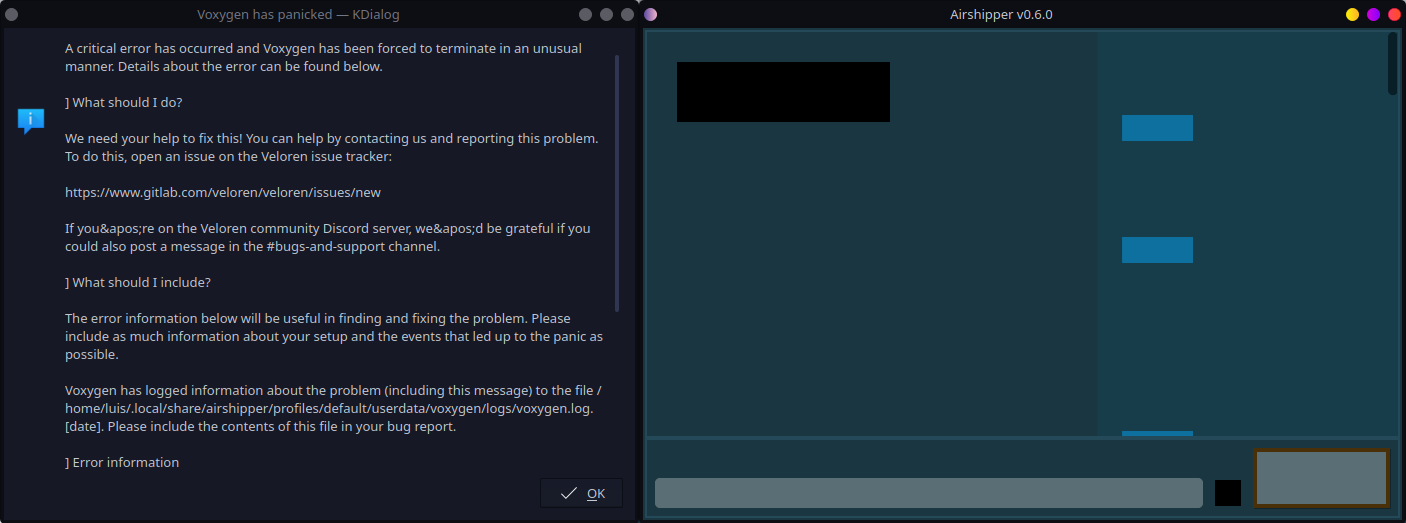
To fix this, you may need to update your graphics drivers.
Graphical glitches in-game
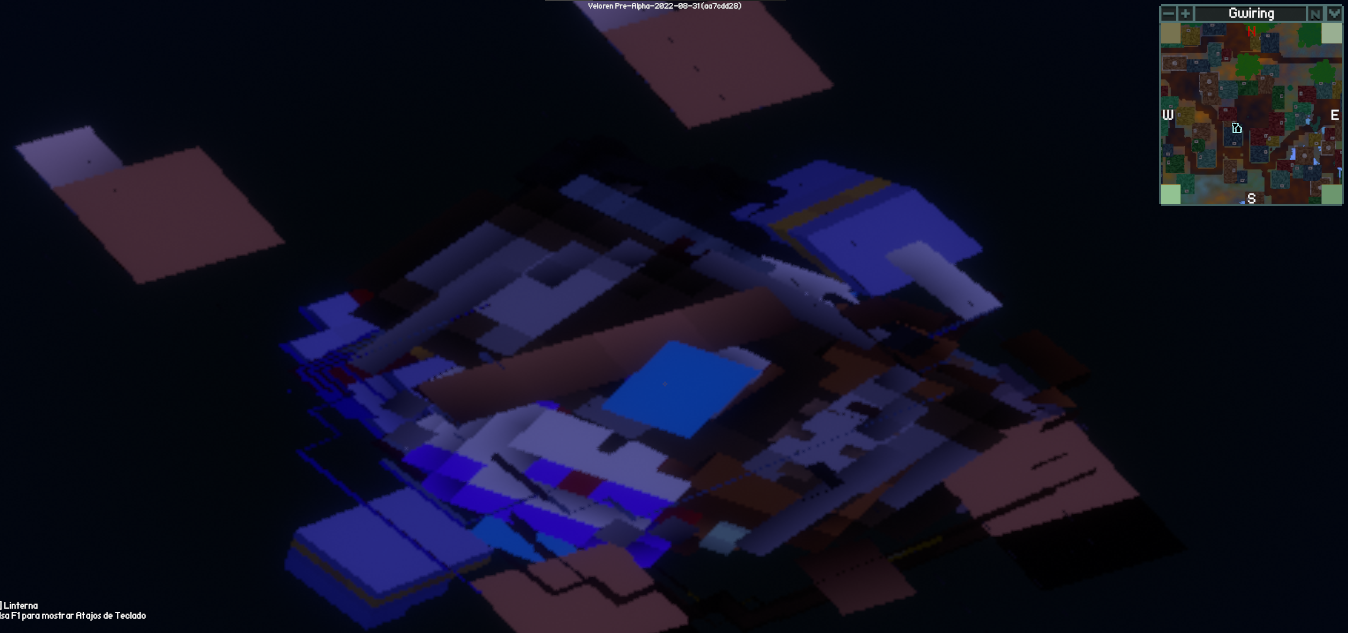
You may need to update update your graphics drivers.
Alternatively, switching to another graphics backend may solve the problem.
Ensure that your computer has the required graphics support.
🎧 Audio
Audio not working
On Linux, you might need to install packages to ensure compatibility with ALSA.
- For Arch Linux, this means installing the
pulseaudio-alsapackage. You can do this withpacman -S pulseaudio-alsa - For Ubuntu, you can install the
pipewire-alsaplugin withapt install pipewire-alsa
Disabling Audio
In particularly dire cases, it may be necessary to disable audio in Veloren to avoid crashes or similar problems. You can do this by:
- Making sure Veloren is closed.
- Locating
settings.ron(See where Airshipper stores files) - Editing it and replacing
output: Automaticwithoutput: Off. It should look like:
  audio: (
    master_volume: 1,
    music_volume: 1
    sfx_volume: 1,
    max_sfx_channels: 10,
    output: Off, // The important line!
  ),
- saving the file and running the game again.
🎮 Input and controllers
Mouse is invisible or window resizing isn't working properly when using Wayland on Linux
Although Veloren does support Wayland, this support can sometimes be buggy. These problems may be fixed by explicitly specifying an xcursor theme for the program to use. To do that, first run the following command in a terminal to get a usable theme:
find /usr/share/icons/ -type d -name "cursors" | head -1 | awk -F / '{print $5}'
Set the XCURSOR_THEME environment variable to the result. If you got Adwaita, for example, you would
do the following:
-
If using Airshipper, add
XCURSOR_THEME=Adwaitato the 'Environment Variables' field in the settings -
If running as a standalone program, have your desktop environment set
XCURSOR_THEMEtoAdwaitawhen running the game -
If running via the command line, prepend
XCURSOR_THEME=Adwaitato the command you use to run the game, likeXCURSOR_THEME=Adwaita ./veloren-voxygen
If that doesn't work, you can try using the xwayland compatibility layer when running.
-
If using Airshipper, add
WINIT_UNIX_BACKEND=x11to the 'Environment Variables' field in the settings -
If running as a standalone program, have your desktop environment set
WINIT_UNIX_BACKENDtox11when running the game -
If running via the command line, prepend
WINIT_UNIX_BACKEND=x11to the command you use to run the game, likeWINIT_UNIX_BACKEND=x11 ./veloren-voxygen
PS4 or other controller not working
Currently only XInput controllers are supported on Windows. This means that controllers like the PS4, Switch, and some older generic controllers may not work with Veloren.
In order to work around this, a program such as DS4Windows can be used. Both a text and video tutorial on how to use DS4Windows can be found here.
Performance
On this page you'll find tips and tricks to help you get the most out of Veloren.
Introduction
Veloren's world might be mostly made of cubes, but don't be fooled! Veloren's world is expansive and detailed and the base game has many graphical effects. On highest settings, Veloren can require a very powerful computer to run. Do not expect to be able to throw all of the sliders up to their maximum and expect the game to run perfectly.
Identifying your bottleneck
Most of the time, poor performance in Veloren results from one of 3 'bottlenecks'. See below for information about these cases, how to identify them, and how to rectify them.
Fragment-limited
If you're fragment-limited, performance gets worse if the amount of time required to render each pixel increases. If reducing your internal resolution improves your framerate, this likely applies to you. To rectify this situation, you can:
- Reduce internal resolution (an anti-aliasing technique can improve the look of the game at lower resolutions)
- Reduce cloud rendering quality
- Switch to fluid rendering to 'cheap'
- Lower shadow map resolution or switch to 'cheap' shadows
- Reduce or disable bloom
Vertex-limited
If you're vertex-limited, anything that results in the game rendering more polygons to the screen worsens your performance. If reducing sprite view distance improves your framerate, this likely applies to you. To rectify this situation, you can:
- Reduce the view distance (reduces the amount of terrain the game must render)
- Reduce the sprite/entity/entity detail view distance
- Reduce the LoD distance
- Reduce LoD detail
CPU-limited
If you're CPU-limited, the performance of the game is limited by the speed of your CPU and not the GPU. If your CPU usage is regularly very high, this likely applies to you. Sadly, these are a limited number of things you can do to rectify this situation because most of the CPU's work is essential to the functioning of the game. That said, you can:
- Reduce your view distance (fewer entities and less terrain data to process)
- Switch to multiplayer (now it's the server's job to simulate the world and generate terrain)
- Close any other programs you may have open
What compromise are you looking for?
Veloren has a much larger number of settings (and a wider range of those settings) than most other games. We don't like it when games artificially limit the way we play, so Veloren is designed to allow you to choose the effects you care about. Here are a few archetypes you might fit into, along with some tips you might want to follow:
The pixel perfectionist
You care about precision. It frustrates you when games have aliasing artifacts. You expect every pixel to be an immaculate work of art in its own right. You're the sort of person that plays Morrowind, but only with 8x super-sampling. You might want to:
- Increase 'Internal Resolution' (more than 1.0x corresponds to super-sampled anti-aliasing, i.e: SSAA)
- Disable FXAA (it can create subtle artifacts)
- Increase shadow map resolution
The low-power underdog
You just want Veloren to be playable on your hardware. You're willing to sacrifice the more fancy graphical effects, but ideally without the game looking like the arse end of a donkey. Anything above 20 fps and 240p is a success in your books. You might want to:
- Switch to 'cheap' shadows
- Switch cloud rendering to 'low' or 'minimal'
- Reduce internal resolution (you can enable an anti-aliasing technique like FXAA or HQX to soften the blow)
- Switch 'fluid rendering' to 'cheap'
- Reduce the maximum FPS to avoid your GPU overheating
- Try enabling the '
BareMinimum' experimental shader
The god-ray god
You sprinkle bloom on your breakfast cereal every morning. You're not happy until your game looks like an underwater disco. The only program you run more than Veloren is 'ReShade'. You might want to:
- Increase 'bloom'
- Increase 'point glow'
- Switch 'light rendering mode' to 'high'
- Increase cloud rendering to 'high' or even 'ultra' (beware: very expensive)
- Decrease 'internal resolution' to free up your GPU for more post-processing effects
- Switch 'fluid rendering' to 'shiny'
- Enable 'camera smoothing' in 'Gameplay' for improved aesthetics
- Give some of the experimental shaders a try
The 144hz gamer
Your senses have been honed over decades to detect sub-millisecond latencies. Back in the day, you ran consoles in NTSC configurations for the extra 4.97 frames per second over PAL. Merely glancing at a screen with a refresh rate in the double digits causes you to vomit. You've already disabled 'motion interpolation' on your TV, and the TVs of everybody you know. You might want to:
- Increase the maximum FPS to 'unlimited'
- Switch 'present mode' to 'vsync uncapped' to reduce tearing
- Reduce 'internal resolution' so your GPU has less work to do per frame
- Switch to 'exclusive fullscreen' to minimise any latencies that might be imposed by your window manager
- Ensure that 'camera smoothing' is disabled in the gameplay settings
- Use the 'GPU timings' tool to figure out what areas of rendering are taking the most time
Veloren for Contributors
Thank you for your interest in contributing!
Make sure to read the Introduction section and if you want the For Developers section.
Otherwise feel free to jump around as you need.
Veloren for Contributors
This section of the book will give an overview on how to contribute to Veloren no matter if you got a degree or taught yourself. Shall it be code, assets, creatures, bug fixes, or the book itself!
Note: In this guide we assume basic computer knowledge and some curiosity to learn about what we do here by yourself.
Installation
If you want to contribute to Veloren in any form you probably need to deal with Veloren's source
code. Therefore these basic tools have to be installed
to interact with it.
Note: Throughout the book we will mention a lot of commands. Therefore we highly recommend getting comfortable with a terminal.
Git
Keeping track of Veloren's history.
For Windows, The 'Git for Windows' suite is a sensible way to install Git, along with a set of tools that'll make it easier for you to use.
On Linux Git is most likely already installed, if it isn't, use your distribution's package manager to install it.
On recent macOS versions you will be prompted to install Git the first time you run it.
Otherwise install it using Homebrew via brew install git or
MacPorts via port install git.
Git LFS
Keeping track of the really big giants out there (aka. asset files).
Git LFS is a Git extension used to store large files like images and audio files. You need to install it in order to download the assets.
-
For Windows you can download an installer here.
On Linux you can use the package manager to install Git LFS, usually the package is called
git-lfs.On macOS you can use Homebrew via
brew install git-lfsor MacPorts viaport install git-lfs. -
Git LFS needs to be set up by running
git lfs installorgit-lfs install(macOS) in a terminal.
Note: If you already cloned the repo before setting up Git LFS, additional steps are necessary.
Note: git-lfs has a known bug with working off remotes. If you plan to work off a fork, refer to this section.
Rust
Keeping us safe and sound to build a reliable and efficient game.
Rust is a general-purpose programming language we use. Refer to the FAQ section to learn why.
The recommended way to install Rust is through Rustup. Veloren currently compiles using a pinned nightly toolchain of Rust. Installing through rustup will get you the correct toolchain.
Note: If you are installing on Windows, Visual Studio prerequisites may be needed, to learn more go to 3.1.3. Compiling
Local repository setup and maintenance
This section describes the initial setup and maintenance of your local repository.
Note: To understand the following we highly recommend reading about git!
Download source code
Note: Veloren needs git LFS installed before cloning to be able to download the assets. If you already cloned the repository before setting up git LFS use these steps to get the assets downloaded.
Clone the repository
git clone https://gitlab.com/veloren/dev/veloren.git
Change your working directory to the cloned repository
cd veloren
Note: All commands in this chapter from now on should be executed from there.
Basic repo navigation
Changing branches
In order to try out new unmerged or unfinished features, you may want to switch to a different branch.
To switch to a development branch
git checkout <branch_name>
To switch back to master
git checkout master
Updating
To download the latest changes and update your current branch
git pull
To download the latest changes without merging them into your local branch
git fetch
The help command
Git also offers a help command with detailed information about other commands
git help <optional subcommand name>
Modifying the source code
If you want to modify the source code, refer to the developer section.
To discard changes you've made to the source code
git reset --hard
Keep in mind that this deletes all the changes without a way to recover them.
To discard your changes with ability to restore them later
git stash
To restore stashed changes
git stash pop
Cleaning old build files
Over time as dependencies get updated, the old compiled versions start to take up a lot of space. To delete them type
cargo clean
NOTE: Keep in mind that cargo will need to recompile all dependencies which can take a long time.
Updating the Rust toolchain
We use a rust-toolchain file in the repository which will automatically update
your rust toolchain to whichever version we use. There shouldn't be any additional effort needed on your side.
Compiling Veloren
This section covers building Veloren from rust source with cargo and running it.
Note: all commands need to be run from the repository.
Required Libraries
On Windows you will need to install the following programs:
Fortunately, there is a quick way to install most of these
-
Download and run the Visual Studio Build Tools, click modify, and install 'Desktop development with C++'. This will include the following downloads:
- C++ tools.
- Windows 10 SDK.
-
Open a PowerShell terminal and run the following commands:
Set-ExecutionPolicy -ExecutionPolicy RemoteSigned -Scope CurrentUser
Invoke-RestMethod -Uri https://get.scoop.sh | Invoke-Expression
scoop install cmake ninja python
The first two lines install the Scoop package manager and the third line installs CMake, Ninja and Python through Scoop in one go.
Note: If you are seeing "error: linking with link.exe' failed: exit code: 1318," try setting the RUSTFLAGS variable before running
cargo run
- In powershell:
$env:RUSTFLAGS = "-Csymbol-mangling-version=v0"- In command prompt:
set "RUSTFLAGS=-Csymbol-mangling-version=v0"
On Linux you will need to have installed GTK3, Python, CMake and mold.
On Gentoo you may require having to enable certain use flags for specific packages.
- sys-devel/binutils (with the
golduse flag to enable the ld.gold linker) - media-libs/mesa (with the
vulkanuse flag)
On Debian systems additional libraries may need to be downloaded, below is a non-exhaustive list:
- g++
- libglib2.0-dev
- libcairo2-dev
- libasound2-dev
- libpango1.0-dev
- libatk1.0-dev
- libgdk-pixbuf2.0-dev
- libgtk-3-dev
- libxcb-shape0-dev
- libxcb-xfixes0-dev
- libudev-dev
- libxkbcommon-x11-dev
- libxcb-xkb-dev
- mold
And a one liner to download and install them all:
sudo apt install g++ libglib2.0-dev libasound2-dev libcairo2-dev libpango1.0-dev libatk1.0-dev libgtk-3-dev libxcb-shape0-dev libxcb-xfixes0-dev libudev-dev libxkbcommon-x11-dev libxcb-xkb-dev mold
On Fedora systems additional libraries may need to be downloaded, below is a command to install them:
sudo dnf install gcc gcc-c++ binutils-gold cmake alsa-lib-devel libxkbcommon-x11-devel libudev-devel mold
On openSUSE Tumbleweed systems, additional dependencies may be needed:
sudo zypper in binutils-gold alsa-devel systemd-devel libxkbcommon-devel libxkbcommon-x11-devel mold
On macOS you only need to install cmake.
This can be done using either homebrew or macports.
Using homebrew, enter brew install cmake or similarly, using macports enter sudo port install cmake.
Note: Do not use sudo with homebrew.
Note: Feel free to open an issue incase these dependencies are incorrect.
Compile and Run Veloren
Run this in a terminal to compile and run Veloren:
cargo run
To compile without running, use cargo build instead.
Note: The initial compilation will take from 5min up to 30min therefore grab a tea and some snacks and come back later.
Compile and Run Veloren Server
cargo run --bin veloren-server-cli
Logging output
We use tracing to collect logs. They can be filtered by setting the RUST_LOG environment variable to the respective level (error, warn, info, debug, trace).
For all available filtering options visit the docs.
Tip: this works both for the server and client
Optimized Release builds
By default debug builds are created which compile faster but run a bit slower than optimized release builds. Unlike many other projects, we've set them up so they're fast enough to be playable. If you want to get optimized builds, add the --release flag when calling cargo. Keep in mind that compiling release might be very slow!
If you want get familiar with cargo we recommend the Cargo Book.
Cross-Compiling Veloren
As more and more people want to play or develop for Veloren on other platforms, it may come as no surprise that building on these platforms might not be the most elegant solution, emulation is quite often slow, and the platform of choice simply doesn't have the necessary resources to build the game in a reasonable amount of time.
Please note: Documentation of these steps is currently underway, you might need to adjust these for your specific scenario.
Linux
Prerequisites
In order to build for your platform of choice, for example arm64, you'll need to install the compiler toolchain for that architecture. In our case, that's aarch64-linux-gnu-gcc.
You'll also need the compilation dependencies of the project installed for your architecture. In our example, we used a Raspberry Pi to install all dependencies needed for compiling the project, then the SD Card was plugged into the building system, and it's root filesystem was mounted under /mnt.
Cross-Compiling
The project source tree was cloned to our building machine, in an arbitrary location. Open a terminal and move to the project root, then execute:
rustup target add [target]
where [target] is one of the targets from here. In our case, that was aarch64-unknown-linux-gnu.
After this, you'll need to go in the newly created .cargo directory and edit the config file. Add the following entry:
[target.X]
linker="Y"
where X was aarch64-unknown-linux-gnu in our case, and Y was aarch64-linux-gnu-gcc respectively. These should correspond with the target mentioned above, and the compiler toolchain respectively (the one you installed as a prerequisite).
For the compilation itself, you'll need to tell Cargo where the correct libraries are. Given that we've mounted the root filesystem of our target at /mnt, we can use the PKG_CONFIG_SYSROOT_DIR environment variable.
The compilation command looks like this:
PKG_CONFIG_SYSROOT_DIR=Z cargo build --release --target X
where X is the target we're building for, and Z is the filesystem root of the platform we're building for. This is where the Raspberry Pi's SD Card was mounted, in our case /mnt.
Feel free to adjust the command for your needs, as per the original compilation instructions. You should find the built binaries in the target subfolder of the project root.
Note
At the time of writing, there is an issue with the keyboard-keynames library for aarch64 and probably others too. Assuming ~/.cargo is the default location of your Cargo downloads, edit the file located at: ~/.cargo/git/checkouts/keyboard-keynames-0b8339ee617b0344/a97ae50/src/platform/unix/key_layout.rs and replace all instances of
#![allow(unused)]
fn main() {
unsafe { &*(utf_key as *const [i8] as *const [u8]) }
}
with
#![allow(unused)]
fn main() {
unsafe { &*(utf_key as *const [c_char] as *const [u8]) }
}
after which compilation should succeed.
Before you contribute
In case you want to contribute code (or added the assets yourself to the game) continue reading. If you do not want to add your assets yourself skip to Contributing Assets.
Git Workflow
There are two main options how contributions can be made to the game. Regardless of how you decide to make your commits, make sure to follow our commit guidelines mentioned below.
Option #1: the collaboration repository
This is our suggested way of contributing to the project.
This is a public repository where anyone can make branches (after following the steps below), it's synced with the changes from the main repo on an hourly basis and regular branches are not shared between the two (the only exception is the master branch). Having a branch without forking can be more convenient for contributors as you can avoid all the shortcomings of having a fork.
To make your first contribution, follow these steps to gain access to our development repository:
- Join our collaboration group: https://gitlab.com/veloren/dev.
- Ping either Core Developers or Admins on our Discord in the #new-contributors channel (or whichever channel seems suitable). Let us know of your GitLab username and we'll be able to give you developer permissions.
- Head over to https://gitlab.com/veloren/dev/veloren and clone the repository to your computer.
- Create a feature branch (more details about it below). You can now either work on your own or work together with others on the same branch.
The development repository is virtually the same as the main repository but everyone can manage branches in the development repository without the possibility of breaking the main repo in any way.
Naming feature branches
We use feature branches with the following naming scheme for easily identifying the owner of the branch:
git checkout -b <your_nickname>/<branch_name>
Example: zesterer/fix_scrolling_in_chat
Option #2: fork the repository
The downsides of using a fork:
- You need to configure CI to run on your fork.
- Maintainers can't easily make changes to your merge requests.
But you are free to choose this workflow instead of collaboration repo (see above). Go to GitLab, to the main repository (not the collaboration one) and use their fork button. Apply the troubleshooting steps in the next section to get LFS to work.
Troubleshooting Git LFS
When working on a fork instead of on a branch in the main repo, you'll need to do the following for the time being due to a bug in git-lfs:
-
Configure git-lfs to ignore smudging:
git config filter.lfs.smudge "git-lfs smudge --skip -- %f" git config filter.lfs.process "git-lfs filter-process --skip" -
Add Veloren as your upstream remote:
git remote add upstream https://gitlab.com/veloren/veloren -
Go ahead and run
git lfs pull upstream, and continue to do so when new assets are added to the repo.
Commit guidelines
Regardless of which option you picked, we want our commit history to be clean and make it easy to keep track of our past changes. In order to ensure clean commits, we've made a list of suggested practices and tips:
-
Split your changes into reasonably sized, yet logical chunks of work.
If you feel a feature can be split into smaller pieces of work, you can reflect that with your commits. It can be hard to find a balance between what is the right amount of commits, just try making commits that make sense to you.
-
Use descriptive commit names.
Take a moment to shortly describe what your commit changes, or even why it changes something. For example,
fixesis a poor name for a commit as it doesn't tell you anything about meaningful about the commit itself. If there's an issue on GitLab that relates to the commit, you may use the issue number and title, e.g.Fixes #123 - UDP buffer overflow when too many players are on the server. -
Use
git commit --amendto change the last commit.For example, you pushed your change and now CI is reporting that the format check failed, now instead of creating a separate commit fixing the commit before it, run
cargo fmtlocally, rungit addand then rungit commit --amendandgit push -fto fix the incomplete commit instead of creating a new one. The same applies to smaller fixes like spelling errors introduced by yourself, fix the commit where the mistake was made instead creating a new one. Do note, sometimescargo fmtformatting rules have changed, in which case formatting may change parts of the codebase you haven't touched. In this case, feel free to make a separate commit that formats the entire codebase.Tip: As you may have noticed, if you already pushed to remote, you will have to force push your amended commit (both
git push --force-with-leaseorgit push -fwill work for this.) -
Rebasing is a good way to change your commits later on.
In case you feel you made a bit of a mess with your commits at some point, you can squash commits and change the commit names.
- Count how many commits your branch contains, e.g. in
git status. - Run
git rebase -i HEAD~N, whereNis the number of commits you counted in step 1. - Follow the instructions in the editor. You can change a commit name by modifying the text in a line.
For example, to squash commit #2 and #3 into a single commit, write
squashin front of commit #3, no need to change commit #2. - Run
fmton every commit in your branch (in bash)git filter-branch -f --tree-filter "cargo fmt" $(git merge-base origin/master HEAD)..HEAD
- Count how many commits your branch contains, e.g. in
-
Double check your code's quality.
You can run
cargo clippyto check for common mistakes and improvements to your rust code. Clippy can even fix issues usingcargo clippy --fix. If you're interested, the full script GitLab will run during a pipeline is found at.gitlab/scripts/code-quality.sh.
Catching up on changes to the master branch
Often when working on a feature for longer than a day or two, you might notice your branch is falling behind the master branch. Fortunately, you can catch up on any changes your branch has missed by rebasing on top of master therefore you should never merge master in your feature branch!
How to rebase on top of master
- First, make sure you have no uncommitted work, e.g. by creating a new commit.
- Run
git fetch --allto get all the latest changes. - Run
git rebase origin/masterto start rebasing. You may or may not encounter merge conflicts during, if you don't, proceed to the next step. If you do, you will have to resolve the conflicts. These usually arise from recent changes on master conflicting with changes of your own and git needs to be told which to prefer. Feel free to ask for help on our Discord with that. - Run
git push -fto push your rebased feature branch. It must be a force push as you've changed the existing commit history.
Tip: Run git status to see the current state of your branch.
Getting your contribution into the game
You've made a feature branch, made your commits, what now? Now the branch must be reviewed by other members; to do this you must create a Merge Request on GitLab.
Creating a Merge Request (MR) on GitLab
- Once your feature is ready for review, create an MR in GitLab from your branch
your-nickname/your-branch-nametoveloren/veloren/master.- An easy way to accomplish this (if you are using the collaboration repository as explained in Git Workflow) is to:
- Log in to GitLab in your browser
- Copy and Paste to your browser the URI provided when you pushed your feature branch. A merge request will be automatically created. Look for a line starting with remote: and containing a URI like
https://gitlab.com/veloren/dev/veloren/-/merge_requests/new?merge_request%5Bsource_branch%5D=your-nickname%2Fyour-branch-name.
- Note: If this is your first MR and you don't yet have the contributor role, or you don't normally see the git terminal or console output you can always create your own URI based on the https pattern shown here, just substitute your nickname and branch name (assuming you followed the guidance on branch naming).
- An easy way to accomplish this (if you are using the collaboration repository as explained in Git Workflow) is to:
- Make sure to tick the box to delete source branch in the MR. There's rarely a reason to keep the branch around after merging it. Feel free to add additional information to the description. Unless the commit history of your branch comprises of clean commits with descriptive titles, your MR will be squashed — you may preemptively check the squash commits checkbox if you want this to happen.
- Send a message on our Discord (if you have access in
#programmersor in a working group channel otherwise in#new-contributors) and mention@Code Reviewerwith a link to the MR, someone will look over it and will work with you together to get it merged.- In whatever channel you have access to, this is automated in Discord using the /review command.
- Choose the appropriate channel for the review, then begin writing a post with
/reviewand Discord will prompt you for the MR number. - Posting the message will create a review thread in the chosen channel. You and reviewers can add comments to the thread to discuss the MR.
- Choose the appropriate channel for the review, then begin writing a post with
- In whatever channel you have access to, this is automated in Discord using the /review command.
- For non-trivial MRs it is also a good practice to add documentation of your changes to the MR in GitLab. Edit the Overview and add comments after the checklist items. The overview supports markdown and images can be pasted inline.
- When a merge request is approved, someone with the maintainer role will merge your MR into the master branch and the MR changes will go live. If you note that your MR has received approval but does not get merged, it may be because there was a lengthy discussion or multiple updates have been made to the MR, and no maintainer is actively watching the discussion. If necessary, you can post to @Maintainer in the MR discussion thread to let them know that the MR is ready for merging to master.
For advice on streamlining the review process, see here.
Adding a Blog Post
The blog-content channel in the Core Development section of Discord is for reporting changes that have been merged. Once your merge request is accepted and merged to master, you should add a blog post letting everyone know what has changed. You can use existing posts as examples. The editors of the devblog TWiV (This Week in Veloren), as seen in Airshipper, will appreciate the input!
Contributing Assets
If you never worked before with git and just want to contribute assets,
post them in #veloren-art on our Discord and ask for feedback. Make sure you own the rights to the assets and agree it being publicly available under GPLv3 license.
Tip: Check out the Artists section for further information.
After your first contribution
Congratulations on your first contribution and thank you for helping out!
After your first contribution you should get the Contributor role on Discord which gives you access to important channels.
Merge Requests
Here follows some advice for dealing with merge requests, both as the opener and as a reviewer.
Opening a merge request
For technical information about opening a merge request, see here.
You can make the review process faster and simpler by taking the following advice:
-
Provide a brief description for your MR to make the job of reviewers easier. You might want to include some of the following bits of information:
- What the MR tries to achieve
- Why you chose the implementation approach you did
- Screenshots or a video of the change in action
- Links/file references to the parts of the MR that need particular attention (perhaps due to complexity)
-
Offer to review someone else's MR in exchange for them reviewing yours: you don't have to be a core developer to provide a review, and it takes pressure off core developers who often find themselves busy. A core developer will still need to provide the final 'rubber stamp', but good peer review can turn this into a quick formality rather than a longer wait.
-
If you feel that a specific contributor is well-suited to reviewing your work, and they've shown evidence of recently being active, you can send them a message asking for them to review. Sometimes things get missed and just need a little prompting!
-
Keep MRs small and self-contained. If you change too much in a single MR it can become difficult to review and potential reviewers might be more reluctant to prioritise it. A common approach is to split large features into smaller MRs, with a compile-time flag that disables the sub-features until everything is ready to enable them.
-
Remain open-minded about feedback: nobody wants to stand in the way of progress, but controversial changes might cause an MR to get stuck in review for longer. It might be better to put any potentially controversial changes in an MR of their own to avoid them blocking the rest of your changes.
Reviewing a merge request
You - yes, you - can review a merge request!
Contrary to popular opinion, you do not need to be a core developer to review / approve a merge request! Any contributor can perform a review, and community peer review is strongly encouraged because it takes pressure off core developers, who may be busy with other things.
You also do not need to have a deep knowledge of the codebase to successfully review an MR. Often, you don't even need to know how to write code at all! The following kinds of review are just as useful as code review:
-
Play-testing (checkout the branch, give it a whirl to see if everything feels right)
-
Balance review (are the changes balanced and well-matched with existing gameplay mechanics?)
-
Aesthetic review (are the changes in-keeping with the existing aesthetics of the game?)
-
Sniff test (does the code look like it's doing the right thing?)
-
Partial review (review the bits you're familiar with and ask for help for parts you feel less comfortable reviewing)
Code smells
One of the benefits of using Rust is that the scope of possible problems a change can introduce is much smaller. Even if you only have a passing familiarity of the language, you should still feel empowered to review code.
As a rough guide, here are some 'code smells' that you might want to watch out for:
-
Use of
unsafe. This is generally a big no-no and its use should be carefully reviewed by a core developer. -
Use of
unwrap. Each use ofunwrapshould be justified with a comment explaining why it can't cause a panic. -
Cloning/creating items. Avoiding item duplication exploits is very important.
Review checklist
If you're new to reviewing, here is a short checklist of things you might want to do as you review a set of changes:
-
Make sure the change is desirable and in-keeping with existing game mechanics.
-
Play-testing. Check out the branch, kick the tires. Try to break it. Take note of any bugs, strange behaviour, or things that feel unintuitive.
-
Skim the code. Are any of the changes non-trivial enough to need more careful checking? Do they look like they fit with the existing code? Are things implemented in the right places?
-
Ask a domain expert - or the MR author themselves - for help if there's anything that you feel less confident about approving.
-
Do any of the changes mean that documentation needs updating to match? Has this been done?
-
Are the changes properly localised? All user-facing text should be generated by the localisation system. Only an English translation needs to be provided for merge, however.
-
Has the changelog (
CHANGELOG.md) been updated if the change is use-facing? Note that internal refactors and trivial changes do not need to be added to the changelog.
Joining a team
If you have loved contributing so far and want to help out further consider joining a working group by letting the respective team lead know.
Tip _You can join multiple groups and are free to work outside of the groups' focus. Mainly it helps to find out who to talk to for a specific part of Veloren.
Group members can be found and contacted via their respective discord group roles_
Audio (led by DaforLynx (@daforlynx))
Discussing, sharing and approving of music and SFX that will be featured in Veloren.
Assets & Visual Design (led by Gemu (@gemupeachems))
3D models, 2D pixel art/icons, UI design, concept art.
Balance (led by Necti (@nectical))
Balancing the mechanics and gameplay
Combat (led by Sam (@goldfalcon9))
Weapons, armor, combat abilities, enemies, and other combat-related things.
Game Design (no formal lead)
Works on designing how the game is played by the player. Designs the way the player interacts with the world, and the system they use to do so.
Meta (led by AngelOnFira (@angelonfira))
Heads up CI, the website, the Discord, and lots inbetween.
Rendering (led by imbris (@imbris))
Graphics, windowing, and UI logic for Voxygen.
Server & Multiplayer (led by xMAC94x (@xmac94x))
Create servers that can host many people, and make multiplayer experience as great as possible.
Testing (led by YuriMomo (@yurimomo))
Testing the game by using specialized tools and making sure new features don't introduce any bugs.
Translation & Internationalization (led by juliancoffee (@juliancoffee_ua))
We govern Veloren translations to other languages and work on improving internal localization systems so people can translate more, better and faster.
Translation (led by Limina (@liminawayfarer))
We translate the game and make it accessible to people all around the world!
UX & UI (led by Pfau (@pf4u))
We improve Veloren's user experience and user interface by applying well-known UX practices to existing features and collecting information, bug reports from users to work out which Quality of Life improvements are needed the most.
Worldgen (led by Isse (@isse.rs) and Zesterer (@zesterer))
World generation and terrain generation.
Worldsim (led by Isse (@isse.rs) and Zesterer (@zesterer))
World simulation
FAQ
1) How come you chose Rust for this game? It's not exactly the most mature language for game development.
Rust may seem like an unusual choice for a project like this. It's a new language that has yet to properly prove itself in production environments, and is still undergoing relatively rapid changes. We chose Rust because it has several unique features that we believe will come to benefit the project in the long-term.
Rust is safe Code written in vanilla Rust cannot trigger undefined behaviour. Rust's design helps us avoid a plethora of bugs common in other compiled languages such as dangling pointers, buffer overflow, invalid/null pointers, data races, array bound errors, and many more. This makes it particularly suitable for a large collaborative project such as this because it makes it difficult for new code to introduce difficult to fix bugs into the codebase.
Rust is fast Rust is a compiled language that doesn't require a garbage collector, exceptions, or many of the other runtime systems that make other languages so slow. In most scenarios, well-written Rust is at least as fast (and often faster) than well-written C++.
Rust is modular Rust comes with the Cargo build system and package manager. It allows Rust to be compiled in a modular manner, borrowing other libraries (known as crates) from the rest of the Rust ecosystem with ease.
Rust is portable Rust's compiler uses LLVM to target most major hardware platforms. By using Cargo as its build system, it allows for consistent compilation across many platforms. No more searching for header files or fighting linker errors!
Rust is well-designed Rust's syntax is designed to be user-friendly (wherever it can without compromising on features) and well-suited to system programming. Its unique combination of low-level control and safety makes it perfect for building both game engines and high-level game logic.
2) Why use GitLab over GitHub?
GitLab has better integrated CI/CD and offers everything else that GitHub has. Both of them are only a service on top of git on the computer, so not too much different.
3) What noise function do we actually use?
Perlin, worley, simplex, value, gradient, and a few Zesterer invented.
4) How can I help? Do I have to be part of a team? I don't have experience in Rust but really want to learn and help.
Generally speaking, you can help in every area you want to. You don't have to become part of a team. But as soon as you helped a bit and showed that you are interested you can get in the respective "team".
5) How is the movement/physics/mechanics programming handled?
That's implemented in
common, which is a crate for code that's common between both the server and the client. (because the server needs to be the ultimate authority on physics, but the client needs to do physics prediction so that lag/latency doesn't look bad).
6) Does it have all the OOP stuff you need for a project like this? Are there times when you are coding in Rust and there is something you feel could be expressed much better in C++? I originally dismissed Rust when I first encountered it since it looked like it was just C with different syntax and some functional programming stuff, but I heard recently it is supposedly much more than that.
Although Rust has features that on the surface appear to make it an object-oriented language (it has objects, methods, interfaces, etc.) it's not actually an object-oriented language. One of the common trip-ups new developers make is to try to force Rust to behave like an OO language when a particular problem is better solved in a more Rust-y way.
7) What flexibility does Rust provide that Unreal Engine does not? Is it simply because Rust makes the project modular while Unreal Engine is not modular enough for open source development?
A voxel game is a rather specific kind of game. It deals with a lot of data that most engines simply aren't really designed to deal with. Along with that, a lot of the game is procedural, something that existing asset-driven engines aren't too well equipped to deal with either. An existing engine, for us, would provide relatively few advantages despite providing several pretty significant disadvantages.
8) Do you guys ever want to take this project to a fundraising platform like Kickstarter so that someone can work on it full time? Is it possible that this could become a goal one day? Or will this never be a goal?
We probably won't go that route, though I guess it's hard to say anything for sure. We see this as a volunteer project. It's more likely that any fundraising we do would go towards maintaining servers and such.
9) I got a question on how to compile the game?
Everything should be described in the Contributors section.
Troubleshooting
Incase you've hit an issue this section might help you resolve it.
Git LFS
If LFS is not installed and setup properly the lfs pointers will not be replaced with actual assets. This produces an error when running Voxygen where it complains about the validity of whatever filetype it is trying to load.
Check status
To check if Git LFS works correctly:
git lfs status
When LFS was not setup before cloning the repo
Windows and Linux
To setup LFS and download the asset files on Linux or Windows
git lfs install
git lfs fetch
git lfs checkout
macOS
git-lfs install
git-lfs fetch
git-lfs checkout
Git pull/rebase failed due to a smudging error/404
This is a known bug with git-lfs itself and has a nice workaround. Refer to this section here.
When using Mingw64 (Windows)
Git LFS fails download the files properly. The main issue seems to be that the askpass program is not spawned when using a normal CMD prompt, preventing Git LFS from authenticating via SSH to retrieve the temporary access token. Setting the SSH_ASKPASS, GIT_ASKPASS and DISPLAY variables seems to solve this issue:
SET "SSH_ASKPASS=C:\Program Files\Git\mingw64\libexec\git-core\git-gui--askpass"
SET "GIT_ASKPASS=%SSH_ASKPASS%"
SET "DISPLAY=required"
Migrating from submodules
If you used the previous submodules system, you can deactivate it with:
git submodule deinit --force --all
Autoformat with git commit hook
You can setup a git commit hook to automatically format your code before committing if your IDE doesn't support it by default.
Just create a file .git/hooks/pre-commit with the following content.
#!/bin/sh
#
# An example hook script to verify what is about to be committed.
# Called by "git commit" with no arguments.  The hook should
# exit with non-zero status after issuing an appropriate message if
# it wants to stop the commit.
#
# To enable this hook, rename this file to "pre-commit".

# run rustfmt to auto check changed files
changefmt=$(git config --bool hooks.changefmt)

rustup component add rustfmt-preview
if [ "$changefmt" != "true" ]
then
  exec cargo fmt --all -- --check
else
  echo "change files via fmt"
  cargo fmt --all --
  echo "adding all files via git add ."
  exec git add .
fi

# enable change to make fmt change files instead of just warn
# git config hooks.changefmt true
Dependencies
Make sure you have all runtime dependencies installed.
Tracking Issues
For very large, complex, or long-running features we maintain 'tracking issues': large issues that summarise information about the feature and its development progress. Implementing large features often means implementing many smaller ones, so it's important to keep track of them to avoid confusion and to keep the community up to date.
Note that several tracking issues might be out of date or lacking community consensus: take a look at the roadmap if you're looking for a list of planned features with broad agreement from the community!
Here follows a list of currently existing tracking issues. Feel free to contribute to this section if you think something is missing!
Features
- 🌦 Weather
- 🛠 Player-driven building
- 📰 Server browser
- 📜 Translations
- 🎲 Balancing and tiers
- 💸 Economy rework
- 🗣 Chat
- 🏗 Build mode
- ⛰ Worldgen
- 🐉 Quests
- 💥 Hitboxes
- 🏹 Aiming (ranged weapons)
- 🗡 Scrolling combat text (SCT)
- 💹 Trading improvements
- 🐢 Creature variants
- 🥷 Stealth
- 🧩 Plugins
- 🪴 Sprites & item models
- 📡 Auras
- 🙊 NPC sound effects
- 🔊 Sound effects
- 🐶 Pets
- 🗡 Combat
- 🧠 NPC/enemy AI
- ✋ Server-side anti-cheat
- 📑 GDPR and Privacy
Platform Support
Internals
Developers bug-free sky
Introducing the power of Rust development.
- Installing an IDE
- Learning Rust
- ECS
- The codebase structure
- Coordinate Systems
- Debugging
- Performance Analysis
Installing an IDE
Before being able to comfortably modify Rust code you will need to install an IDE.
TIP: Checkout the rust tools page to find common IDEs which support Rust and install the respective plugins.
Learning Rust
There are a lot of resources to learn about Rust.
For the basics we recommend taking a look at the book and the cookbook.
After that you can start familiarizing yourself with the codebase.
ECS
Veloren uses an Entity Component System (ECS). This is a relatively new paradigm in game engine development that competes against traditional object-oriented design models that make heavy use of hierarchy, inheritance, and polymorphism. It encourages game developers to design data structures in a way that allows for efficient batch processing of data on modern CPU architectures with deep caches by storing batchable data contiguously in memory.
Traditionally, the representation of entities within a game are done like so:
#![allow(unused)]
fn main() {
struct Entity {
    position: Vec3<f32>,
    velocity: Vec3<f32>,
}
}
When representing multiple entities, it's common to use an array-like data structure.
#![allow(unused)]
fn main() {
struct World {
    entities: Vec<Entity>,
}
}
However, this comes with problems. Modern CPUs have deep caches, meaning that they are significantly faster at accessing memory that is closer in the address space to memory they have already accessed. The most efficient storage formats pack data to be processed very close together in memory. Our current representation looks like the following:
| Entity 0            | Entity 1            | Entity 2            |
|---------------------|---------------------|---------------------|
| position | velocity | position | velocity | position | velocity |
Let us imagine a 'typical' operation that we'd like to perform: applying gravity to the entities. This involves adding
9.81 in vertical velocity to each of the entities. Unfortunately, the access pattern of this operation involves
touching each velocity field, but skipping each position field. These gaps in our data make the operation slower. In
technical jargon, we call this a lack of 'cache coherency'.
All is not lost.
A design pattern you might have heard of is called Struct Of Arrays, or SOA. It suggests that instead of packing the data associated with each entity together in one place, we should instead group data according to its purpose.
#![allow(unused)]
fn main() {
struct World {
    positions: Vec<Vec3<f32>>,
    velocities: Vec<Vec3<f32>>,
}
}
Now our representation is much more densely packed and our application of gravity to entities is more efficient because we no longer need to skip over the position data while iterating through entity velocities.
| Entity 0 | Entity 1 | Entity 2 |     | Entity 0 | Entity 1 | Entity 2 |
|----------|----------|----------| ... |----------|----------|----------|
| position | position | position |     | velocity | velocity | velocity |
ECS is this idea taken to its logical conclusion: entities as associated but separate collections of components, with each type of component stored in its own distinct storage buffer. This approach comes with more advantages too: because components are stored separately, it is easy and fast to add or remove components from an entity as the game is running, thereby altering the behaviour of the entity and its capabilities. This is a remarkably powerful technique and allows for what amount to the ability to radically alter the behaviour of the game and the entities within it while the game is running and without sacrificing performance.
The specific ECS crate that Veloren uses is SPECS. You can read more about ECS and the specifics of how SPECS works here. If you're looking to work on Veloren, I strongly recommend reading this resource from cover to cover (it's quite short).
Project Architecture
When we started developing Veloren, we set out to with several aims in mind.
- Modularity: The project should be composed of many interlocking pieces
- Performance: The project should avoid architectural choices that constrain performance
- Avoiding lock-in: The project should avoid forcing the use of certain components where possible
Crates
Veloren is split into several Rust crates. The purpose of this is twofold.
-
Reduce compilation time by allowing parallel processing of crates during compilation
-
Allow users of the Veloren ecosystem to only depend on specific parts of the project
Frontends
If you've spent any time around games with an active modding scene, you've no doubt come across games that have had entirely new graphical frontends written for them that allow you to play the game using different graphics or that view interesting game data that the default game doesn't usually display, such as the Legends Viewer of Dwarf Fortress. These frontends are often hackily constructed, requiring direct memory access to the game's RAM, lack significant features, or require the main game to be running in parallel.
Veloren ditches this approach and instead makes frontends a first-class abstraction. voxygen, the default graphical
client frontend, has no inherent coupling with the internal client library. It's possible to write entirely new
frontends that display the game's contents in a vastly different way on top of the generic client library. Examples of
such alternative frontends include:
- Teloren, a command-line frontend with nethack-style graphics
chat-cli, a chat-only command-line frontend
(Is something missing from this list? Feel free to add it)
voxygen
Voxygen is the default client frontend for Veloren and is the program that users most commonly interact with. It is a fully maintained and features a fully 3D view of Veloren's world and makes use of all of the game's client features.
server-cli
server-cli is the default server frontend for Veloren. It allows running Veloren servers via a simple command-line
interface that includes both a 'basic' mode (streaming output to stdout/stderr) and a more complex mode that allows
the inputting of server commands via a simple ncurses-style terminal interface.
Backends
As mentioned, Veloren implements core gameplay functionality through headless developer-facing libraries. These are:
server
The core server implementation of Veloren, with all the bells and whistles. It includes APIs for server frontends to query game state, inject events (such as server-wide broadcasts), and load plugins. In the future, we imagine a plethora of server frontends catering to many requirements: simple graphical frontends for players wanting to host a LAN game with friends, or a powerful CLI server frontend backed by a web control panel that allows precise control over game state and advanced features such as live maps or civilisation stats viewable on the web.
client
The core client implementation of Veloren. It is non-prescriptive about how a client frontend displays data and allows clients to connect to servers through one of many 'modes' including chat-only, spectator, and character. The default client frontend, Voxygen, is 3D, but there's no reason as to why other client frontends couldn't implement displaying the world using isometric graphics, Dwarf Fortress style layered 2D graphics, or any other representation one could imagine.
world
The core world generation implementation of Veloren. The use of this crate is a little more nebulous since world generation and simulation are under active development, but this crate is intended to allow viewing, generating, and simulating a Veloren world without a client or server being associated with it. In the future we imagine frontends existing that allow viewing aspects of world history like Dwarf Fortress' Legends Viewer, or editing of world data to allow for custom worlds and scenarios.
Utility crates
Many other crates in the ecosystem are utility crates that contain functionality common to many other crates. These are not intended for consumption by anything but the core Veloren libraries and should be treated as an implementation detail. These are:
common (and its sub-crates)
Implements behaviour and contains definitions that are common to both client and server.
network
Contains the raw implementation of Veloren's networking utilities.
Plugins
Veloren has recently gained a plugin API that allows for the development of additional features on top of the core Veloren experience. While the plugin API is still extremely experimental, we envisage it soon becoming the standard way to expand the game's features. Plugins are written in any language that may compile to Web Assembly (WASM), although Rust is so far the only language with official support and bindings. Plugins are fully sandboxed and get shared with clients when connecting to a server. Plugins may have server-side and client-side behaviour contained within the same package.
There are several crates associated with plugins:
plugin-rt
The core plugin runtime. This crate facilitates communication with the host engine and manages plugin hooks and IO.
plugin-api
Contains type definitions that constitute the plugin interface used to communicate with Veloren. This includes types and structures used to represent in-game state and communicate about changes in that state.
plugin-derive
Includes utility procedural macros for setting up a plugin, automating some of the more complex APIs provided by
plugin-rt.
Coordinate Systems
Various coordinate systems are used for different tasks throughout the codebase so it can be useful to have a reference for how they work and relate to each other.
A not necessarily exhaustive list:
- "world" coordinates
- chunk coordinates
- weather sim cell coordinates
- "regions" used on the server for syncing to clients
- coordinate spaces used during rendering in voxygen
- LoD zones (see
common/src/lod.rs)
Note: This document is unfinished and details for more of these could be included.
World coordinates
World coordinates can actually be broken down into two different kinds.
There are non-integer positions currently represented via Vec3<f32>, e.g. which can be used to
represent an entity position.
Then there are integer positions currently represented via Vec3<i32>, e.g. which can be used
for the position of a voxel in the world. The coordinates of the voxel containing a Vec3<f32>
point can be obtained via .floor() as i32 on each element of the Vec3. Consequently, when the
integer position of a voxel is directly converted to a Vec3<f32>, this is located at the minimum
corner of that voxel. To obtain the center of a voxel in that space 0.5 must be added to each
element of the position.
Debugging
This section covers some helpful debugging tips within the Veloren project. This should help if you wish to explore the code base at runtime, or work on implementing a feature.
Compiling With Debug Symbols
In order for debug symbols to be generated for the project, the debuginfo profile must be used. You can build the project with debug symbols included by running this command:
cargo build --profile debuginfo
Visual Studio Code
Follow this guide to setup your VS Code installation.
After that make the following modifications to launch.json (remember to build with the cargo command listed above!)
{
  "version": "0.2.0",
  "configurations": [
    {
      "name": "(Windows) Launch",
      "type": "cppvsdbg",
      "request": "launch",
      "program": "${workspaceRoot}\\target\\debuginfo\\veloren-voxygen.exe",
      "args": [],
      "stopAtEntry": false,
      "cwd": "${workspaceRoot}",
      "environment": [],
      "externalConsole": true
    },
    {
      "name": "(OSX) Launch",
      "type": "lldb",
      "request": "launch",
      "program": "${workspaceRoot}/target/debuginfo/veloren-voxygen",
      "args": [],
      "cwd": "${workspaceRoot}"
    }
  ]
}
JetBrains Integrated Development Environments
Please do note that debugging on JetBrains IDEs is only supported on a small subset of their products (like CLion or IntelliJ Idea Ultimate). Visit this link for further information.
Install This plugin in your IDE (either via File -> Settings -> Plugins [Ctrl + Alt + x], or via your browser) and open your rust project in the IDE.
Click the button "Add Configuration..." in the upper right corner. This will open a window giving you the ability to create launch / debug profiles.
Click the little "+" button and select "Cargo in the dropdown". This will create you a launch profile.
Edit the "Name" field however you want. Then here's the interesting part : Editing the "Command" field
By default, the "Command" field should have "run" in it, keep it and add "--bin {bin} --profile debuginfo" where bin is the name of the binary to debug (veloren-server-cli, veloren-voxygen, ...).
The "Command" field should then contain something similar to "run --bin veloren-server-cli --profile=debuginfo".
If you have any question, please reach out to me (infrandomness#4003) on the Veloren Discord server.
WGPU Vulkan Shader Validation
WGPU comes with some helpers to ensure your shaders are correct.
To enable them, install vulkan-validation-layers and start veloren with the ENV variables:
export VK_INSTANCE_LAYERS=VK_LAYER_KHRONOS_validation; #generates some loglines after startup
export WGPU_GPU_BASED_VALIDATION=true; #might cause a crash
export WGPU_VALIDATION=true;
RUST_LOG="wpu=trace,naga=trace,shaderc=trace"; #enable tracing levels for compilation
cargo run
Troubleshooting
Note: Some users have reported needing to run VSCode as an administrator for debugging to work correctly. If you notice an error message similar to below, then try re-running VSCode as administrator.
Unable to open 'panicking.rs': Unable to read file (Error: File not found
(c:\rustc\7dbfb0a8ca4ab74ee3111e57a024f9e6257ce37c\src\libstd\panicking.rs)).
Performance Analysis
You want to improve Veloren's performance? But you don't know how to best measure Veloren's performance ? This page is a collection of tools that are already integrated in veloren and can be used to help you collecting data.
Compiling With Release & Debug Symbols
Most tools work better with debug symbols AND in release mode: You can build the project with debug symbols included by running this command:
cargo build --profile releasedebuginfo
Integrated tooling
Prometheus
Prometheus allows you to gather internals of veloren during runtime. The data points are aggregated (e.g. all entities, state tick time spend in physics system). It allows to get a quick, rough look into Veloren's performance, but is not very detailed.
Prometheus statics are exported by default whenever you run veloren-server-cli
Open your web browser http://localhost:14005/metrics to see the raw values.
You can import this data into Prometheus via this tutorial: https://prometheus.io/docs/prometheus/latest/getting_started/
Add localhost:14005/metrics to your /etc/prometheus/prometheus.yml.
Connect to http://localhost:9090 and enter tick_time, execute and switch over to Graph mode.
You can connect your Prometheus service to a Grafana instance: https://prometheus.io/docs/visualization/grafana/ You'll find example dashboards in the veloren infrastructure repo (not yet available): https://gitlab.com/veloren/infrastructure/-/blob/master/veloren-infra/templates/grafana-dashboads-gameserver.yaml
Tracy
Tracy enables you to track the time spent in certain spans based on instrumentation inserted into code. It allows to get a detailed level into certain blocks of code, when they execute and how long they take.
Tracy has an extensive manual available https://github.com/wolfpld/tracy/releases/latest/download/tracy.pdf.
Enable tracy support with the feature tracy on one of the binary crates:
cargo run --bin veloren-voxygen --no-default-features --features tracy,simd,egui-ui,shaderc-from-source --profile no_overflow"
We have an alias defined for this in .cargo/config, so the following shorthand can be used if you
don't need to customize the profile or what features are enabled:
cargo tracy-voxygen
Similarly, we have an alias for running the server with the tracy feature enabled:
cargo tracy-server
Connect to the running process via your Tracy tool: https://github.com/wolfpld/tracy/releases
Note: The version of Tracy required depends on the current version of the
tracy_clientcrate being used by veloren. This can be found in theCargo.lockfile at the repo root and checked against this table https://github.com/nagisa/rust_tracy_client#version-support-table
'cargo build -Z timings'
When you want to analyse compile time, you can use cargo's feature -Z timings. It will output a
.html file with individual compile times, and dependencies and a total graph showing inactive,
active and idling projects.
External tooling
rust: flamegraph
Follow the installation tutorial here: https://github.com/flamegraph-rs/flamegraph
execute it via either cargo flamegraph or simply flamegraph and provide the location to the executable.
Once you close veloren a flamegraph.svg file will be created you can open with your browser
Visual Studio 2019 Community Edition (Windows only)
visual studio has a build in profiler, follow this tutorial and attach it to the running veloren program: https://docs.microsoft.com/de-de/visualstudio/profiling/cpu-usage?view=vs-2019
valgrind/cachegrind
you can use valgrind/cachegrind profiler to generate a output file and later analyse it via valgrind. Tutorial: https://www.valgrind.org/docs/manual/cg-manual.html
Artists creative heaven
Introduction into the art of adding artistic content to Veloren.
Saying 'Hello' in one of the art-channels
This is the best way to get in contact with our art-team on Discord. Plus you already get an idea of how we work together as a team and maybe even get to know some of us.
Artists are showing off their creations on those channels to get feedback or an 'OK' from Core-Devs that their model is ready for being animated and placed into the game.
Attribution and Licensing
Assets that are (or are adapted from) licensed copyrighted material often have certain requirements including attribution of the source and making note of the modifications.
For example, the Creative Commons licenses generally require attribution with:
- Title of the original work
- Link to the original work
- Author of the original work
- The license name with a link to the full license
- Notes of any modifications to the original work
- If modifications are enough to be considered a derivative/adaptation, the new title and authors
To keep track of attributions and provide a format that can be displayed in the game we have created assets/common/credits.ron. Merge requests that add works requiring attribution should update this file with new entries. This manifest allows entries with the following fields:
#![allow(unused)]
fn main() {
(
    name: String,
    source_link: String,
    authors: Vec<String>,
    asset_path: String,
    license: String,
    license_link: String,
    modfications: String,
    notes: String,
)
}
Attributing work with no modifications or small modifications from the source can be formatted like:
#![allow(unused)]
fn main() {
(
    name: "Original Title",
    source_link: "https://fonts.com/fancyfont/",
    authors: ["Author One"],
    asset_path: "relative/path/to/fancyfont.ttf",
    license: "CC BY-SA 3.0",
    license_link: "https://creativecommons.org/licenses/by-sa/3.0/",
    modifications: "Trivial modification",
)
}
Derivative work can be formatted in the current scheme like:
#![allow(unused)]
fn main() {
(
    name: "Derivative Title",
    source_link: "https://fonts.com/fancyfont/",
    authors: ["Author Two (derivative)", "Author One (original)"],
    asset_path: "relative/path/to/fancyfont.ttf",
    license: "CC BY-SA 3.0",
    license_link: "https://creativecommons.org/licenses/by-sa/3.0/",
    modfications: "Added additional characters to the font.",
    notes: "Derived from Original Title",
)
}
There is room for improvement in the format for derivatives works and thoughts on this would be welcome! For instance, in the example above original and derivative authors have to be differentiated using a note in parentheses and the title of the original work is listed in the notes field.
For now, attribution requirements that don't fit the provided fields can utilize the notes field to provide any further information. Additional cases that might need this are:
- Work derived from multiple original works.
- Work derived from derived work (indication of previous modifications needs to be retained).
Careful review of the specific license and requests of the original author is advised. For more helpful information on the Creative Commons licenses see:
- https://wiki.creativecommons.org/wiki/Best_practices_for_attribution
- https://creativecommons.org/faq/#attribution
Contributing Voxel Models
Welcome to the section about getting your voxel models into Veloren!
Software to create Voxel files
Most of our artists use the freely available MagicaVoxel from ephtracy. It's available for Mac, Windows and runs with Wine on Linux.
Of course you are not obliged to use this software but it's highly suggested as some block properties are determined directly with palette parameters shown in MagicaVoxel.
At some point we might create our own voxel editor with built in model rigging and animating.
Getting started - Useful links
MagicaVoxel is easy to begin with but hard to master. YouTube is always a great idea to start with.
You should totally have a look at controls in MagicaVoxel as they highly optimise your workflow.
Our GitLab assets repo will give you an idea of how assets are organized and what kind of style we try to achieve with them.
If you want to create armour/weapon models it's suggested taking a look at the reference models For hairstyles you might want to take a look at the hairstyle reference.
For detailed info about how to create and add them to the game have a look at the guides section of the book.
Some basics you should know about
Our world consists of big, "landscape" sized blocks and small scale blocks. Houses, trees and everything directly placed in the procedurally generated world is made from landscape blocks. Objects, figures and sprites (i.e. crops) are made from small scale blocks.
One landscape block is 11x11x11 small scale voxels big.
While creating models you should always keep their scale in mind. A character model is around 22 small scale voxels tall and 10 voxels wide. So that's 1x2 landscape blocks.
Objects/figures made from small scale voxels can be arbitrarily scaled to change their size in relation to the world.
I made a model, it's approved by Core-Devs, what now?
The best way to make your creations available to us is to upload them into our Google Drive model directory.
If you can't find a folder that fits your model you can just create a new one.
Whenever we look for new models and don't have them available in our local asset repositories we will resort to this drive.
How do I get the rank of an artist?
Self motivated model creation, showing general excitement about Veloren and high quality content along with a moderate to high activity on the Discord will earn you the rank of an Artist. Becoming a Contributor is easier and only involves showing any kind of motivation to contribute to Veloren.
What is the art-and-assets working group?
This working group is for the most dedicated and skilled artists having constantly contributed to the project. They are the ones newcomers should listen to and take suggestions from.
Is creating art for a game like playing it and mostly fun?
Yes and no. Creating models will feel like work. Usually following an initial rush of motivation right after discovering Veloren people quickly realize how much there is to do and that they can't invest the required time into this hobby due to their other commitments. We are used to that so please don't feel bad if you have to vanish for some weeks.
Keeping intrinsic motivation and working self organized isn't for everyone.
Seeing people actually playing with your models and ideas feels like a massive achievement though. This is why most of us chose to become artists on this project:
To create a beautiful world for everyone to enjoy.
If you feel like you want to join us on this great journey: We are looking forward to welcome you to our team and seeing your creations!
Contributing Audio
The best way to contribute audio is to first visit the Discord, ask for a contributor role in the #new-contributors channel, and start a conversation in the #audio channel.
All sound files must be in Vorbis format (with the .ogg file extension) and
exported at Variable Bit Rate level 5.
The quick and easy way to do this is to export as a .wav, open it in Audacity,
and export it again as an Ogg Vorbis file at compression level "5".
It is customary to check in with one of the audio leads on Discord to get your music and sound effects approved for the game.
Sound Effects
Most sound effects go in an appropriate folder in assets\voxygen\audio\sfx\.
Sound effects that emit from an source in 3D space, like footsteps, hitsounds, and utterances, should be exported as mono.
There are two main ways of triggering a sound effect in-game: SFX events and outcomes.
SFX events retrieve SFX from the sfx.ron file. They are mostly triggered by any of the various mod.rs's in voxygen\src\audio\sfx\.
Outcome SFX are retrieved from sfx.ron and handled in voxygen\src\audio\sfx\mod.rs. Outcomes are emitted from whichever code is related to it, be it combat, server event, etc. The outcome must also be added to common\src\outcome.rs.
UI SFX are usually stereo sounds that play directly to the player (i.e. not from a place in the world).
There are is also ambience, used for things like wind and rain. These sounds are always stereo. The code for it is in voxygen\src\audio\ambience.rs, the files are in assets\voxygen\audio\ambience, and its manifest is assets\voxygen\audio\ambience.ron.
If possible, have your SFX tested in-game before trying to merge it; ensure it sounds right and plays at the right volume. Be sure to get a second opinion from the Discord channel!
Music
Music files are found in assets\voxygen\audio\soundtrack\. The game retrieves the files via the soundtrack.ron file. Music should be normalized at -1dB after mastering.
Rough loudness guidelines: For people with LUFS analysis software, try to keep the max LUFS-S (after normalization) between -14 and -13 for exploration tracks, and between -13 and -12 for combat tracks. If in doubt, compare directly with existing tracks.
Exploration
The game plays exploration music as single, standalone tracks in the background. When one track ends, some time passes before another track plays. Which track is played is determined by which site, biome, weather, and time of day the player is in.
The available sites currently are the overworld, dungeons, caves, and towns. For an up-to-date list of sites, see /common/src/terrain/site.rs.
The available biomes currently are Grassland, Forest, Desert, Tundra, Lake, Mountain, Ocean, Jungle, Savannah and Taiga. A Swamp biome is planned, but doesn't exist yet. For an up-to-date list of biomes, see common\src\terrain\biome.rs.
It is worth noting that biomes are descriptive, not prescriptive, when it comes to code. The world doesn't generate based on biomes, and biomes are determined based on existing chunk data.
Certain biomes supersede others - most notably, snow-covered mountains will count as Tundra. If you want to know exactly how biomes are determined, see
get_biome()inworld\src\sim\mod.rs.
Also note that music may play in more than one biome and time of day, though we generally want to minimize this as more music gets added, to give each biome a more distinct tone.
The times of day are day and night.
The best way to get a feel for the tone of the soundtrack is to simply listen to it.
Exploration music should have soft starts and endings since they come in at essentially random times.
Combat
Note: Currently, combat music is a disabled feature, as it doesn't work well with the new dungeons nor the new backend. It is due for redesigning.
The current implementation of the combat music system is as follows:
"Combat" as a state is when the player comes within a certain distance of enemies with either high health or high quantity. Currently, combat music is reserved for the old, underground dungeons. Upon the player entering combat, a start segment is played. If it ends and combat continues, a loop segment is immediately played, before either fading out or playing an end segment when combat ends.
-
startis a short intro attached to aloop. If the composer is smart, they can shorten this segment by having it somehow transition perfectly into theloopwithout playing the entireloopitself. -
loopis the main portion of the combat music. Since the music only comes in when the player is in a fairly dire situation (mobs of enemies, hard enemies, and bosses), the intensity of the music should be fairly high. -
endis a very short cadence coming off the end of theloop, and is only played if the fadeout can't complete before theloopends. Should give a sense of finality.
It is important for the transitions and loops to be smooth. This means the loop must be "exported as loop"; the tail (the residual release/reverb at the end) of the loop (and the start) must also bleed into its beginning, as well as into the end.
Translation working group
Introduction on translating content to your language and not only.
Translating the game

Preface
Veloren uses the Fluent localization system to translate content.
Translation files have the .ftl file extension.
Fluent files contain a list of messages in key-value format.
Fluent messages may or may not have variables inside via syntax of placeables.
main-servers-other_error = Server general error: { $raw_error }
main-credits = Credits
Fluent messages may have attributes attached to them.
common-abilities-hammer-leap = Smash of Doom
    .desc = An AOE attack with knockback. Leaps to position of cursor.
Fluent also supports plural selectors via Unicode rules:
https://www.unicode.org/cldr/cldr-aux/charts/30/supplemental/language_plural_rules.html
NOTE: each language has its own plural-set. Don't copy-paste what English does.
hud-trade-buy_price = { $coin_num ->
  [1] Buy Price: one coin
  *[other] Buy Price: { $coin_formatted } coins
}
Branch marked with * will be used as default.
The plural selectors allow Fluent to select by "group" (distinct for each language). Fluent can also use literals in the selectors for direct comparison. The same example, in Ukrainian may look like this:
hud-trade-buy_price = { $coin_num ->
  [1] Ціна покупки: одна монета
  [one] Ціна покупки: { $coin_formatted } монета
  [few] Ціна покупки: { $coin_formatted } монети
  *[other] Ціна покупки: { $coin_formatted } монет
}
NOTE: [1] and [one] are different in most languages, despite being the same in English. In Ukrainian, both 1 and 21 would go to [one], but because here we explicitly put [1] at the beginning, it will match sooner, allowing us to special-case single coin.
Don't overdo it, if something is possible, doesn't mean it's required.
Fluent allows us to handle grammatic genders as well. You can translate
sentences using the provided gender of actors. Remember to set a default
option with the * character for those cases where messages fail to
provide the gender.
hud-chat-offline_msg = { $user_gender ->
    [she] [{ $name }] вийшла з серверу
    [he] [{ $name }] вийшов з серверу
    *[any] [{ $name }] оффлайн
}
NOTE: not all messages provide genders. If in doubt, check comments in the English translation or ask the translation team. If gender information is not available, try to remake the sentence into one where grammar doesn't require you to specify the gender.
You can learn more about Fluent and its syntax here:
Using Weblate (recommended)
Weblate is the most convenient way to translate Veloren to your language.
https://translate.codeberg.org/engage/veloren/
The game is translated on Weblate with translation suggestions. These suggestions work differently depending on whether or not a language has any dedicated reviewers.
- The language has one or more dedicated reviewers.
- You can only add translation suggestions. Reviewers will decide whether to accept or reject the suggestions.
- The language has no dedicated reviewers.
- You can both add and vote for translation suggestions. Suggestions that reach a certain number of upvotes get accepted automatically.
- The language does not exist on Weblate.
- You need to raise an issue on GitLab asking us to add the language to Weblate, so that you can start submitting your suggestions there.
- You can create the issue here: https://gitlab.com/veloren/veloren/-/issues/new
Dedicated reviewers are trusted members of the community who are committed to managing translations of their assigned language(s). They decide what translation strings get into the GitLab repository.
If you would like to become a dedicated reviewer for a language, feel free to discuss it with us.
Using programming tools (old way)
Before Weblate was available for contributors, translating the game was harder because translators needed to make use of the Git version control system to submit their translations.
Some translation tools complemented those older workflows. They are still available, but the only supported way to contribute translations to the game is using Weblate.
Previewing your translation
Veloren supports viewing your changes to translation files in real time. The game must have been compiled with a "debug" build to support this feature. You can compile the game yourself in this mode by following the instructions here:
After you have compiled the game and, effectively, can run a "debug" build of
Veloren, any changes you do to the Fluent files will be reflected in the game
in real time.
These are the files contained inside the assets/voxygen/i18n directory.
Getting information about the translation
Veloren includes a localization test tool if you have compiled the game.
This special tool compares the Fluent keys of your selected language with those of the reference language, English. The tool then classifies, counts and prints these comparisons in a neat way for translators to inspect.
It is the same program we run in our automated CI pipelines, but less verbose.
For example, you can run this command to get information about the Ukrainian translation.
cargo run --bin i18n-check --features=bin -- uk
For more information on how to use this tool, run it with the --help argument:
cargo run --bin i18n-check --features=bin --help
Online localization test
We offer a web service to display translations statistics.
https://grafana.veloren.net/d/mNjODNM7z/translations
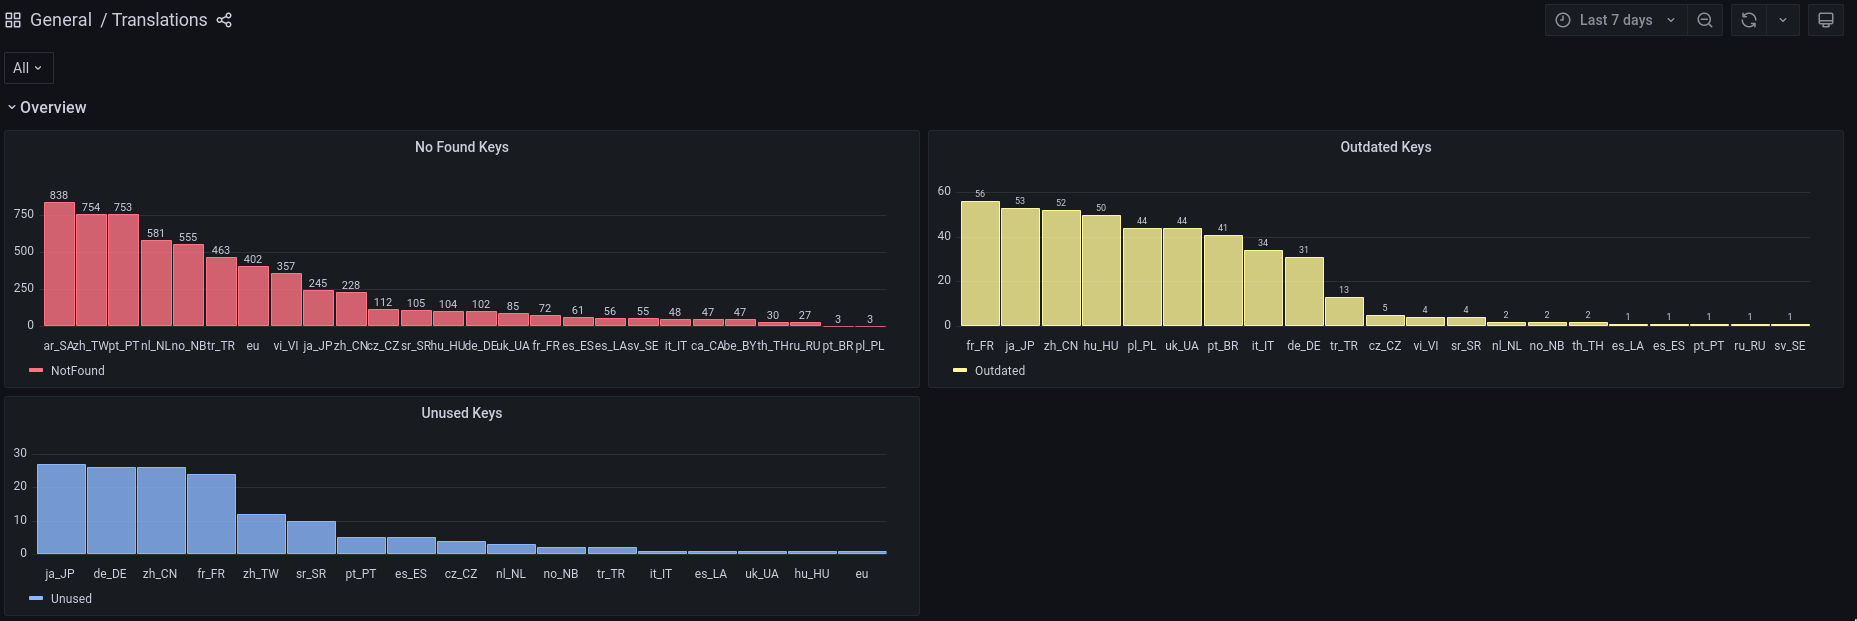
We will use the Ukrainian translation as our example.

Here we have detailed information about all language keys used in the Ukrainian
translation (uk directory) in comparison with the reference language
translation (English - en/ directory).
The status section displayed for each key has the following possible values:
-
Unused: The key exists in the Ukrainian translation but not in the English translation. These are keys that have been used before in the game but have been removed since they weren't needed or have been renamed. These are safe to remove. -
NotFound: The key exists in the English translation but doesn't exist in the Ukrainian translation. Here we need your translation! -
Outdated: Currently not available, means that some changes were made to the English translation, but not to the Ukrainian translation.
Troubleshooting
I cannot make translation suggestions for Veloren on Weblate
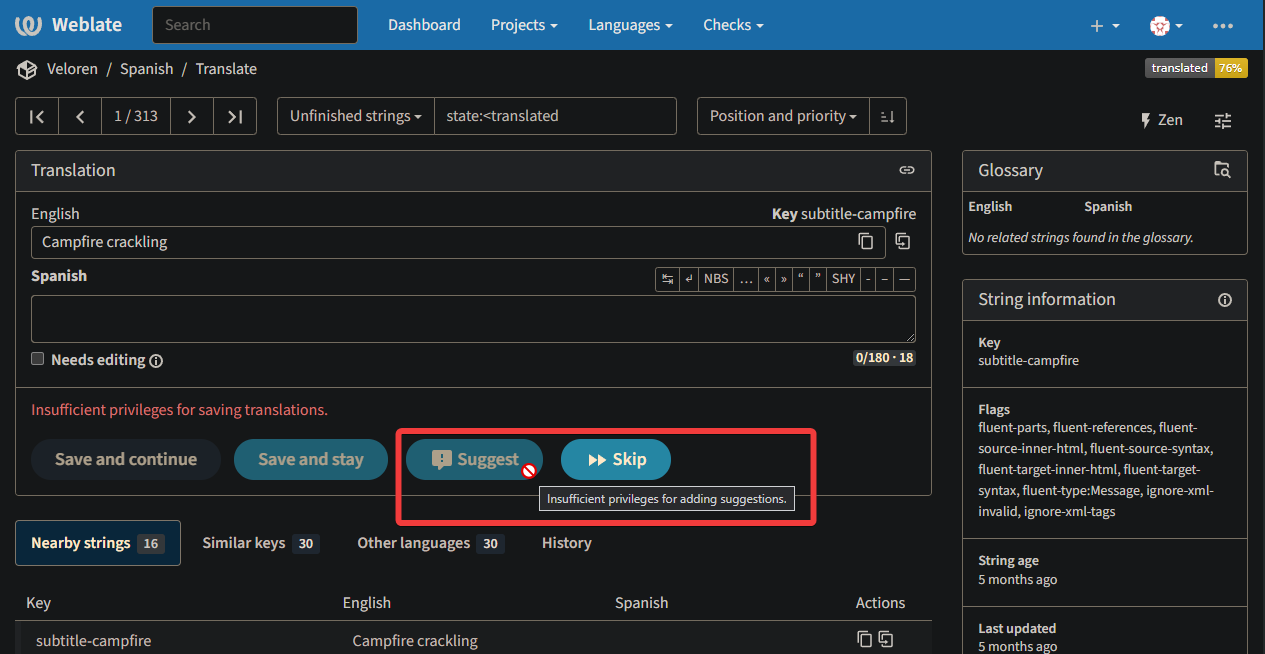
If your user account on Codeberg Translate was created before February 2024, your account might not be granted the required permissions to contribute to the Veloren translation.
Please, contact the translation team, either on Discord or through an issue on GitLab. We will review your permissions and help you resolve the issue.
Some of the text characters are missing or displayed incorrectly
Please, raise an issue on GitLab to add the missing characters to the game fonts for your language.
Managing Weblate
Translation workflow
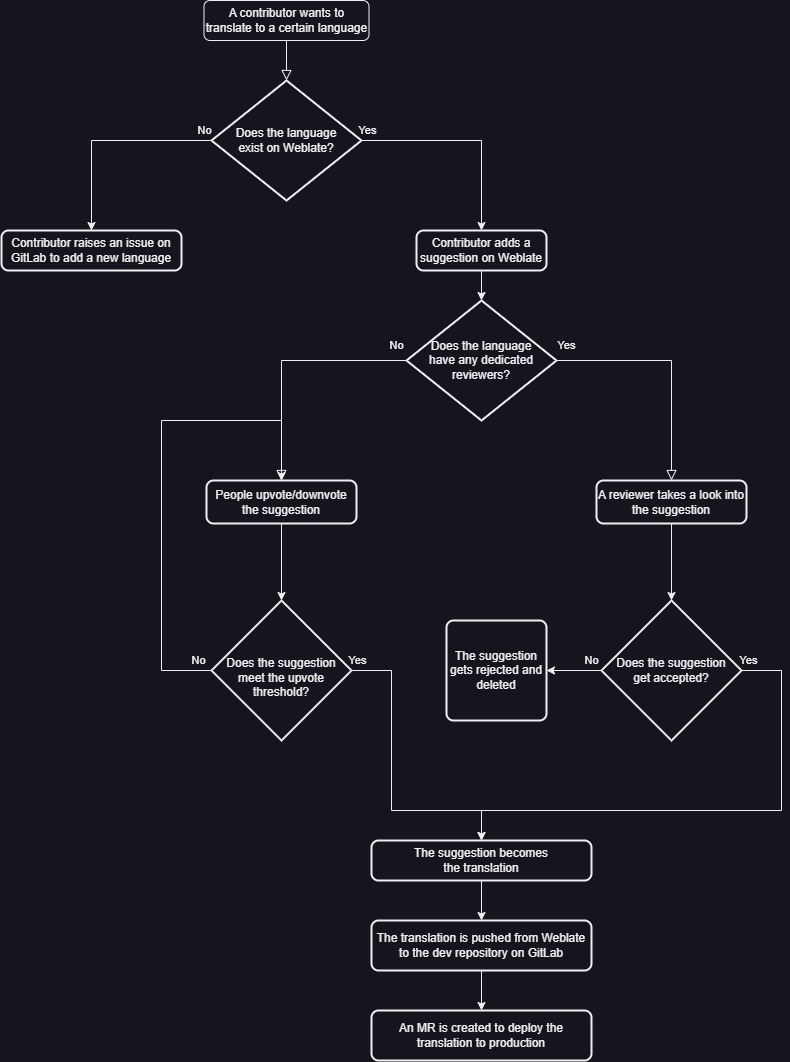
Sometimes, it's needed to make changes to translation files outside of Weblate, in this case, it's important to comply with the following requirements:
- Changes that only affect the English source files can be merged at any time.
- Changes that modify translated language files can only be merged in
coordination with Weblate:
- Translations from Weblate are all committed ("Commit pending changes").
- The translations are pushed and a merge request is opened.
- The translations are locked in Weblate for modifications.
- The Weblate MR is merged, Weblate remains locked.
- After resolving potential merge conflicts itself, the external changes are merged.
- After all changes are in the master branch, Weblate is updated and unlocked.
- Updating translated language files must only happen when they are in sync with Weblate, and Weblate is locked to prevent conflicting modifications.
Language types
Languages are classified into two types:
- Languages with one or more dedicated reviewers.
- Contributors can only add translation suggestions.
- Reviewers are responsible for checking suggestions and deciding whether to accept or reject them.
- Languages without any dedicated reviewers.
- This is the default type.
- Contributors can both add and vote for translation suggestions.
- A suggestion becomes the new translation once it reaches a certain number of upvotes.
Language configuration
Set the language type
Our project on Weblate assumes by default no language has any dedicated reviewers. Only languages with one or more reviewers are configured explicitly by administrators.
Let's imagine the following scenario:
- The Turkish language does not have any dedicated reviewers on Weblate.
- A member of our community, Mary, requests to be a reviewer for the Turkish
translation of Veloren.
- To check their contributions, use https://translate.codeberg.org/translate/veloren/-/LANG/?q=suggestion_author:AUTHOR.
ReplaceLANGandAUTHORplaceholders with proper values.
- To check their contributions, use https://translate.codeberg.org/translate/veloren/-/LANG/?q=suggestion_author:AUTHOR.
- The Turkish language must change from the default, implicit, behavior to a new, explicit, behavior. A behavior for languages with dedicated reviewers.
As an administrator of our Weblate project, you would need to follow these steps:
- Go to the language settings for Turskish on Weblate.
- The URL in this context would be: https://translate.codeberg.org/settings/veloren/-/tr/
- Make sure only these checkboxes are enabled:
- Customize translation workflow for this language
- Turn on suggestions
- Add Mary's user on Weblate to the Reviewers: Turkish project team.
- The URL in this context would be: https://translate.codeberg.org/teams/487/
The difference now, with respect to default behavior, is that Turkish has
Suggestion voting disabled. Thus, reviewers, such as Mary, are the only
people capable of managing the translation: what strings make it into the
GitLab repository.
If you want to get the default behavior back for a language (no reviewers), follow these steps:
- Remove every user from the corresponding reviewer team.
- Go to the language settings and disable the Customize translation workflow for this language checkbox.
Adding a language to Weblate
We may get requests from time to time to add languages on Weblate for which there are no translations of the game yet. Administrators of our Weblate project are responsible for attending such requests.
A local installation of Git is required to add new languages to Weblate.
Cheatsheet
If you need to add a language quickly, follow these steps:
-
Make sure you have a local copy of the Veloren repository on your device.
git clone https://gitlab.com/veloren/dev/veloren.git -
Create a new branch.
cd veloren git checkout -b <yourusername>/add-<language> -
Head to the
assets/voxygen/i18ndirectory.cd assets/voxygen/i18n -
Make a copy of the
en/directory, named after your language. For example, if you want to translate to Turkish, your directory would be namedtr/:cp en <ietf_bcp_47_code> -
Remove the contents of all the Fluent files inside your new directory. All the files with the
.ftlfile extension. Make sure the files still exist, but empty. -
Open the
_manifest.ronfile and modify thelanguage_nameandlanguage_identifierfields as appropriate (see below for more details about this file.) -
Commit your changes locally.
git commit -
Push your local branch upstream.
git push -u origin <yourusername>/add-<language> -
Go to your new branch on GitLab: https://gitlab.com/veloren/dev/veloren/-/branches
-
Create a merge request (MR) targeting the
masterbranch of the main repository.
About the manifest file
The _manifest.ron file has a metadata section.
This section has the display name and the language identifier for your translation.
Change language_name to a human readable name in your language with this format:
<name_in_original_language> (<name_in_english>)
For example:
metadata: (
    language_name: "Türkçe (Turkish)",
    language_identifier: "tr",
),
If the language is a variant spoken in a certain region or country, follow this format:
<name_in_original_language> (<name_in_english> - <region>)
Two examples of this case are:
metadata: (
    language_name: "Español de España (Spanish - Spain)",
    language_identifier: "es",
),
And:
metadata: (
    language_name: "Español de Hispanoamérica (Spanish - Latin America)",
    language_identifier: "es-419",
),
Remember to set the value of language_identifier to match the parent directory's name.
Here's the complete example:
/// Localization for Čeština
(
    metadata: (
        language_name: "Čeština (Czech)",
        language_identifier: "cs",
    ),
    fonts: {
        "alkhemi": Font (
            asset_key: "voxygen.font.Alkhemikal",
            scale_ratio: 1.0,
        ),
        "cyri": Font (
            asset_key: "voxygen.font.EnterCommand",
            scale_ratio: 1.0,
        ),
    }
)
Fonts have two required entries and one optional one:
- alkhemi stands for super fancy font we use for special strings. English only usually.
- cyri stands for regular font we use for everything else. Used for translated strings.
- universal stands for font that should cover every language. Used for chat or similar cases.
You don't need to set "universal" font usually, but if universal font doesn't cover your language, you would want to override it. That's what Korean does.
/// WARNING: Localization files shall be saved in UTF-8 format without BOM

/// Localization for Korean
(
    metadata: (
        language_name: "한국어 (Korean)",
        language_identifier: "ko",
    ),
    fonts: {
        "universal": Font (
            asset_key: "voxygen.font.bdfUMplus-outline",
            scale_ratio: 0.75,
        ),
        "alkhemi": Font (
            asset_key: "voxygen.font.bdfUMplus-outline",
            scale_ratio: 0.75,
        ),
        "cyri": Font (
            asset_key: "voxygen.font.bdfUMplus-outline",
            scale_ratio: 0.75,
        ),
    }
)
Adding new font
If available fonts in assets/voxygen/font/ folder aren't enough for you, you can add a new one, or modify existing fonts.
Instruction of how to modify existing fonts are out of scope, but keep in mind that fonts have different licences, and
potentially not all fonts support modifications.
If you want to add new font, you need to find it, get its license, check that it is compatible with our project and that we can redistribute it.
When you have the font file (in TTF format), and the LICENSE, steps are as following:
- Put the font into
assets/voxygen/font - Add
<font>-license.txtwith a license - Mention the font in
assets/credits.ron
Translation system explained
You can see the localization files inside the assets/voxygen/i18n directory.
Each subdirectory inside represents a language, or a variant of it.
The directories are named after IETF BCP 47 (RFC5646) language tags (e.g. en/, de/, pt-BR/, etc). A language tag is comprised of one or more subtags, separated by hyphens ("-").
This is a comprehensive list of available language subtags:
They must be formatted in UTF-8, without BOM.
Each language directory contains a _manifest.ron file with a metadata section,
font settings that will be used in the game and a convert_utf8_to_ascii option,
which can be used when translating a language which has characters that aren't
in the fonts Veloren uses.
The metadata section includes a display name and an identifier for the language. The display name may be freely changed but the identifier should stay the same after the introduction of a new language:
metadata: (
    language_name: "English",
    language_identifier: "en",
),
Note: The language identifier must match the name of the containing language folder. This requirement implies the identifier must also comply with the IETF BCP 47 naming standard.
Troubleshooting
I am receiving hundreds or even thousands of emails from Weblate
Once upon a time, while configuring our Weblate project for the first time, there was an incident where administrators back then received a considerable amount of notifications via email from Weblate. Seemingly, it was caused either by a software bug or by bad configuration.
If you are an administrator of our project on Weblate and want to get notified via email, just in case, we suggest you set up custom Inbox rules to move messages from the following sender to an email folder of your choice:
Internationalization Developer's Guide
TL;DR
There's a lot to be said about theory and best practices, but here's the quick checklist of what you MUST and MUST NOT do.
- Add new key in an existing
assets/voxygen/i18n/en/**.ftlfile that fits. Don't add new files, unless you plan for said file to have 100+ strings. If you're adding a new file, please let i18n team know. - Don't mass-rename i18n keys unless absolutely neccessary. Weblate won't see it as renaming, it will see it as deleting old keys and adding new ones. And it will delete "old" keys from all languages. Only rename i18n key if you want to delete all existing translations for that key.
- Don't touch other languages. You'll introduce a merge conflict that will be very hard to solve.
- If you need to go around
2.and3., please get in touch with i18n team.
Deep dive
So, if a feature you're working on requires any text, it's probably related to i18n. This guide will help you on that journey, and covers:
- high-level system overview
- best practices and anti-patterns
- examples
Let's start with quick high level overview.
Foundational crates
We have two foundational crates with utilities you'll need to use:
client/i18n
Flesh and blood of our translation capabilities.
It's based onfluent-rscrate andassets_manager's wrapper we have incommon/assets.
Most useful type from this crate is Localization which exposesget_msg-family methods, which take i18n key andget_contentmethod which can takeContentobject. Both give you ready-to-use translated string.common/i18n
Governs interfaces for localization when you need to do it outside ofvoxygen.
Most importantlyContenttype which is a recursive type which represents delayed evalution of i18n with required context.
Tip: you don't need Content, if you're already in voxygen. Just use get_msg or get_msg_ctx.
The point of founational crates is that they are super small, fast to compile, and much more abstract.
Application crates
Now when you know what you can use for translation, let's talk about crates where you can use it:
-
voxygen
The client crate. Manages graphics, audio, and UI. And UI uses text, as you can guess.
All widgets must have access toi18n::Localizationthere, so if you need a translated string, do it. -
serverand co
There's much difference in which crate you work really, because they dont't have access toLocalizationobject.
They don't even know what language players use.
Instead, if you're producing some message server-side, like NPC message, command result, NPC name, you should useContent.
Assets
It's all good that you can code whatever you want, you still need assets.
So let's check them out:
assets/voxygen/i18n/
The folder where all Fluent files live. If you want to add new string, pick file that looks good to you, put new key there and you're good.
If you think you need to create a new file, please consult translation team.assets/common/
Holds various files that pretty much holdContentidentifiers:assets/common/entity/**/*.ronusesname: Translatedto reference i18n content.assets/common/npc_names.ronusesgeneric: <i18n-key>to get translations for names.assets/common/item_i18n_manifest.ronis a mapping from item def to its translation.- etc
Best practices & recommendation
Ok, I'll put this in bold: Keep It Simple
If you don't remember anything else, remember this.
Fluent is a powerful format, because localization is hard. We must provide the most straightfoward
interface to translators, and introducing our own abstractions and requiring re-usable pieces on top will
lead to bugs.
This goes against traditional rules of programming, where we strive for writing as little code as possible and reusing as much as possible, but it doesn't work for translations, because we don't know what exactly to re-use.
Don't concatenate
To reference Fluent docs.
# ❌ Avoid splitting messages.
reaction-thumbs-up = thumbs up
reaction-smiley-face = smiley face
reacted-with = { $user_name } has reacted with a { $reaction_type }.
That looks like correct message in English, but it can fall apart real quick.
What if you add reaction for "Eye roll", which should start with an and not a?
To avoid such situations, here's a first rule for you: Don't concatenate
The same can be rewritten as follows.
# ✅ Redundancy helps localizers understand each message in full.
reacted-with-thumbs-up = { $user_name } has reacted with a thumbs up.
reacted-with-smiley-face = { $user_name } has reacted with a smiley face.
reacted-with-eye-roll = { $user-name } has reacted with an eye-roll.
There are exceptions to this rule. If you'd have combinatorial number of strings otherwise, you'll be
forced to use concatenation, but please be super careful and consult translation team.
And if you need to use concatenation, expose the template to give translators maximum control.
Don't use selectors for logic
# ❌ Don't use selectors for logic
dialogue-buy_hire_days = { $days ->
    [1] A day
    [7] A week
    *[other] { $days } days
}
The golden rule is that all variants of selectors should have exactly the same meaning.
If you want to put a logic somewhere, put it in your code and then call the right key.
# ✅ Uses attributes for logic, exposes selectors to handle plurals.
dialogue-buy_hire_days =
   .day = A day
   .week = A week
   .unknown = { $days ->
     [one] { $days } day
     *[other] { $days } days
    }
Pay attention to gender
We only recently started doing that, but if possible, try to provide a gender string.
hud-chat-online_msg =
    { $user_gender ->
        [she] [{ $name }] si è connessa.
       *[he] [{ $name }] si è connesso.
    }
The code for that would look something like that.
    // getting the string
    let gender_str = |uid: &Uid| {
        if let Some(pi) = info.player_info.get(uid) {
            match pi.character.as_ref().and_then(|c| c.gender) {
                Some(Gender::Feminine) => "she".to_owned(),
                Some(Gender::Masculine) => "he".to_owned(),
                _ => "??".to_owned(),
            }
        } else {
            "??".to_owned()
        }
    };
    // usage
    localization
        .get_msg_ctx("hud-chat-online_msg", &i18n::fluent_args! {
            "user_gender" => gender_str(uid),
            "name" => name_format(uid),
        })
Important bit is in player_info which holds character which holds gender.
For now, we only support two genders which is unfortunate, but hopefully we'll improve it soon.
Provide a good example
Translators have different knowledge levels, so try to create some redundancy in English versions.
# ❌ [one] doesn't mean *single* item
# ❌ Concatenation makes it harder to see whole picture
hud-trade-buy = Buy Price: { $coin_num ->
    [one] one coin
    *[other] { $coin_formatted } coins
}
While, again, it's a correct string, at least when it comes to English, it has some issues.
# ✅ Uses [1] for exact match
# ✅ String isn't interrupted by selectors, always full.
hud-trade-buy = { $coin_num ->
    [1] Buy Price: one coin
    *[other] Buy Price: { $coin_formatted } coins
}
For example, the correct way to translate it to Ukrainian would be following.
hud-trade-buy =
    { $coin_num ->
        [1] Ціна купівлі: одна монета
        [one] Ціна купівлі: { $coin_formatted } монета
        [few] Ціна купівлі: { $coin_formatted } монети
        [many] Ціна купівлі: { $coin_formatted } монет
       *[other] Ціна купівлі: { $coin_formatted } монет
    }
But if a person not fully understanding the rules would copy first example, we could get something like
# ❌ 21 would mean [one] as well, while we assume [one] means 1 only
hud-trade-buy = { $coin_num ->
    [one] Ціна купівлі: 1 монета
    *[other] Ціна купівлі: { $coin_formatted } монет
}
And because in Ukranian things like "21" follows the same rules as "1", it falls into category
of [one], we would get "Ціна купівлі: 1 монета", which is obviously incorrect, because, well
"21" isn't "1".
So please, consider this when providing English strings.
Examples
GUI
Let's say you want to internationalize warning message when some abstraction will force dropping items.
You'd start by adding a key to fluent file, assets/voxygen/i18n/en/hud/bag.ftl.
hud-bag-swap_slots_drop_items = { $slot_deficit ->
    [1] This will result in dropping 1 item on the ground. Are you sure?
    *[other] This will result in dropping { $slot_deficit } items on the ground. Are you sure?
}
Then you take a function that expects string and use LocalizationHandle::get_msg_ctx on it.
self.hud.set_prompt_dialog(PromptDialogSettings::new(
    global_state.i18n.read().get_msg_ctx(
            "hud-bag-use_slot_equip_drop_items",
            &i18n::fluent_args! {
                "slot_deficit" => slot_deficit.unsigned_abs(),
            })
        ),
    ),
p.s. if you get some lifetime errors, it is Rust, it happens, dancing with borrowchecker is out of scope for this guide, may the Feris be with you.
Server Message
Ok, this is a super simple function, but it allows us to demonstrate how would you use Content type.
fn handle_version(
    server: &mut Server,
    client: EcsEntity,
    _target: EcsEntity,
    _args: Vec<String>,
    _action: &ServerChatCommand,
) -> CmdResult<()> {
    server.notify_client(
        client,
        ServerGeneral::server_msg(
            ChatType::CommandInfo,
            Content::localized_with_args("command-version-current", [
                ("hash", (*common::util::GIT_HASH).to_owned()),
                ("date", (*common::util::GIT_DATE).to_owned()),
            ]),
        ),
    );
    Ok(())
}
ServerGeneral::server_msg function takes Content, because we need localization, but can't use LocalizationHandle.
Here we're using Content::localized_with_args which takes a key you want to localize and list of (key, value) arguments.
And of course, if we define a command, we also need to give it a description, for which you can use Content as well.
Deep inside ServerChatCommand::data() function you'll need to add this.
            ServerChatCommand::Version => {
                cmd(vec![], Content::localized("command-version-desc"), None)
            },
Most commands have more complicated data, but /version is super simple, we only need to define its description.
And because it doesn't need any context, we can just use Content::localized and not Content::localized_with_args.
Last but not least, don't forget to add both strings to assets/voxygen/i18n/en/command.ftl.
command-version-desc = Prints server version
command-version-current = Server is running { $hash }[{ $date }]
Conclusion
That's all. I tried to cover everything, but I probably missed some things, so don't hesite to ask.
In general, before making an MR, I strongly recommend reaching out to someone and talk.
And on that note, writing documentation is hard, and the help is always appreciated. If something is
unclear, you can improve it. You don't need to know everything to be helpful, you just need to be patient.
For Game Designers
Section under construction. Be careful out there.
Writing a Proposal by @Silentium
The first thing to remember when writing a design proposal is that any idea might not make it into the game due to the consensus of the design team. Unfortunately, we can't include all ideas, but with some compromising and some creative thinking, we can usually extract important aspects of the idea. Even ideas that don't get used in their full state can still provide some very important insight into other aspects of the game's design, so do not think that an unused idea is invalid. Every idea is useful, just maybe not necessarily in the way it was intended. The more the better.
The second thing to understand is that the proposal needs to keep from being too detailed. The goal is to do the least amount of work possible to effectively communicate the fundamental principles and reasoning of an idea. This is because if the idea isn't well-received, or if it needs some reworking or changes, they can be done without subverting a large portion of the work done to write the proposal. No idea proposed to the game design team is used verbatim.
The third thing is to be open to changing ideas. As previously stated, no idea is used without some changes being made first. As long as the proposer keeps an open mind about what can be changed, their idea will be very useful to the design of the game. This also helps uphold healthy conversation grounds.
Fourth is to read all preceding documentation. Almost everything we are currently doing is built off previous work. We have a very specific order in which we are designing gameplay elements and systems, and some of them need to be addressed before others. Make sure not to presume we haven't designed an element of play, and make sure not to read too deeply into the potential implications of a system we have designed. The proposals are written to be specific, including only that which has been explicitly been decided on. Items out of its scope may still be up in the air.
The last thing is that everything is changeable, even the stuff we have already written in our official documentation. By this, I do not mean we are open to redesigning the whole thing again. We are very proud of the work we have done and would rather not scrap it. That being said, if anyone thinks there is a problem with a system we have designed or a fundamental fatal design choice we have made, we are open to hearing about the criticism. Not only that, but we fully expect some systems to not prove viable when we start playtesting. As a result of this, we will likely have to rework some of our systems and come up with more iterations.
Each time we begin a new topic of design, I will make a post to let the team members put their ideas into one document. We all collaborate on this to get the final proposal finished so keep an eye out for those in #game-design!
As long as someone can keep these principles in mind while they write their proposal, they will be very effective in contributing their ideas to the game design team. Please let me know if you have any questions about any of this, or if you need clarification. I love when people take an interest in our work, so please don't hesitate to message me!
Cheers ✨👍✨ @Silentium
Writers vocabulary hub
An art style worth a look.
Contribute to this book
You can find the source for this book at our GitLab, feel free to make changes, correct errors and add more content.
Note: The Git Workflow options for the book are the same as for the game repo
Common elements
Consistency is key. Therefore here are common elements used in the book and how they should be styled:
content
Note: Highlight important notice which the reader should keep in mind.
Short description for experienced people
More detailed description for beginners and newcomers.
Use <br/> for linebreaks.
Rust syntax highlighting works good for .ron files. (Use rust,ignore to avoid making them runnable)
Brown: (
    vox_spec: ("armor.chest.grayscale", (-7.0, -3.5, 2.0)),
    color: Some((90, 49, 43))
),
content
Tip: notice which can help reduce time and effort.
DevOps automated introduction
Section under construction. Be careful out there.
Provide a CI runner
We need to host our own CI runners, if you have a spare pc or server and have some spare compute time for Veloren, it would help us a lot.
What is CI?
Continuous Integration (CI) is a set of automated tests and tasks that run on the GitLab repo every time code is added. This means that Merge Requests have a lower chance of breaking the codebase, and we can automatically get builds of the contributed code, among other benefits.
We need your computer to help us with the testing. It's not free to run CI, so we use our own computers to do it.
Technology
We use GitLab runners in combination with Docker.
Requirements
-
= 2 CPU cores. we don't cause constant 100% load, but when a compilation even comes it, more cores help to quickly process them.
- 50 GiB of free HDD space. The Docker image contains a cache and is about 20 GiB additional caches can take up some more space.
-
= 1 Mbit/s internet. you don't need fast internet, but the runner will connect to the internet from time to time. a flat rate is ideal.
Install a runner
First, you will need to contact a maintainer to get a GitLab runner token. For this, either message @xMAC94x, or @AngelOnFira. We will probably make sure you've been with the project for a bit, as we don't want to give the token to just anyone.
You will need to have Docker installed, as all of the builds use it. You can follow instructions here,
Clone our Veloren CI repo and start the helper script from the runner directory
git clone https://gitlab.com/veloren/veloren-docker-ci
cd veloren-docker-ci/runner
./launch-runner.sh
# provide the token from above
# provide a name in the style: `<discord-username>-<descriptor>`. So for example, @angelonfira's might be `angelonfira-server-1`.
The script will take about 10 minutes and when it's done a Docker container is started in the background. It will only take processing power when there are Pipelines to be done.
Currently, the script is Linux only, if you run Windows your best bet is to create a Linux VM (e.g. using VirtualBox and Ubuntu Server 20.04)
Update a runner
In order to use caches effectively, we need at least gitlab-runner v13.8.0.
If your runner is older, please recreate the runner, you can use the update-runner.sh script.
Note, it is interactive and requires your input
# 1. update repo veloren-docker-ci repo
git pull
# 2. go in runner folder
cd runner
# 3. execute update script
./update-runner.sh
# provide if you want to prune old images, choose yes except if you have certain images you want to keep or run other Docker containers
# provide the CONTAINER ID that reflects the old image
# see the Install section above for re-setting up the runner
Rotate Secrets
Our infrastructure depends on various Secrets that needs rotation. This service needs to be done usually once per year in order for a smooth translation.
Gitlab subscption for VELOREN group
We have a Gitlab Open Source Subscription for veloren. This usually rotates yearly at 20xx-06-30. A owner of the gitlab group has to fill out the form accordingly 3 weeks in advance so that they renew it. TODO: add values to be added in the request here.
(in case someone from Gitlab reads this, thank you for your support!)
Gitlab PAT veloren-bot
The following tasks are done via our gitlab user veloren-bot.
Access is handled via xMAC94x (@xmac94x).
Its our only source of PAT accorss the veloren infrastructure.
Tokens should be set to rotate once a year.
Labbot
Our Labbot requires a PAT to approve MRs and comment.
Create fine-grained token via User Settings -> Access -> Personal access tokens, named: LABBOT_PAT and description: used for approval service.
Select Only specific groups I am member of: veloren (group).
| Area | Element | Permission | Why |
|---|---|---|---|
Project Planing | Work Item | Create, Update | Allows POST /projects/:id/merge_requests/:merge_request_iid/notes, used when labbot comments on MRs |
Project Planing | Work Item | Read | in case we want to check for already existing comments in the future |
Repository | Merge Request | Approve | Allows POST /projects/:id/merge_requests/:merge_request_iid/approve, used by /approve |
Repository | Merge Request | Merge | in case we want to allow this in the future |
Repository | Merge Request | Read | Only if projects are private or reads are authenticated later |
Inject this token via the infrastructure repo, in the file:
sops ops/labbot/prob/svalues.yaml
Create a new PR and merge to master.
Airshipper
Our Airshipper requires a PAT to integrate the gitlab webhooks with schedules.
Create fine-grained token via User Settings -> Access -> Personal access tokens, named: AIRSHIPPER_PAT and description: used for schedule data fetch.
Select Only specific groups I am member of: veloren/veloren (project).
| Area | Element | Permission | Why |
|---|---|---|---|
CI/CD | Pipeline Schedule | Read | Allows GET /projects/:id/pipeline_schedules and GET /projects/:id/pipeline_schedules/:pipeline_schedule_id, used by Airshipper to read schedule variables such as SCHEDULE_CADENCE |
CI/CD | Job Artifact | Read | Only needed if artifact downloads must be authenticated in the future; allows GET /projects/:id/jobs/:job_id/artifacts |
Inject this token via the infrastructure repo, in the file:
sops ops/airshipper/prob/svalues.yaml
Create a new PR and merge to master.
CI Integration
This token is used to push tags in our CI, e.g. by schedules on veloren or infrastructure repos.
Create legacy token via User Settings -> Access -> Personal access tokens, named: VELOREN_GITLAB_TOKEN_WRITE and description: allows our CI to push tags.
Give the permissions for WRITE REPOSITORY.
Put that token in the veloren/veloren CI Variable named: GITLAB_TOKEN_WRITE. It should be masked, protected, and expand variable reference.
FAQ:
How do I detect tokens need to be roated:
Typical symptoms are:
- labbot no longer can approve MRs, but still detect that MRs are closed
- Weekly release does not happen
- Its May and xMAC94x hasn't rotated them yet.
Releasing rock stable software
Introduction release steps per software.
Release cycle
This page aims to document the release process of Veloren. It first describes an overview and has more detailed chapters for single steps.
Tasks
2 months before release
On the Sunday meeting:
- Estimate a release date and communicate it to internal parties. The date is subject to change until it becomes official later on.
- Settle the following points:
- The theme of the release party.
- The features to implement with the release and those which would be nice-to-have.
- The people assigned to the party map.
- The design of the party map.
- The people assigned to the release trailer.
- The contents of the trailer.
- The people assigned to writing a blog post about the release.
- The people assigned to managing the feature freeze period.
- The people assigned to creating and publishing the release binaries.
- The people assigned to announcing the release on our social media accounts.
- The schedule for the release party:
- The activities for the party.
- The duration of each activity.
- The people responsible for (each of) the activities.
- Create a milestone on GitLab to track progress of the release.
1 month before release
On the Sunday meeting:
- Choose an official release date when the core developers and the corresponding assignees are available.
- Gather feedback about the activities and the trailer.
- Discuss with the people responsible for the map:
- What is the current state of the map?
- What are their plans for the map?
- Can they make the schedule?
| People in charge | Task |
|---|---|
| Feature freeze assignee(s) | Post the feature freeze schedule |
| Blog post assignee(s) | Write the blog post |
| Social media assignee(s) | Write the social media posts |
| Social media assignee(s) | Create an event on our Open Collective profile for the release party |
3 weeks before release
| People in charge | Task |
|---|---|
| Map assignee(s) | Prepare the map for the trailer |
| Activities assignee(s). | Prepare the activities for the trailer |
| Core developers | Review the map and the activities |
| Feature freeze assignee(s) | Gather feedback on what features are necessary, who will review them and when merge will be done |
2 weeks before release
| People in charge | Task |
|---|---|
| Trailer assignee(s) | Prepare the trailer for review |
| Core developers | Review the trailer |
1 week before release
| People in charge | Task |
|---|---|
| Feature freeze assignee(s) | Apply and watch the schedule over the next week |
| Map and activities assignee(s) | Wait until all tasks are completed |
| Trailer assignee(s) | Publish the trailer |
| Blog post assignee(s) | Publish the blog post |
8 hours before release
| People in charge | Task |
|---|---|
| Social media assignee(s) | Post the release announcement |
| Map and activities assignee(s) | Upload map and activities to the server |
| Release binaries assignee(s) | Merge the release commit and publish the release binaries |
Sunday after release
On Sunday meeting:
- Discuss how the release party went.
- What was done well?
- What could have been done better?
Plan for releasing the binaries
The sample commands in this section would be run for version 0.12.0 of the game. Remember to adjust these commands to your applicable version.
- Copy over
CHANGELOG.md.- Update only the
server,client,server-cliandvoxygencrates. Other crates have an independent semantic versioning. Example MR
- Update only the
- Create a release branch from
master:git checkout -b "r0.12" - Create a release tag:
git tag -a "v0.12.0" -m "Version 0.12.0" - Push the release tag.
git push --tag "v0.12.0" - Verify the release tag pipeline executed successfully.
- Trigger a scheduled pipeline.
- Verify the release container is built.
- Add a link on the website to the release.
- Create a release on GitLab.
- Verify the release binaries have been copied to Wasabi.
Social media cheat sheet
| Timeframe | Location | Notes |
|---|---|---|
| T-1 week | Discord | Ping the @NewsPingSquad and @MediaPingSquad roles. |
| T-30 mins | Discord | Ping the @everyone role. |
| T-8 hours | The subreddit is r/veloren. | |
| T-8 hours | Mastodon |
Templates
GitLab milestone
# v0.xx Release

## People responsible
Blog post:
Trailer:
Map:
Feature freeze:
Release binaries:
Social media:

## Overview
Theme is: ``
Rough release day is: ``
Included features are:
-
Excluded features are:
-
Party schedule is:
- 18:00 UTC+00 start of party

## Checklist

Sunday meeting:
- [ ] Fixed release day is: `` *(T-1 month)*
- [ ] Map is approved by the core developers
- [ ] Activities are approved by core developers
- [ ] Trailer is approved by core developers

Blog:
- [ ] Release blog is prepared *(T-1 month)*
- [ ] Release blog is uploaded *(T-1 week)*

Trailer:
- [ ] Trailer is ready for review *(T-2 weeks)*
- [ ] Trailer is uploaded *(T-1 week)*

Map:
- [ ] Map is ready for review *(T-3 weeks)*
- [ ] Map is uploaded *(T-8 hours)*

Feature freeze:
- [ ] Freeze period is announced to public in #town-hall *(T-1 month)*
- [ ] Feature freeze is enforced *(T-1 week)*

Release binaries:
- [ ] Release binaries are produced, uploaded and verified *(T-8 hours)*

Social media:
- [ ] Posts are prepared *(T-1 month)*
- [ ] Posts are uploaded *(T-8 hours)*
Feature freeze announcement
Hey @Contributor @DevPingSquad ,

**0.13 release is on Saturday, 2022-07-23 18:00 GMT**

As usual, there will be a **feature freeze** starting from 2022-07-16 18:00 GMT. We recommend submitting critical and large MRs for review now, before the feature freeze.

This release will also have a **stress test event** between the feature freeze and the release. We will be sharing further details of this later.

__Getting your large MR merged before feature freeze__
Please mention @xmac94x in the <#992383235332001942> thread with a short summary with the following details:

* What is complete.
* What needs to be done.
* Can your feature be partially introduced to master in its current state (as multiple MRs)?
* Do you foresee any issues with your MR and if so, which ones?
* Why should this feature be in 0.13?

This is required to align our testing and review strategies to ensure a smooth release.

**Schedule**
``
2022-07-16 18:00:00 GMT Feature freeze — No new feature MRs will be merged.
2022-07-18 18:00:00 GMT Stress test event.
2022-07-22 10:00:00 GMT Total freeze — no new merges will be introduced unless they're critical.
2022-07-22 16:00:00 GMT Release build will be compiled.
2022-07-23 12:00:00 GMT Main server hardware upgrade.
2022-07-23 18:00:00 GMT Release party!
``
Release a new Version
- Copy over CHANGELOG, update only crates. example MR
- Create release branch from master
git checkout -b "r0.7" - Create release tag
git tag -a "v0.7.0" -m "release 0.7.0" - Push release tag
git push --tag "v0.7.0" - Verify a release tag pipeline runs: https://gitlab.com/veloren/airshipper/-/pipelines
- Verify release container is build: https://gitlab.com/veloren/airshipper/container_registry
- Verify github/airshipper actions to build a release binary
- Create a release on GitHub
- Ping
@LunarEclipse#3307for AUR package update & ping@Frinksy#1694for Flathub version.
Packaging guidelines
This sections contains information useful when packaging Veloren for new platforms.
Packaging the standalone game
The preferred method for shipping Veloren is now Airshipper, but here is information about packaging the standalone game.
Note:
This document is focused mainly on packaging Veloren for Linux, but some information will also be helpful for other platforms.
General information
Please refer to this guide for the general setup and compilation instructions.
Tip:
As additional reference, see the veloren-git AUR package, more specifically the PKGBUILD file.
It should always have an up-to-date buildtime and runtime dependency list.
Rust version and Rustup
The specific version of Nightly Rust a given version of Veloren is intended to be compiled with is specified in the rust-toolchain file.
If you use rustup, it will install and use the right version automatically. Otherwise you need to make sure you use the correct one yourself.
Veloren will fail to compile on Stable Rust, and we do not support compiling it with Rust versions other than the one specified in the rust-toolchain file.
Compile-time options
- It is recommended that you use the
--releaseflag so that the resulting binaries are fully optimized. - In order for the game to use standard (XDG-compliant) directories to save user data instead of trying to save it next to the executable, you need to set the
VELOREN_USERDATA_STRATEGYenvironment variable tosystem. - To compile specific binaries, you need to pass
--bin <NAME>arguments.
The resulting command to compile the game server and client using the above settings would be:
VELOREN_USERDATA_STRATEGY='system' cargo build --release --bin veloren-voxygen --bin veloren-server-cli
In this case the resulting binaries will be target/release/veloren-voxygen and target/release/veloren-server-cli.
Other files
-
You need to include the assets for the game to run. The expected location for them is
/usr/share/veloren/assets. -
In the assets folder, we provide a
.desktop[spec] file, an icon and a.metainfo.xml[spec] file. You should place them as follows: -
assets/voxygen/net.veloren.veloren.png->/usr/share/pixmaps/net.veloren.veloren.png -
assets/voxygen/net.veloren.veloren.desktop->/usr/share/applications/net.veloren.veloren.desktop -
assets/voxygen/net.veloren.veloren.metainfo.xml->/usr/share/metainfo/net.veloren.veloren.metainfo.xml
Guides
This section of the book will provide guides for common modifications to Veloren like adding new Armor.
Guide: Adding armour to Veloren
\_ made by @Pfau
\_ updated by @BottledByte
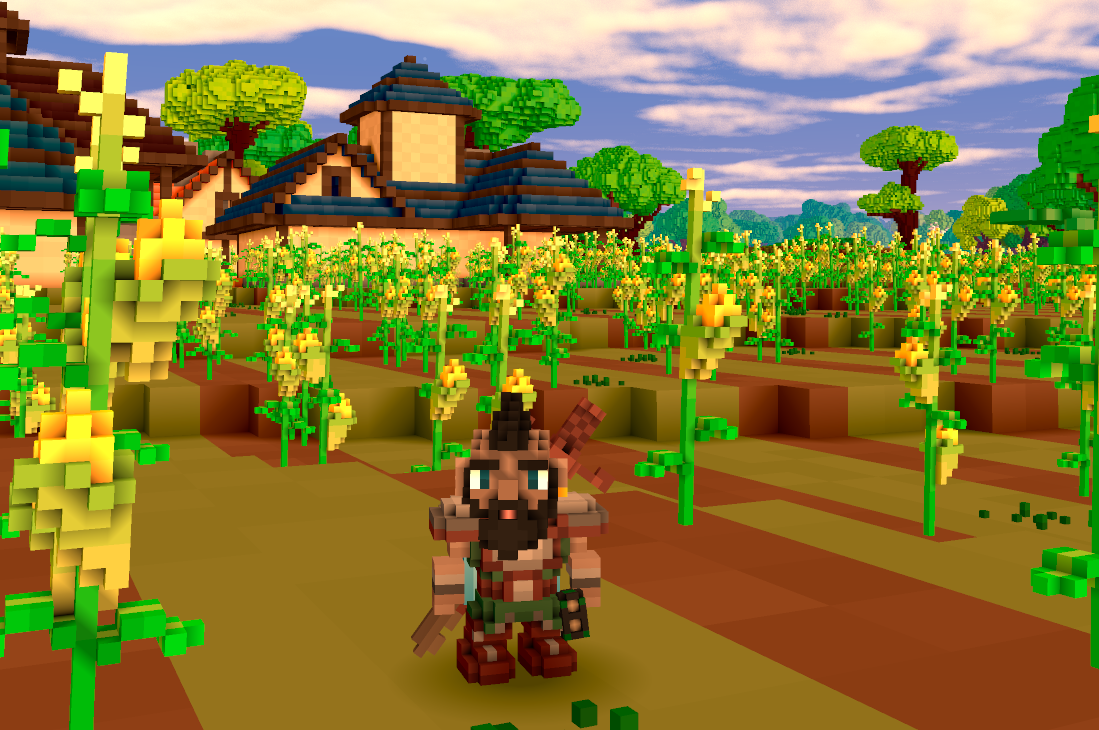
What you need
An IDE of your choice (A programme that lets you view and edit code)
Examples: VSCode, Atom, Notepad++
A Voxel Editor (To create the armour model)
Example: Magicavoxel
The character template. (Can be opened with any voxel-editor that supports layers; i.e. Magicavoxel.)
This is also included in the Veloren client’s assets.
Getting Started
Before creating your armour in a voxel editor there are a few things you should know:
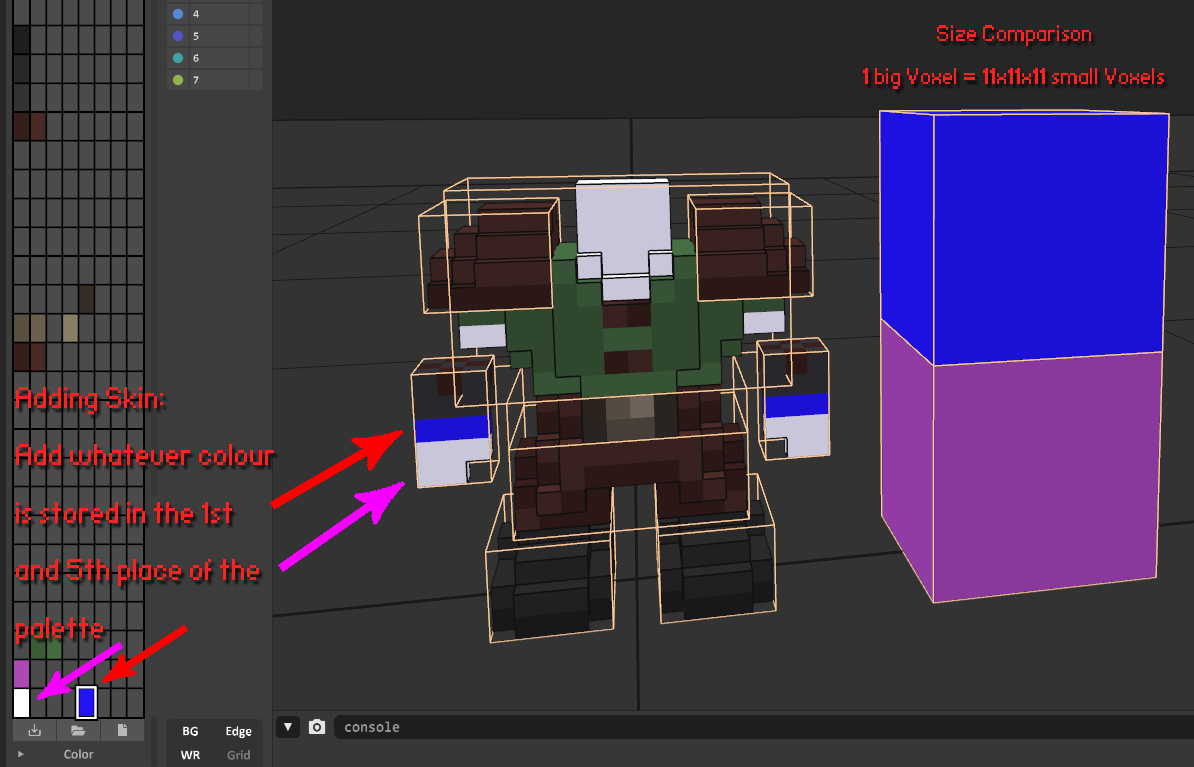
In order to place “skin” (parts that are not covered by armour) to your work you have to use whatever colour is stored in the 1st (light tone) and 5th (dark tone) slot/index of your palette.
Note: The important thing is not the colour but the position on the palette to get the right result.
Armour can be coloured in the code, too.
To do that just use grayscale colours in your model. (Later you will learn how to apply the colours with code.)
Another thing you might notice is the neck added to the chest armour. This is needed to not make the head appear disconnected from the body when it’s turned.
Importing the model and adding it as an item to the game
To make the game actually load your creation there are several steps you have to follow.
They can be done in any order.
Copying the .vox into the asset folder
Make sure to export your model(s) as .vox and NOT just copy a saved .vox file from magicavoxel. Just copying will result in a ~10x bigger file size.
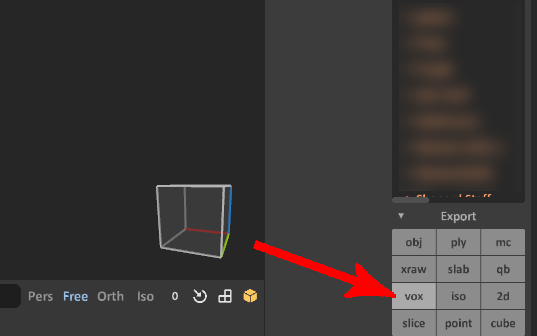
The file path inside the assets folder is something like
assets/voxygen/voxel/armor/<Armor Type>/<Model Name>
So for a chest armour called “leather_vest-0.vox” it is:
assets/voxygen/voxel/armor/chest/leather_vest-0.vox
Naming scheme for .vox files
Single words are parted with an underscore (“_”)
Counting starts at zero.
Numbers are added with a single dash(“-”) in front of them.
Your item name should always end with a number, unless you are absolutely positive there isn't going to be an alternative version/design of the item
Load the file and store it inside the code
Those are the file paths you will need after opening the root folder of Veloren in your IDE:
assets/voxygen/voxel/humanoid_armor_<armour type>_manifest.ron
ONLY needed for armour with .vox files
(sets the filepath and offsets of the .vox)
assets/common/items/armor/<armour type>
(create a new .ron in here to create an in-game item)
assets\voxygen\item_image_manifest.ron
(create a new entry in here to add an item image to the item)
common/src/comp/inventory/item/armor.rs
Note: ONLY needed for armour with .vox files
(list your new armour style in here)
Veloren has 12 types of armour
Types in bold need a 3D .vox file
- Head
- Neck (Necklaces)
- Tabard
- Shoulder
- Chest
- Hand
- Lantern
- Belt
- Ring
- Back (Capes, Backpacks...)
- Legs
- Feet
Armour types that need a 3D .vox file need to be listed in every file above.
Example for adding a new cape
1. New entry in assets\voxygen\voxel\humanoid_armor_back_manifest.ron
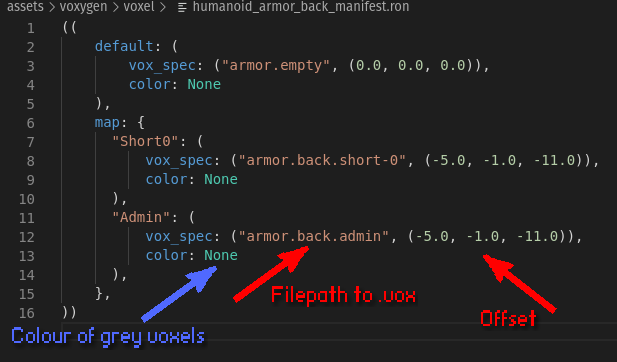
The offset will be determined at a later point! Just keeping the numbers from the example you copied should be good for now.
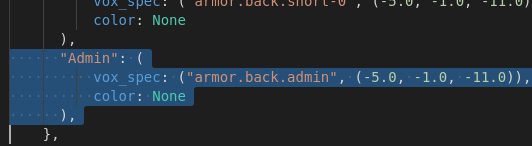
Copy this part (make sure to include the brackets and comma!) and paste it:
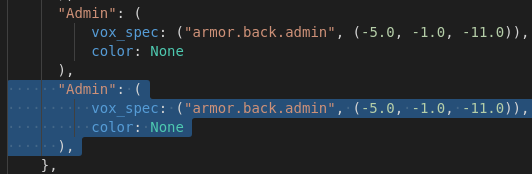
Fill in the name of the item style (kind). This is the name you’ll use to later to match up assets.
Note: color: None indicates that grey parts won’t be recoloured.
To colour those parts put in “color: Some((<R>, <G>, <B>))” here.
Example of recoloured armour
"Brown": (
    vox_spec: ("armor.chest.grayscale", (-7.0, -3.5, 2.0)),
    color: Some((90, 49, 43))
),
2. New entry in assets/common/items/armor/<armour type>
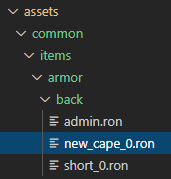
Copy and paste one of the existing .ron files (Note: Use numbers here too).
Item(
    name: "New Cape",
    description: "Example Item",
    kind: Armor(
        kind: Back("NewCape"),
        stats: (20),
    ),
)
Edit the file to have the right kind. (The same kind you put in before.)
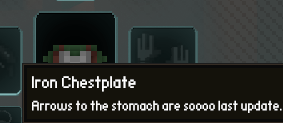
description field in Item creates a tooltip text similar to this.
3. Add a new item image in assets\voxygen\item_image_manifest.ron
You can either use a .png or .vox file as an item image.
Example for a .png:
// Lanterns
Lantern("Black0"): Png(
    "element.icons.lantern_black-0",
),
Example for a .vox:
Armor(Back("Short0")): VoxTrans(
    "voxel.armor.back.short-0",
    (0.0, 0.0, 0.0), (-90.0, 180.0, 0.0), 1.0,
),
In order to find the right posing numbers for the .vox it’s often a good idea to look for a similar item.
Armor(Back("NewCape")): VoxTrans(
    "voxel.armor.back.new_cape-0",
    (0.0, 0.0, 0.0), (-90.0, 180.0, 0.0), 1.0,
),
You can use the same .vox as the actual 3D asset shown equipped on the character later.
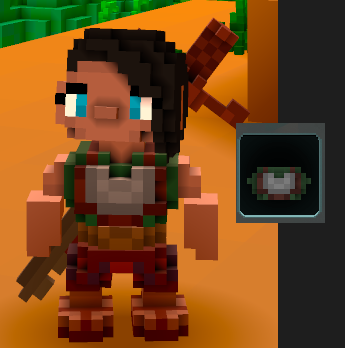
4. Finding the right offset for your item
In order to test your item in-game you need to compile your game now.
Your new item will only be available locally, so make sure to connect to a local server or choose “Singleplayer”.
To drop the item into your inventory use the chat command /give_item:
/give_item common.items.armor.back.new_cape
When equipping your new item you might be presented with this sight.
To set the right offset you need to revisit ssets/voxygen/voxel/humanoid/<armour type>_manifest.ron
The values in there can be hot-reloaded. That means just saving them will immediately take effect in-game.
"Admin": (
    vox_spec: ("armor.back.admin", (-5.0, -1.0, -0.0)),
    color: None
),
They represent the coordinates:
(X, Y, Z)
X = Left (lower the number) and Right (increase the number)
Y = Back (lower the number) and Forth (increase the number)
Z = Up (increase the number) and Down (lower the number)
Change the numbers until you get the desired offset.
Done. You added a new armour style and item to Veloren. :)
But just in case something went wrong, a little troubleshooting advice
It may happen that your armor displays as a big pink box with a question mark (in the world or in the inventory).
If this happens, some entry is invalid, probably due to a typo in your style (kind; like "NewCape") or one of the asset paths. See the log for details to pin-point the source.
If the game panics when loading your armor, it mostly means that the syntax
of one or more entries in .ron files got garbled (like a missing parenthesis or a quote mark).
Guide: Using multiple Models in one VOX File
\_ made by @Christof
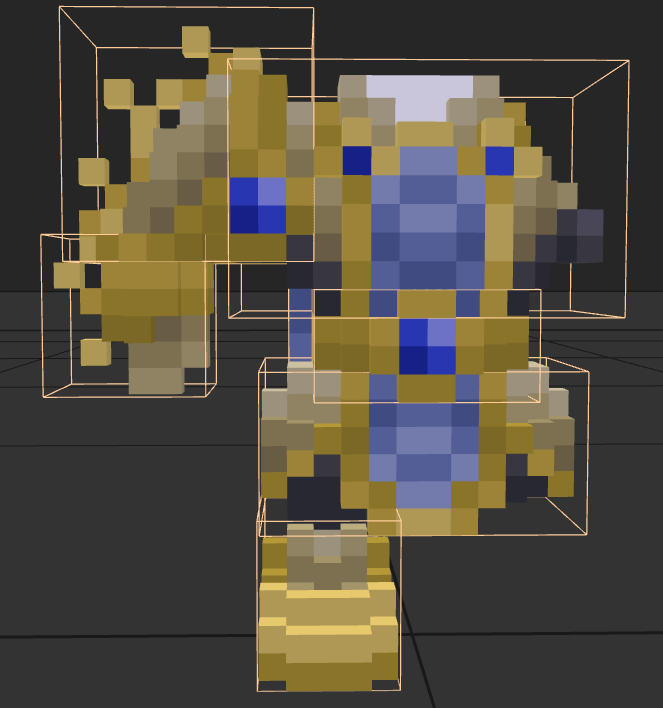
Introduction
This chapter assumes that you have read the chapter on adding armor and guides you how to keep all pieces of one armor set inside a single VOX file. Using this, it is more easy to see and edit related models in one MagicaVoxel instance.
Combining models from multiple files
The branch symbol in the outline panel opens the menu to work on multiple models. The plus symbol creates new ones, a double click selects a different one. A right click enables editing the name. Only the active model printed in yellow will be edited, pasted into, etc.
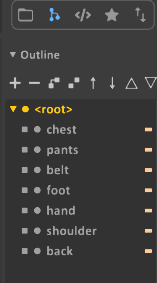
To create a single file from a set of armor files, you can copy models from one file and then paste it into another one. One at a time. Remember to first create a new model entry in the list view and select it before pasting the voxels into it.
The up/down arrow top right in the main editor (light blue here) switches between world and voxel editing. To move models relative to another switch to world mode and pull at the arrows of the current selection.
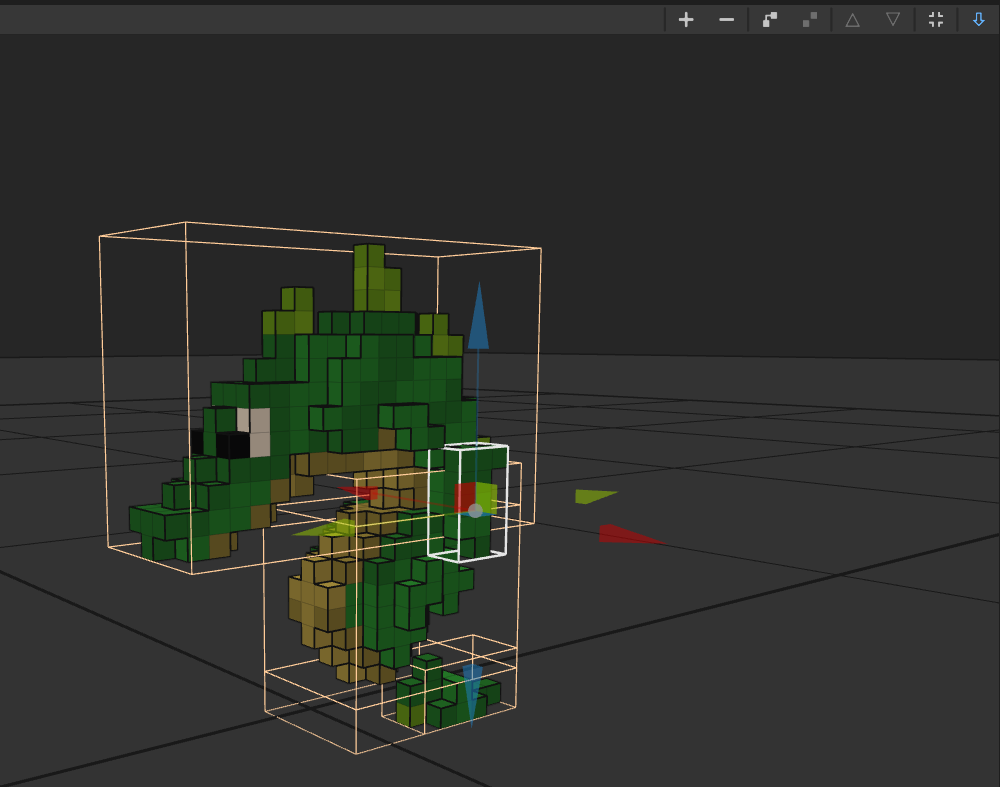
To cut down the size of the generated files we sadly can't use export with multiple models, but we can turn off the optional parts and save then:
Specifying the model index in the manifests
Again like in adding armor, you add an entry to
assets/voxygen/voxel/humanoid_armor_<armour type>_manifest.ron for each
of the armor parts:
#![allow(unused)]
fn main() {
"common.items.armor.mail.orichalcum.belt":(
    vox_spec: ("armor.mail.orichalcum", (-4.0, -3.5, 1.0), 2),
    color: None
),
}
The last (integral) number in the second line is the model index, if the number is absent, the first model in the file is used. Note that the first model in the file has the number zero.
And in assets\voxygen\item_image_manifest.ron:
#![allow(unused)]
fn main() {
Simple("common.items.armor.mail.orichalcum.belt"): VoxTrans(
    "voxel.armor.mail.orichalcum",
    (0.0, 0.0, 0.0), (-120.0, 210.0,15.0), 0.9, 2,
),
}
Again, the last (optional) number is the model index, starting from zero.
Guide: Adding sprites to Veloren
\_ made by @Pfau
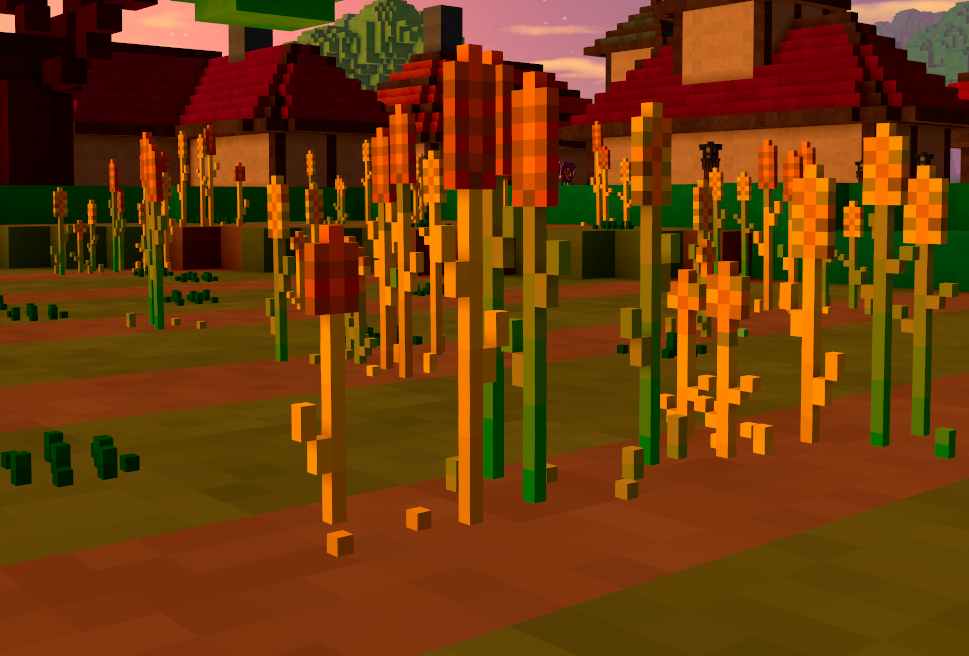
What you need
-
An IDE of your choice (A programme that lets you view and edit code)
-
A Voxel Editor (To create the sprite model)
Example: Magicavoxel
-
A guide on how to compile and run Veloren on your OS.
-
A locally cloned branch of Veloren's nightly version.
Getting Started
Before creating your sprites there are a few things you should know:
-
Sprites act like landscape sized blocks that get replaced with small scale models.
They can either be set to behave like air (no collision at all) or as solid objects. -
Things like grass should have no collision. While scarecrows and windows should.
-
As of now they will always act like a single row of up to three landscape blocks (33 small scale voxels) above each others. That means you can control the collision height of your sprite but not the width.
Every part of a sprite that exceeds the x and y-axis bounds of a single block will not clip with figures and objects. -
Sprites act as immovable objects like blocks. They can't be moved around like figures or objects.
-
Sprites can be set to give players a certain item when picked up.
-
Sprites can have certain spawning and orientation rules.
Naming scheme for .vox files
- Single words are parted with an underscore (
_) - Counting starts at zero.
- Numbers are added with a single dash(
-) in front of them. - Your model name should always end with a number, unless you are absolutely positive there isn't going to be an alternative version/design of the item
Import the model and add it to the codebase
assets/voxygen/voxel/sprite_manifest.ron
Here you define how many variations your sprite can have, how much it sways in the wind and which model(s) to load from the asset folders.
common/src/terrain/sprite.rs
Here you define the sprites' properties like collision, orientation, the height of their "collision frame" or if they can be collected.
Step by Step: Addition of an example sprite
-
Adding a voxel model
In
assets/voxygen/voxel/sprite_manifest.roncopy and paste one of the code blocks, eg:Window1: Some(( variations: [ ( model: "voxygen.voxel.sprite.window.window-0", offset: (-5.5, -5.5, 0.0), lod_axes: (1.0, 1.0, 1.0), ), ], wind_sway: 0.0, )),... and put it behind the last entry in the file, making sure to leave the last
)at the very end of the file. Replace the name of the object (eg,Window1), with the name you'd like to call your sprite object (no spaces in the name).Next add your .vox model to
assets/voxygen/voxel/sprite/, either in the appropriate subfolder or create a new folder if it doesn't fit anywhere else. For example, if your sprite is a piece of furniture, add it to thefurnituresubfolder. Follow the naming scheme for .vox files mentioned earlier on this page.In the new codeblock you pasted, edit the
modelsection to point to your .vox file; making sure to keep the double-quotes and the comma at the end. In the example above, the filewindow-0.voxwas added to thewindowsubfolder and the model was defined as"voxygen.voxel.sprite.window.window-0",Next, the center-point of the model needs to be defined in the
offsetsection. In your voxel editor, set the workspace to fit your model. If you're using MagicaVoxel, press the button labeled 'Fit Model Size' to do this. The workspace will shrink to fit your model. The center point is half the number of blocks in the x and y axes. For example, in the Window1 codeblock above, the model is 11 x 11 blocks. So we've entered-5.5, -5.5for the x-axis and y-axis respectively. Set the z-axis to0.0unless the model is supposed to sink into the ground (eg, ore).The
lod_axesrefers to an object's level of detail the further away it is from the player. Reducing the level of detail when an object is far away helps with game performance. This setting tells the game how to scale the level of detail reduction across all three axes (x, y, z). For now, just use 1.0 for all three axes, like the Window1 example above, or find another object that is similar to yours and copy it's lod_axes values.If your sprite is designed to sway in the wind (eg, grass or flowers), modify the
wind_swayto a number between 0.0 and 1.0. The higher the number the more it will sway. Take a look at some other objects to get an idea of the what value to use. -
Telling the game the sprite exists and making it solid
In
common/src/terrain/sprite.rsNear the beginning of the file, look for a long list of objects with a hexadecimals number after each object (eg, 0x0A). The name of the objects in this list matches the name in the previous step. For example, in the previous step we were looking at
Window1. In the list of objects here, we will findWindow1 = 0x28,.To add your object to this list, scroll down to the bottom of this list (it's pretty long). At the END of the list add your object name and give it a value of the next hexadecimal number in the sequence.
Tip: hexadecimal numbers range from 0 to 15, but numbers with two digits are represented by a letter: 0 1 2 3 4 5 6 7 8 9 A B C D E F. Notice how 10 is actually A, 11 is B, and so on. So if the last object in the list had a value of 0xB9, the next object would need to be 0xBA. (0xB9 + 1 = 0xBA). If you need help, you can type
0xB9 + 1into Google and it will tell you the answer.Next, if your sprite is solid, and players should collide with it, you need to add it to a function called
pub fn solid_height. Search for this function in thesprite.rsfile. This function tells the game how tall the collision box for the object should be. You can skip this if your sprite isn't meant to be collided with and players should move right through it (for example, grass and flowers).Within the function you will see a long list of objects that looks like this:
SpriteKind::Tomato => 1.65,. Scroll to the bottom of this list and add your sprite at the end. You'll need to calculate what number value to assign your sprite though. This number is simply the height of your sprite in voxels divided by 11. For example, if your voxel model is 18 voxels tall, the calculation is 18/11 = 1.64. You can find the height of your model by going to your voxel editor and counting the number of blocks.Note: 3.0 is the maximum value that can go in this list. If you have defined multiple variations of a sprite in the previous step, they will all share the same height.
Finally, in the
pub fn has_orifunction, add your sprite to the end of the list. Follow the examples already there and don't forget the|at the start (eg,| SpriteKind::Window1). Adding your sprite to this function will allow it to be rotated (oriented) by code when it's spawned in the world. -
Other properties for the sprite
Other than being solid, sprites can also be collectible or minable.
A collectible sprite can be picked up from the world by the player (eg, stones). Or can be opened by the player with an item taken from it (eg, a chest).
A minable sprite requires a mining tool before it can be collected (eg, an ore).
The steps required to make sprites collectible or minable are too involved for this page and need be addressed in a separate guide.
However, for those who wish to dive into the code and figure it out for themselves, here are some pointers to get you started.
- Add sprite to
pub fn collectible_idincommon/src/terrain/sprite.rs. - If the sprite requires mining, add it to
pub fn mine_toolincommon/src/terrain/sprite.rs. - If your sprite is meant to be opened, and will give the player an item, follow the examples for crates and chests in
common/src/terrain/sprite.rs. This will involve creating a .ron file inassets/common/loot_tables. - If your sprite is to be collected, and goes into the player's inventory:
- Create a .ron file for your collectible sprite in subfolder of
assets/common/itemsand use an example that most closely matches what your sprite does (eg, food). - Add your item to
assets/voxygen/item_image_manifest.ron. You'll also need to add a copy of your voxel model file to another folder, which is defined in this manifest. Find an item which most closely resembles yours and use it as an example. - Add your item
assets/voxygen/voxel/item_drop_manifest.ronin the appropriate section with similar items. - Add your item to
common/src/states/sprite_interact.rsin the sectionfn from(sprite_kind: SpriteKind) -> Self.
- Create a .ron file for your collectible sprite in subfolder of
- Add sprite to
Making sprites spawn in the world
Sprites are spawned into the world through code, rather than being placed manually. This means in order to make your new sprite spawn where you intend (eg, in a house, field, dungeon, etc), you'll need to be able to modify code.
But... if you're looking for a quick way to see what your sprite looks like in the game, without coding, there is an easier way to marvel at your handiwork. This is useful to check if your sprite is the right size, for example.
- You'll need to compile the code you've written so far in the steps above. There are other parts of the guide that explain how to do this, but in essence you type:
cargo run- Tip: Don't be surprised if your compile fails with an error, it's usually just a typo. Take a look at the code you wrote, see if there are any obvious mistakes, and repeat the steps above if necessary.
- Find and remember the name of the sprite you created in step 1 above. We've been using
Window1as an example. - Once your local copy has been compiled, and is running, start a singleplayer game.
- In the game, type:
/make_sprite YourSpriteNamereplacing the word "YourSpriteName" with the name of your sprite in step 1.- Example:
/make_sprite Window1
- Example:
- Your sprite will be spawned where your character is standing. Huzzah!
If you want to take it to the next level, and see your sprite appearing properly in the world, you'll need to get your hands dirty with Rust coding. This is beyond the scope of this page, but here are a few tips to get you started:
world/src/layer/scatter.rscontains code for items such as flowers, twigs, stones, etc. Anything that is 'scattered' about in the environment randomly.world/src/site2/plot/house.rscontains furniture in houses, such as tables, beds and coat racks.- Take a look around
world/src/for other examples. - The #new-contributors channel on the Veloren Discord server is a good place to ask questions.
Congratulations on adding a new sprite to Veloren!
Guide: Adding Weapons to Veloren
\_ made by @BOB17368
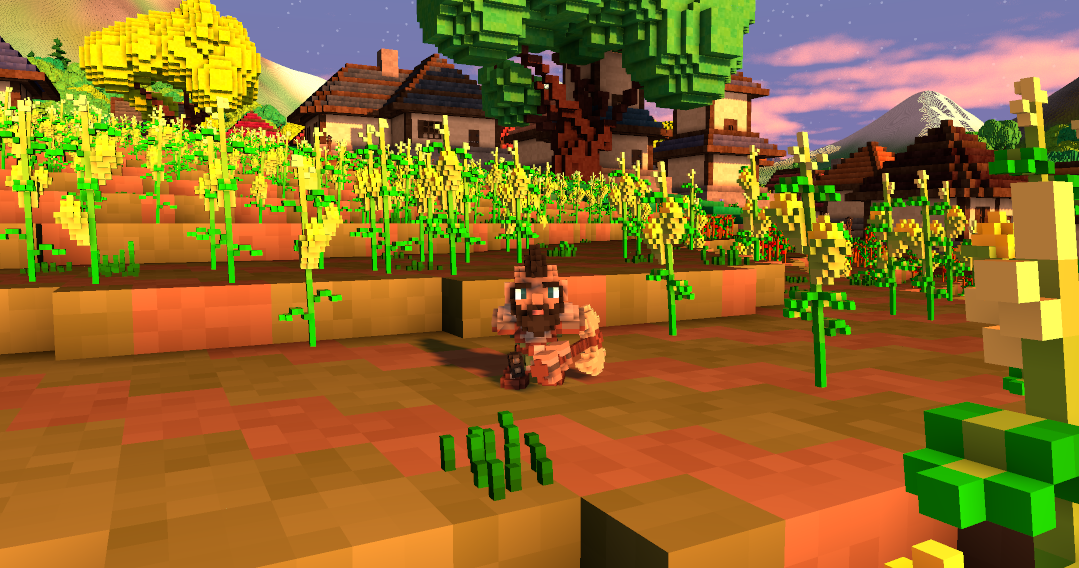
What you need
-
An IDE of your choice (A programme that lets you view and edit code)
-
A Voxel Editor (To create the weapon model)
Example: Magicavoxel
-
A compiled version of veloren(So you can edit the game's files)
Optional
-
A character template. (Can be opened with any voxel-editor that supports layers; i.e. Magicavoxel.)
-
Access to the veloren google drive model directory.
Some things you might want to know before you start creating your weapon
1. Veloren has 12 types of weapons:
- Polearms
- Tools
- Shields
- Daggers
- Sword
- Axe
- Longbow/Shortbow
- Staff
The non-bolded ones are either a work in progress or have not started their development yet.
2. The Veloren google drive files are useful because it allows you to use the existing weapon models as format
3. You need to have your model(s) approved by the core-devs if you want your model to make it into the actual game
4. The handelbar for the weapon has to be at the most, three voxels long and three voxels wide
Importing the model and adding it as an weapon to the game
To make the game actually load your creation there are several steps you have to follow.
They can be done in any order.
Step 1: Export and copy the .vox file into the asset folder
Before you export you models please double check that you have...
-
Exported your model(s) as .vox and NOT just copied a saved .vox file from magicavoxel. Just copying will result in a ~10x bigger file size.
-
Made sure that there is No extra space can be shaved of without sacrificing voxels.
Go to the file path below and paste your .vox file and rename it according to the naming scheme below.
assets/voxygen/voxel/weapons/<Weapon Type>/<Model Name>
The file path should look something like this by the time you finish
assets/voxygen/voxel/weapon/sword/long_2h_fine-0.vox
Naming scheme for .vox files
- Single words are parted with an underscore (“_”)
- Counting starts at zero.
- Numbers are added with a single dash(“-”) in front of them.
- Your weapon name should always end with a number, unless you are absolutely positive there isn't going to be an alternative version/design of the item
Step 2: Create a .ron file
1. Create a New Entry in
assets/common/items/weapons/<weapon type>
Copy and paste one of the existing .ron files of the same type of weapon you aim to create and edit the parts encapsoulated in [ ] to your preference
Item(
    name: "[Crude Mallet]",
    description: "[Two-Hand Hammer\n\nPower: 10-12\n\nBreaks bones like sticks and stones.\n\n<Right-Click to use>]",
    kind: Tool(
        (
            kind: Hammer([BasicHammer]),
            equip_time_millis: 500,
            power: 1.30,
        )
    )
)
Note: From now on when I refer to the "Weapon Kind" I am talking about the case-sensitive name you put for "BasicHammer"
Step 3: Create a new entry in the weapon manifest file
Go to this file path and open humanoid_main_weapon_manifest in a text editor
assets/voxygen/voxel/humanoid_main_weapon_manifest.ron
Copy and Paste a module of code where the same type of weapons you are adding are grouped (make sure to include the brackets and comma!)
Then adjust WornIronAxe0 with your "Weapon Kind"
Axe(WornIronAxe0): (
        vox_spec: ("weapon.axe.2haxe_worn_iron-0", (-1.5, -3.0, -4.0)),
        color: None
    ),
The offset will be explained at a later point!
Just keeping the numbers from the example you copied should be good for now.
Optional: color: None is used for giving a weapon a specific tint. Just specify the rgb values by replacing None with Some((<R>, <G>, <B>))
3. Step 4: Adding the armour style to tool.rs
Open common/src/comp/inventory/item/tool.rs in a text editor
and add your "Weapon Kind" to the respective enum
#[derive(Clone, Copy, Debug, PartialEq, Eq, Hash, Serialize, Deserialize)]
pub enum ShortbowKind {
    BasicShortbow,
    WoodShortbow0,
    WoodShortbow1,
    LeafyShortbow0,
}
Step 5: Add a new item image in image manifest file
Find where the code for your weapon type is located and copypaste it in the same location
You can either use a .png or .vox file as an item image. But it is only practical to use a vox model for weapons.
Example for a .vox:
Tool(Longbow(WoodLongbow1)): VoxTrans(
        "voxel.weapon.longbow.longbow_wood-1",
        (0.0, 0.0, 0.0), (90.0, 90.0, 0.0), 1.0,
    ),
In order to find the right positioning values for the weapon, it’s often a good idea to look for a similar item.
Armor(Back(NewCape)): VoxTrans(
    "voxel.armor.back.new_cape-0",
    (0.0, 0.0, 0.0), (-90.0, 180.0, 0.0), 1.0,
),
You can use the same .vox as the actual 3D asset shown equipped on the character later.
Step 6: Finding the right offset for your item
In order to test your weapon in-game you need to compile your game now.
Your new item will only be available locally, so make sure to connect to a local server or choose “Singleplayer”.
Drop the weapon into your inventory by using the following chat command:
Full Command:
/give_item common.items.weapons.<weapon type(ex: staff)>.<Weapon Kind>
Tip: You can type /give_item common.items.weapons. and then press tab to cycle through available weapons
If you don't like how your character holds your weapon you have to mess with the weapons offsets.
To set the right offset you need to revisit assets/voxygen/voxel/humanoid_main_weapon_manifest.ron
And then tweak the offsets marked below until satisfied
Sword(LongFine4): (
    vox_spec: ("weapon.sword.long_2h_fine-4", (<x offset>, <y offset>, <z offset>)),
    color: None
),
The values in there can be hot-reloaded. That means just saving them will immediately take effect in-game.
They represent the coordinates:
(X, Y, Z)
X = Left (lower the number) and Right (increase the number)
Y = Back (lower the number) and Forth (increase the number)
Z = Up(increase the number) and Down (lower the number)
Change the numbers until you get the desired offset.
Done. You added a new weapon style and item to Veloren.
Guide: Using the const_tweaker crate to modify values at runtime
\_ made by @Pfau
What you can do with it
The const_tweaker crate allows you to modify constants at runtime. This can be used to tweak animations, UI widget positions and much more!
Short guide by example
Add a new const to your file
#[const_tweaker::tweak(min = -100.0, max = 20.0, step = 1.0)]
const EXAMPLE: f64 = 10.0;
Notice the attached attributes above. Every new const needs their own!
This will create an f64 type that can be changed between -100.0 and 20.0 in steps of 1.0.
Adding your changeable value into the code looks like this:
Foo + *EXAMPLE = Sum
Notice how it has to be dereferenced in order to work.
Const_tweaker is feature gated in Veloren/voxygen. So you need to compile with cargo run --features tweak.
Note: go into voxygen folder for this as the compiler won't accept running --features from the root directory.
This will create a local web GUI at 127.0.0.1:9938 where you can play around with the values.
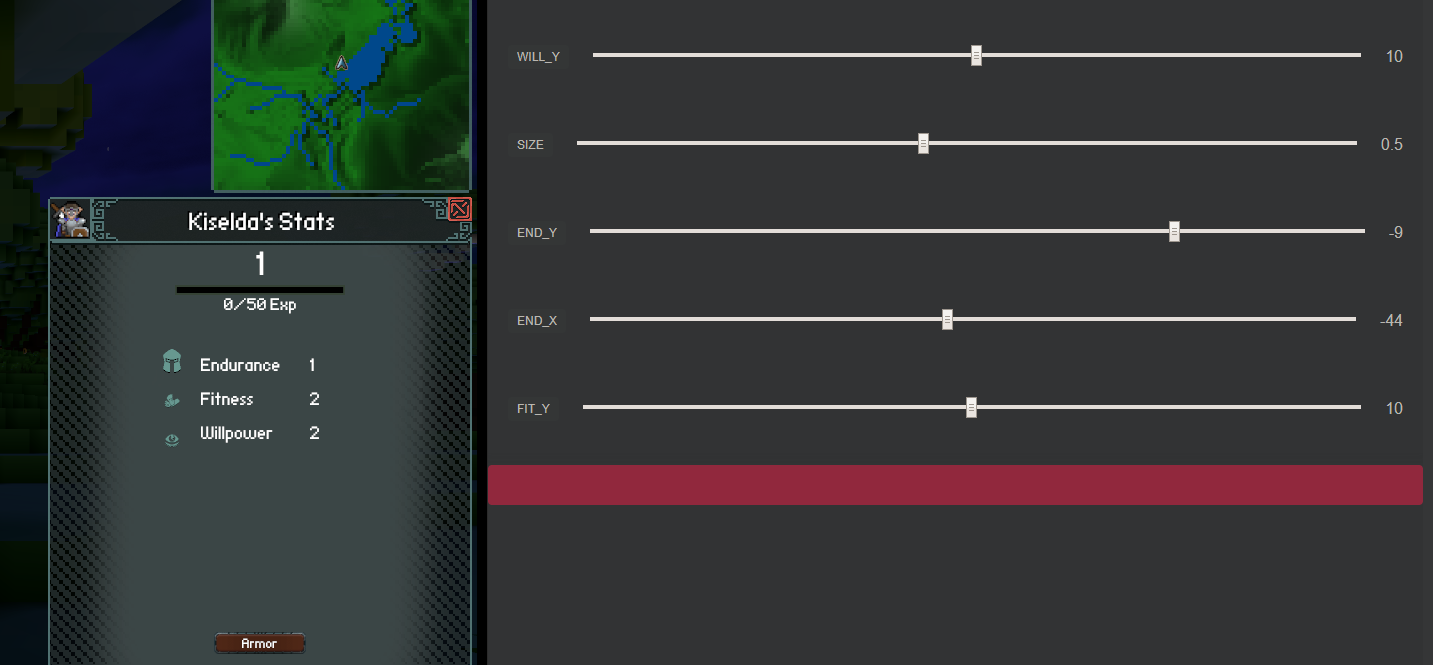
Guide: Adding Weapon Skills to Veloren
\_ written by @Sam with additions from @James
Define your skill
The first thing you need to do is define your skill and figure out what parameters it will need. It is important to do this as sometimes the new skill can be handled by one of the current character states, and if it’s close, then only 1 or 2 additional could be added to a pre-existing character state.
Adding your skill
Weapon attack skills are handled by character states. As of this edit, these are the following character states (though ComboMelee is in the works and TripleStrike is on the way out).
pub enum CharacterAbilityType {
      BasicMelee,
      BasicRanged,
      Boost,
      ChargedRanged,
      ChargedMelee,
      DashMelee,
      BasicBlock,
      TripleStrike(Stage),
      LeapMelee,
      SpinMelee,
  }
These character states can be (and are) reused for multiple skills. Your new skill may fit easily into one of these states. The state may need to be adjusted slightly to accommodate your skill. The third alternative is the addition of a new character state. All three of these possibilities are covered in the following sections.
If your skill can be handled by an existing character state
Go to common/src/somp/inventory/item/tool.rs
Once there, add an additional attack to the weapon which you are adding an attack to. Note that a weapon’s abilities are handled by a vector, with the first ability tied to M1, the second to M2, the third to skill bar slot 1, and additional ones to more skill bar slots (only skill bar slot 1 might be implemented right now).
If your skill requires modifying an existing character state
Go to common/src/states/.
Open the corresponding character state file. In the Data struct at the top, add the additional fields you need, you’ll also need to add it to every section in the code that updates the character state data (the compiler will throw errors if you forget). Then proceed through the code and change any logic necessary.
Go to common/src/comp/ability.rs.
Look for where the fields of the character state are defined. They are defined in 3 places. The top one determines what fields are read from tool.rs, the second one reads from tool.rs, and the third one constructs the Data struct in the character state file. Sometimes you may only need to add the new field to the 3rd section, though usually you’ll need to add your new field to all 3.
Go to common/src/comp/inventory/item/tool.rs.
Once there add your new attack to the weapon you want. Also, if any weapon already had the attack, update the fields to include the new variable you added.
If your skill requires creating a new character state
Go to common/src/states/.
Create a new file, and give it a name appropriate to the character state you are adding. It can be helpful to start by copying a file from a similar character state. Create the logic for your character state, and determine what fields will need to be passed into the state in the Data struct at the top.
Also, in this section, you will need to determine what kind of attack your character state is. Currently there are systems for melee attacks, projectiles, and explosions. There will soon be support for shockwaves and beams. If you need some other system to handle your attack, ping me (@Sam) for assistance.
Go to common/src/states/mod.rs.
Add your character state to this file, keep it sorted alphabetically
Go to common/src/comp/ability.rs.
In each location every other character state is handled, add your new character state (it can be helpful to search in the file for “leapmelee” or “leap” and just add your character state stuff in each location. The locations to be careful of your logic though are the 3 locations where the fields of your character state are defined (see section for modifying character state for more detail) and where it checks the requirements of entering the character state (though you can almost always just copy what other character states do).
Go to common/src/comp/inventory/item/tool.rs.
Add your new character state as an attack for the weapons you want to add it to. Ensure that the fields in this location match the fields passed into the first section of ability.rs.
Go to common/src/comp/character_state.rs.
Add your character state to the CharacterState enum (ideally include a short description too). Look in the implementation of CharacterState, if yours is described by any of the functions, add it there.
Go to common/src/sys/character_behavior.rs.
Search for any character state (e.g. LeapMelee). Add your character state in the 2 locations the other character states are handled with the same logic.
Go to common/src/sys/stats.rs.
Add logic for how your character state affects natural energy regen here. (If it’s an attack or consumes energy it should disable natural energy regen).
Adding an Ability to the skill bar
(When skill trees are implemented this section will be updated)
As every weapon currently implemented already has at least 2 abilities, the chances are high you will need to either add your ability to the skill bar or move a currently existing ability to the skill bar.
In the tool.rs file, the ordering of abilities in the vector determines what slot they’ll be assigned to. The first slot is M1, the second M2, the third skill bar 1, the fourth skill bar 2, etc. So when adding your ability, ensure that it is in the correct location in the abilities vector.
Go to voxygen/src/hud/hotbar.rs
Add the weapon type you are adding the third skill to the logic when determining the value for the bool should be present. It should be as simple as adding:
else if let ToolKind::Hammer(_) = &kind.kind {
    true
}
Add an icon in assets/voxygen/element/icons. Skill icons should be 20 x 20 pixels with transparent corner pixels. Check the pins in the assets or veloren-art channel on Discord to find the appropriate color pallet. Ping @Pfau on Discord to see if someone will design a better icon or to get yours approved.
Go to voxygen/src/hud/img_ids.rs.
There is a section around line 140 listing all M1 and M2 icon locations. Add your skill here with the path to its icon. If your skill is going on the skill bar, add your skill/icon pair to the "Icons" section around line 270 instead.
Go to voxygen/src/hud/skillbar.rs.
If your skill is replacing an M1 or M2 skill, add it to the match around line 620 for M1 and around line 700 for M2.
For M1 and M2, add an arm to the match expression around line 730 to make the skill icon fade when self.energy.current() is over the energy drain of your skill. If your skill does not have an energy drain (and should always be available), you do not need to put your skill in this match.
If your skill is going in the hotbar, follow the steps below:
Add a name and description of the skill around line 800 of voxygen/src/hud/skillbar.rs. Just look at the logic of the skills currently there. This will add a tooltip and a name for the skill.
Go to voxygen/src/hud/slots.rs.
Around line 90 add your skill to the HotbarImage enum.
Around line 120 make the appropriate weapon match return the proper skill from the HotbarImage enum.
Around line 130 add your skill to the match. Copy the logic of one of the other skills here, but make energy.current() < ENERGY_DRAIN where ENERGY_DRAIN is the energy drain of your skill. This will make the icon fade when the player does not have enough stamina.
In the image_id function around line 165, add the path identifier for your skill (copy the logic of the other skills).
Animations
Ping @Slipped on Discord.
You can also dig through previous MRs (like this one: https://gitlab.com/veloren/veloren/-/merge_requests/1171/diffs) if you want to see how to do it yourself (this’ll show where to add stuff, and show you what code for other animations looks like).
Changelog
Go to CHANGELOG.md
Add a line saying you added an attack
Modding the game
You don't always need to know how to code!
- Writing a plugin
- Adding items via a plugin
- [Adding server-side assets with manifests]
Writing a plugin
This guide will show you how to write a simple server-side (and client-side) plugin for Veloren. Please note that both the plugin API and the process for plugin development is under active development and we currently make no stability guarantees about APIs, tooling, etc. If in doubt, please check this page to find the latest information.
It's also important to remember that the plugin API is still very new and not much functionality is supported. We hope that by publishing this tutorial and encouraging people to experiment with the plugin API that we might start to build consensus on a future direction and future features for the API. If you're interested in helping out, reach out to us!
Example code
You can find the code for this example plugin here.
Requirements
-
Knowledge of basic Rust
-
Ability to use simple Unix-like terminals and commands
-
An up-to-date instance of Veloren (a local repository is preferred for compatibility purposes)
Note: Having problems? Feel free to ask in #learning on the Veloren Discord server.
Overview
Plugins for Veloren are written in Web Assembly (herein referred to as 'WASM'), a code format originally designed for high-performance, memory-safe web executables, but also perfectly suited to a variety of other applications. This implies the following things about Veloren plugins:
-
They are sandboxed, and so are safe to run client-side automatically
-
WASM does not yet have a well-defined host ABI, so communication with the game engine is event-driven
-
They are portable and will work on all architectures and platforms
-
(Planned) Plugins are managed by the server and get sent to clients when they connect to a server, so joining a plugin-enabled server is a seamless process.
Setting up
We assume that you're using either a Unix-like system, or some environment with similar properties (like WSL or Cygwin).
Note: from now on, where you see my_plugin, replace this with the name of your plugin.
First, create a new cargo project.
cargo new --lib my_plugin
Plugins have multiple entrypoints (i.e: ways to request things from the plugin) that may be invoked by the game. To
ensure we make all of these appropriately accessible to the game, add the following to Cargo.toml:
[lib]
crate-type = ["cdylib"]
Because Veloren's plugin API is unstable, we're going to depend on Veloren's git repository. In Cargo.toml, add the
following to [dependencies]:
veloren-plugin-rt = { git = "https://gitlab.com/veloren/veloren.git" }
The veloren-plugin-rt crate wraps the plugin API, event handler derive macros, and a series of other useful bits and
pieces together into what we colloquially call the 'plugin runtime' (rt).
Because we need to compile our plugin to a WASM module, first ensure that the appropriate toolchain is installed (and works) by running the following:
cargo build --target wasm32-wasi
If you get a error[E0463]: can't find crate for 'core', you can install the relevant version of core using the
following rustup command:
rustup target add wasm32-wasi
Veloren's codebase currently requires the nightly version of the Rust compiler (we hope for this not to be the case in
the future), and so you also need it. If you are not already using nightly, you can set a directory-specific override
for this with the following command (ensure you are in the my-plugin directory before running this):
rustup override set nightly
Packaging the plugin
Plugins are packaged in uncompressed (compression may later be supported, but is not currently)
tar archives with the extension .plugin.tar. Each archive contains:
-
A file with the name
plugin.tomlthat specifies plugin metadata -
And any number of WASM modules (conventionally with the extension
.wasm)
my_plugin.plugin.tar
  |- plugin.toml
  |- foo.wasm
  `- bar.wasm
The format of plugin.toml is TOML. The required fields are quite simple, as
the example shown below demonstrates (you can omit the comments):
# The name of the plugin (lowercase, no spaces)
name = "my_plugin"

# A list of paths to WASM modules in the plugin (this can be used to group
# plugins together in a rudimentary way until we implement dependencies).
modules = []

# Plugins required by this plugin (currently unsupported, keep this empty)
dependencies = []
We'll want to start off by creating a single module. Let's give it the same name as our project. Start off by adding it
to the modules list like so:
modules = ["my_plugin.wasm"]
To package the plugin, we can copy the compiled WASM module from the previous steps located at
target/wasm32-wasi/debug/my_plugin.wasm into a packaging directory of your own making, along with the
plugin.toml, and then use the tar command (or your favourite tar-capable archive manager) to package them up. The
following command, executed from within the packaging directory, should work fine:
tar -cvf ../my_plugin.plugin.tar *
You might want to automate this process with a script because you'll be doing it often. A simple shell script would likely suffice.
In the future, we'd like to create a cargo subcommand that automates this step, but this hasn't yet been done.
For reference, I just use a simple shell script with the following contents:
cargo build --target wasm32-wasi
cp target/wasm32-wasi/debug/my_plugin.wasm build_dir/.
cd build_dir
tar -cvf ../my_plugin.plugin.tar plugin.toml my_plugin.wasm
cd ..
Running the plugin
To run the plugin, simply copy it into the plugins directory in the asset directory of Veloren. The plugin will be
sent over the network to connecting clients, so it's only important that it's accessible to the server (or Voxygen if
you wish to run the plugin in singleplayer).
In my case, this just involves copying the final archive to assets/plugins/my_plugin.tar within my local repository
and running the game.
When a server starts (or when singleplayer is started) you should see messages similar to the following in the console:
INFO veloren_common_state::plugin: Searching "/home/zesterer/projects/veloren/assets/plugins" for plugins...
INFO veloren_common_state::plugin: Loading plugin at "/home/zesterer/projects/veloren/assets/plugins/my_plugin.plugin.tar"
INFO veloren_common_state::plugin: Loaded plugin 'my_plugin' with 1 module(s)
If you got this far, congratulations: you've officially created a plugin for the game!
Handling events
At this point, it's worth taking a brief look over the documentation for the plugin API,
here. Although we are depending on veloren-plugin-rt, the similarly-named
veloren-plugin-api crate is exported by it for our convenience. We're now ready to write the first event handler for
our plugin.
In lib.rs, enter the following:
#![allow(unused)]
fn main() {
use veloren_plugin_rt::{*, api::{*, event::*}};

#[event_handler]
pub fn on_load(load: PluginLoadEvent) {
    emit_action(Action::Print(String::from("Hello, Veloren!")));
}
}
This is worth taking a little time to explain, especially if you're not so familiar with Rust.
#![allow(unused)]
fn main() {
use veloren_plugin_rt::{*, api::{*, event::*}};
}
Here, we import the necessary macros, types and functions we need to write our plugin.
#![allow(unused)]
fn main() {
#[event_handler]
pub fn on_load(load: PluginLoadEvent) { ... }
}
Here, we declare a new function that accepts a
PluginLoadEvent. We use the
event_handler attribute to tell the runtime that we'd like to use this function as an event handler that will be
called when the event of the specified type occurs.
In this case, the on_load event simply gets called once when the plugin is first loaded during server startup.
#![allow(unused)]
fn main() {
emit_action(Action::Print(String::from("Hello, Veloren!")));
}
We've already mentioned a way to receive inputs to the plugin, via event handlers. How do we act upon those events?
Through Actions! An Action is a thing that you want the server to perform, and you can use the emit_action and
emit_actions function to have the server perform them.
If you run the server with the newly compiled plugin, you should now see the following in the server console:
INFO veloren_common_state::plugin::module: Hello, Veloren!
If you're running the game in singleplayer, you'll see this twice: once for the internal server, and once for the internal client (once it's received the plugin from the server).
Chat commands
We're going to expand our plugin such that when we type /ping into the chat, the player gets the response Pong!.
Why? No specific reason, but it's a good demonstration of chat functionality.
Add the following to lib.rs:
#![allow(unused)]
fn main() {
#[event_handler]
pub fn on_command_ping(chat_cmd: ChatCommandEvent) -> Result<Vec<String>, String> {
    Ok(vec![String::from("Pong!")])
}
}
The only thing to explain here is something that might be a little unexpected given the previous example: the return type.
Every implementer of the Event trait (such as PluginLoadEvent, ChatCommandEvent, etc.) also specifies a response
that is required of it. In the case of PluginLoadEvent, the response is simply (), which is why we didn't need to
explicitly return anything from the on_load event. The return type for ChatCommandEvent is different, however: it
expects either a list of message responses to the command, or an error message should the command syntax be invalid.
If you run the game with the newly compiled plugin and then enter the world, you should be able to type /ping into the
chat and receive a Pong! as a response.
Global state
There's a final feature of the plugin API to talk about before this tutorial ends: the management of global state.
If you're more than a little familiar with Rust, that might sound like a scary word: but given that event handlers are themselves 'global' (i.e: they're communicating with just a single instance of the game that loaded the plugin they are in), it also makes sense that any data you want to store about the state of the game in your plugin must also be global.
Thankfully, the plugin API has a feature for this!
To define the type of your global state, you can add the global_state attribute above a type like so:
#![allow(unused)]
fn main() {
#[global_state]
#[derive(Default)]
struct State {
    ping_count: u64,
}
}
It's also important that it implements the Default trait: this is needed because we do not yet provide a way for the
global state to be initialised via the on_load event handler.
To access this global state in an event handler, simply add a second parameter to the event handler like so:
#![allow(unused)]
fn main() {
#[event_handler]
pub fn on_command_ping(chat_cmd: ChatCommandEvent, state: &mut State) -> Result<Vec<String>, String> {
    state.ping_count += 1;
    Ok(vec![format!("Pong! The total number of pings so far is {}", state.ping_count)])
}
}
Now any player can use /ping and the server will tell them how many times the command has been used since the server
started!
Reducing plugin size
See min-sized-rust for information about reducing the size of Rust binaries.
Future topics
Possible future topics to cover include:
- More event handlers
- Modifying entity attributes
- Persistent plugin state
- Controlling NPC AI
- More plugin API features
- Plugin-specific assets
Adding in-game items from a plugin
To add new armor or weapon types, you don't need to write and compile Rust, this guide will show you the necessary steps.
Plugin metadata
First, start from a new, empty directory.
Like described here, we need to create a
plugin.toml file:
# The name of the plugin (lowercase, no spaces)
name = "cool-armor"

# A list of paths to WASM modules in the plugin (not needed for items).
modules = []

# Plugins required by this plugin (currently unsupported, keep this empty)
dependencies = []
Please note that all assets are directly stored in this directory,
this means that the normal assets/ prefix or directory isn't necessary.
Then follow the guide in armor creation to
create a voxel file in voxygen/voxel/armor/<Armor Type>/<Model Name>, see also
using multiple models on how you can
put all pieces into a single VOX files.
For a weapon please follow this guide instead.
Adding new files like voxygen/voxel/weapon/tool/paddle.vox,
common/items/weapons/tool/paddle.ron or common/items/armor/hide/lizard_boots.ron
is straightforward and described in the guides above
(remember to skip the top level assets/ directory), but
voxygen/voxel/biped_weapon_manifest.ron already exists in the game.
Here simply create a new file with the exact same layout as the existing one in assets/:
({
    Tool("common.items.weapons.tool.paddle"): (
        vox_spec: ("weapon.tool.paddle", (-2.5, -4.0, -4.0)),
        color: None
    ),
})
Veloren will merge the contents of these RON files when it loads the manifest.
voxygen/voxel/humanoid_armor_foot_manifest.ron will also require the default: part, although it won't be used:
((
    default: (
        vox_spec: ("armor.misc.foot.none", (-2.5, -3.5, -2.0)),
        color: None
    ),
    map: {
        "common.items.armor.hide.lizard_boots": (
            vox_spec: ("npc.lizardman.male.foot_r", (-2.5, -3.5, -2.0)),
            color: None
        )
    }
))
Then, like described here, create a tar file containing all
the newly created files and put in inside the assets/plugins/ folder on the server:
tar -cvf ../my_plugin.plugin.tar *
You can find an exemplary plugin on GitHub.
Please keep in mind that for now we don't give any guarantees on plugin compatibility across Veloren versions, although we might write a plugin migration tool in the future, similarly to the database migration tool, once we see the need and resources for it.
For Journalists
If you want to report about us this section will provide some guideline to make your job easier. We prepared a sample press-kit with logos/images to use on the following page.
In case you want to contact us for an interview, our Discord channel is the best way to reach out to us.
Official information is available under https://veloren.net/. Other websites might be 3rd party fan-pages and although containing useful information, e.g. for non-english communities, they shall not be confused for official statements.
Press Kit
The complete press-kit can be downloaded here Alternatively you can download single files from GitLab
Logos
We have 1 Full-size logo, as well an icon version of our logo, in 2 sizes.
![]()
![]()
Example Screenshots
Feel free to visit the servers of veloren to do your own screenshots, but you can also always take some of our example screenshots to decorate your text.
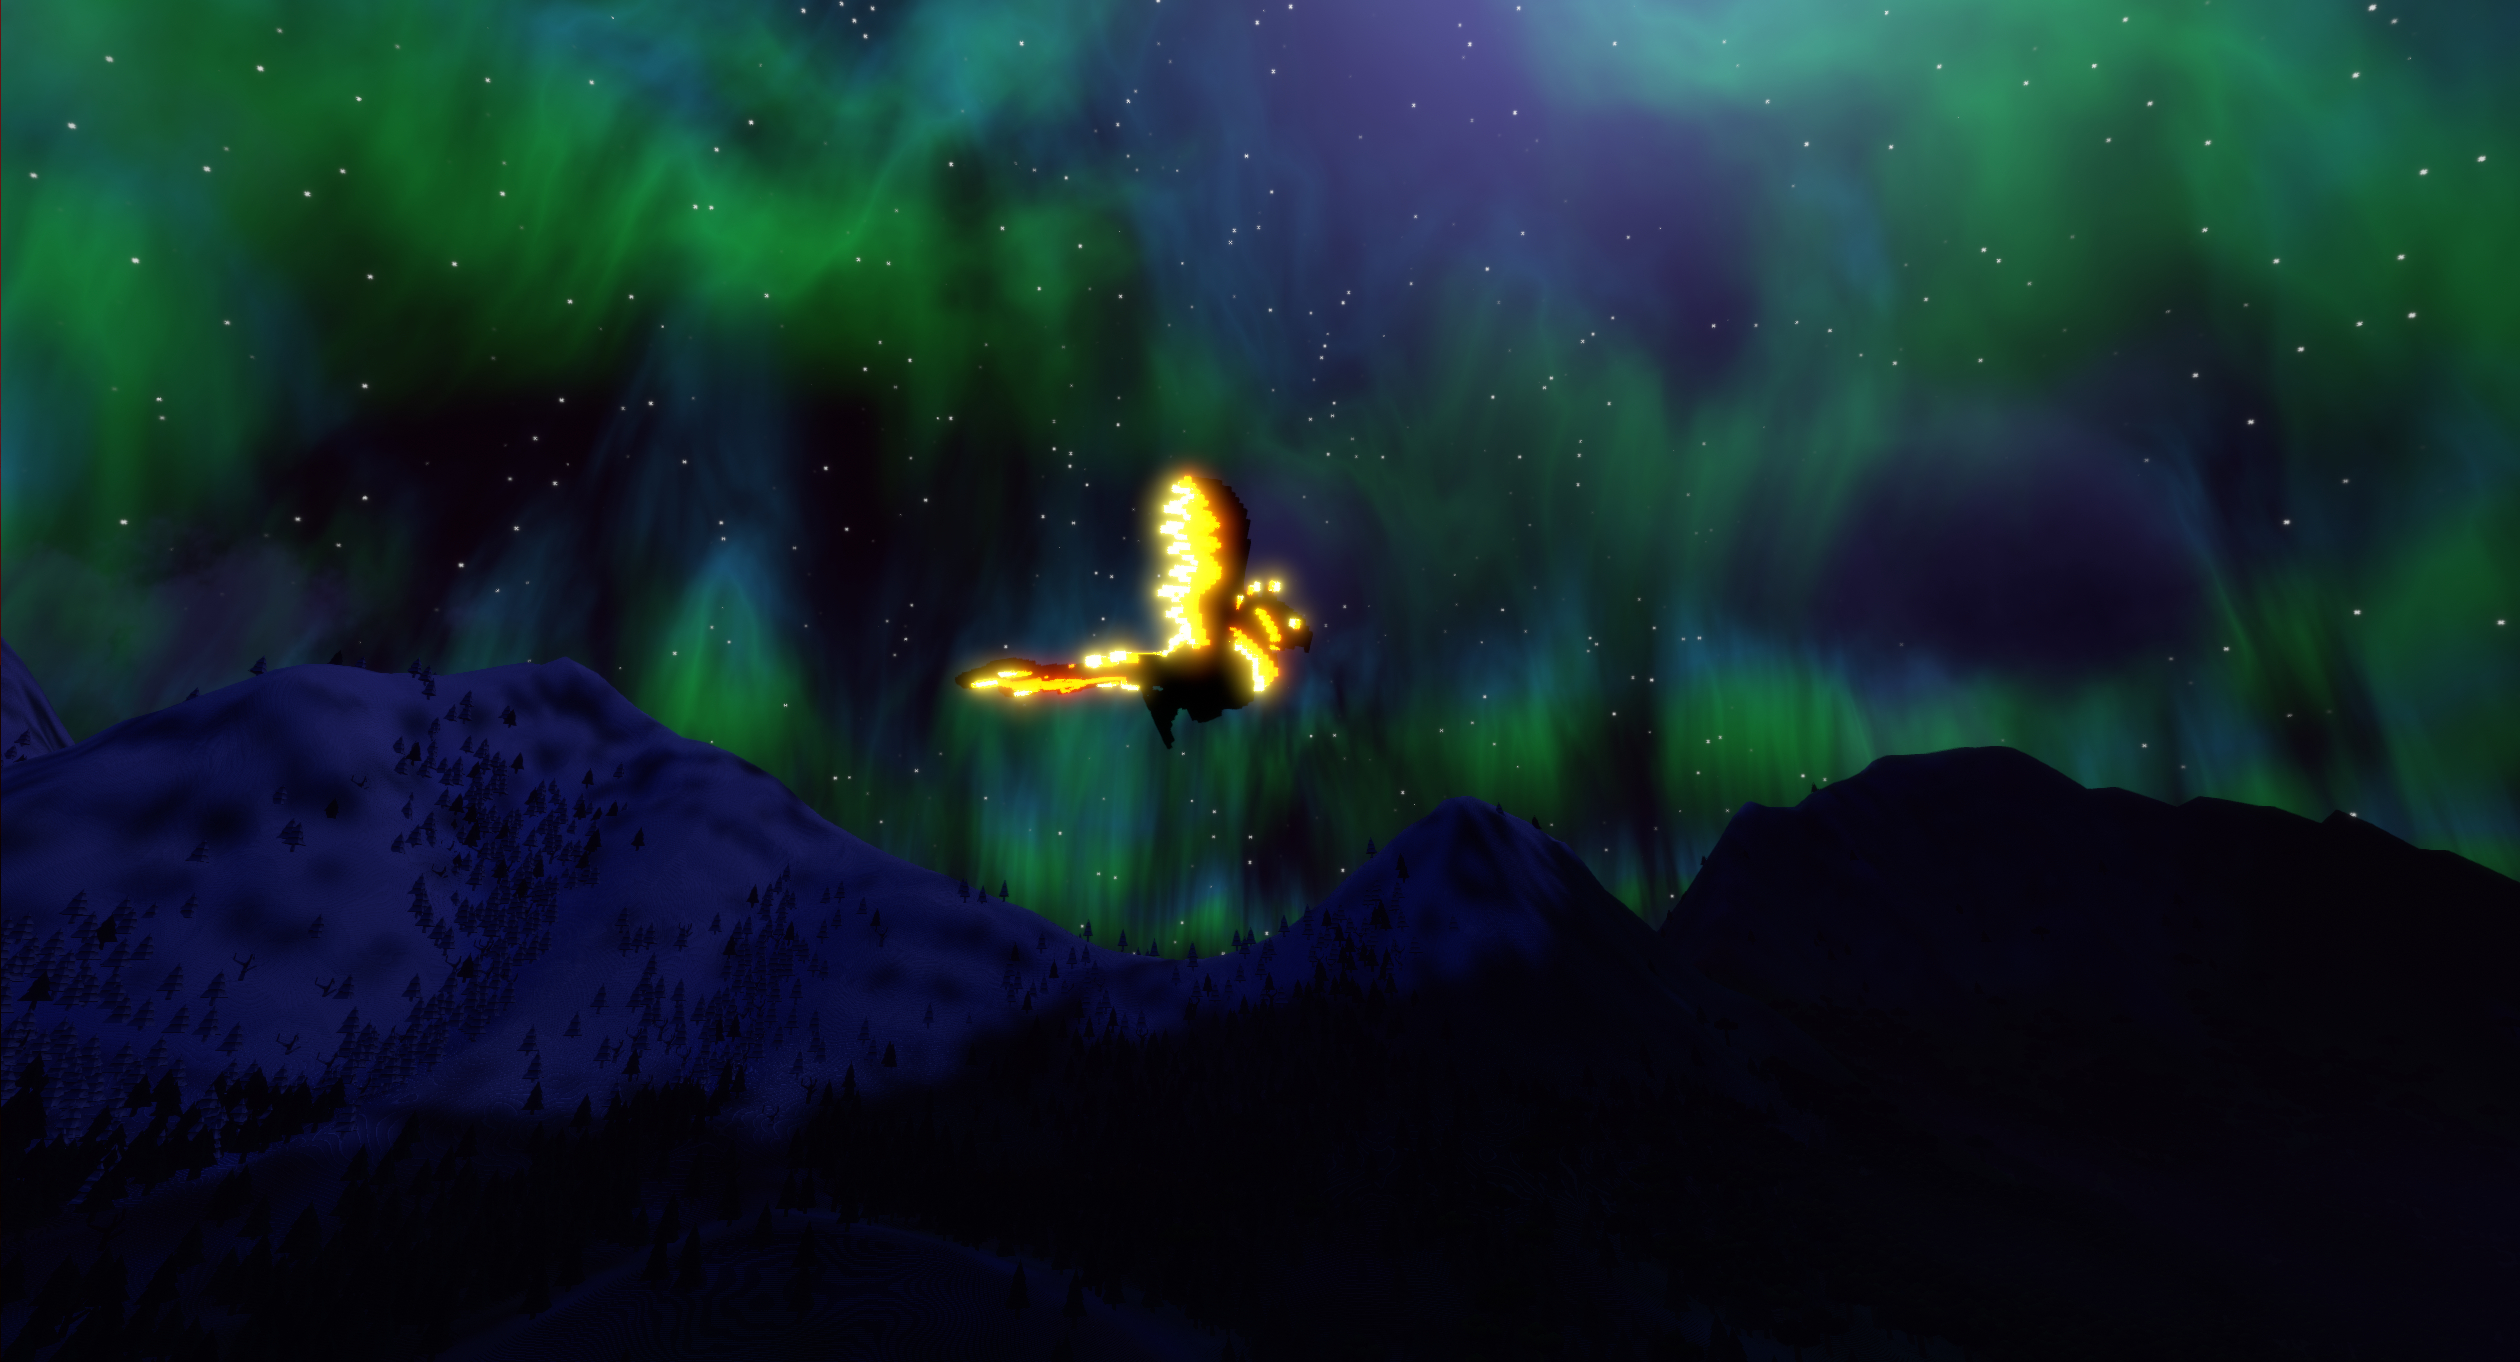
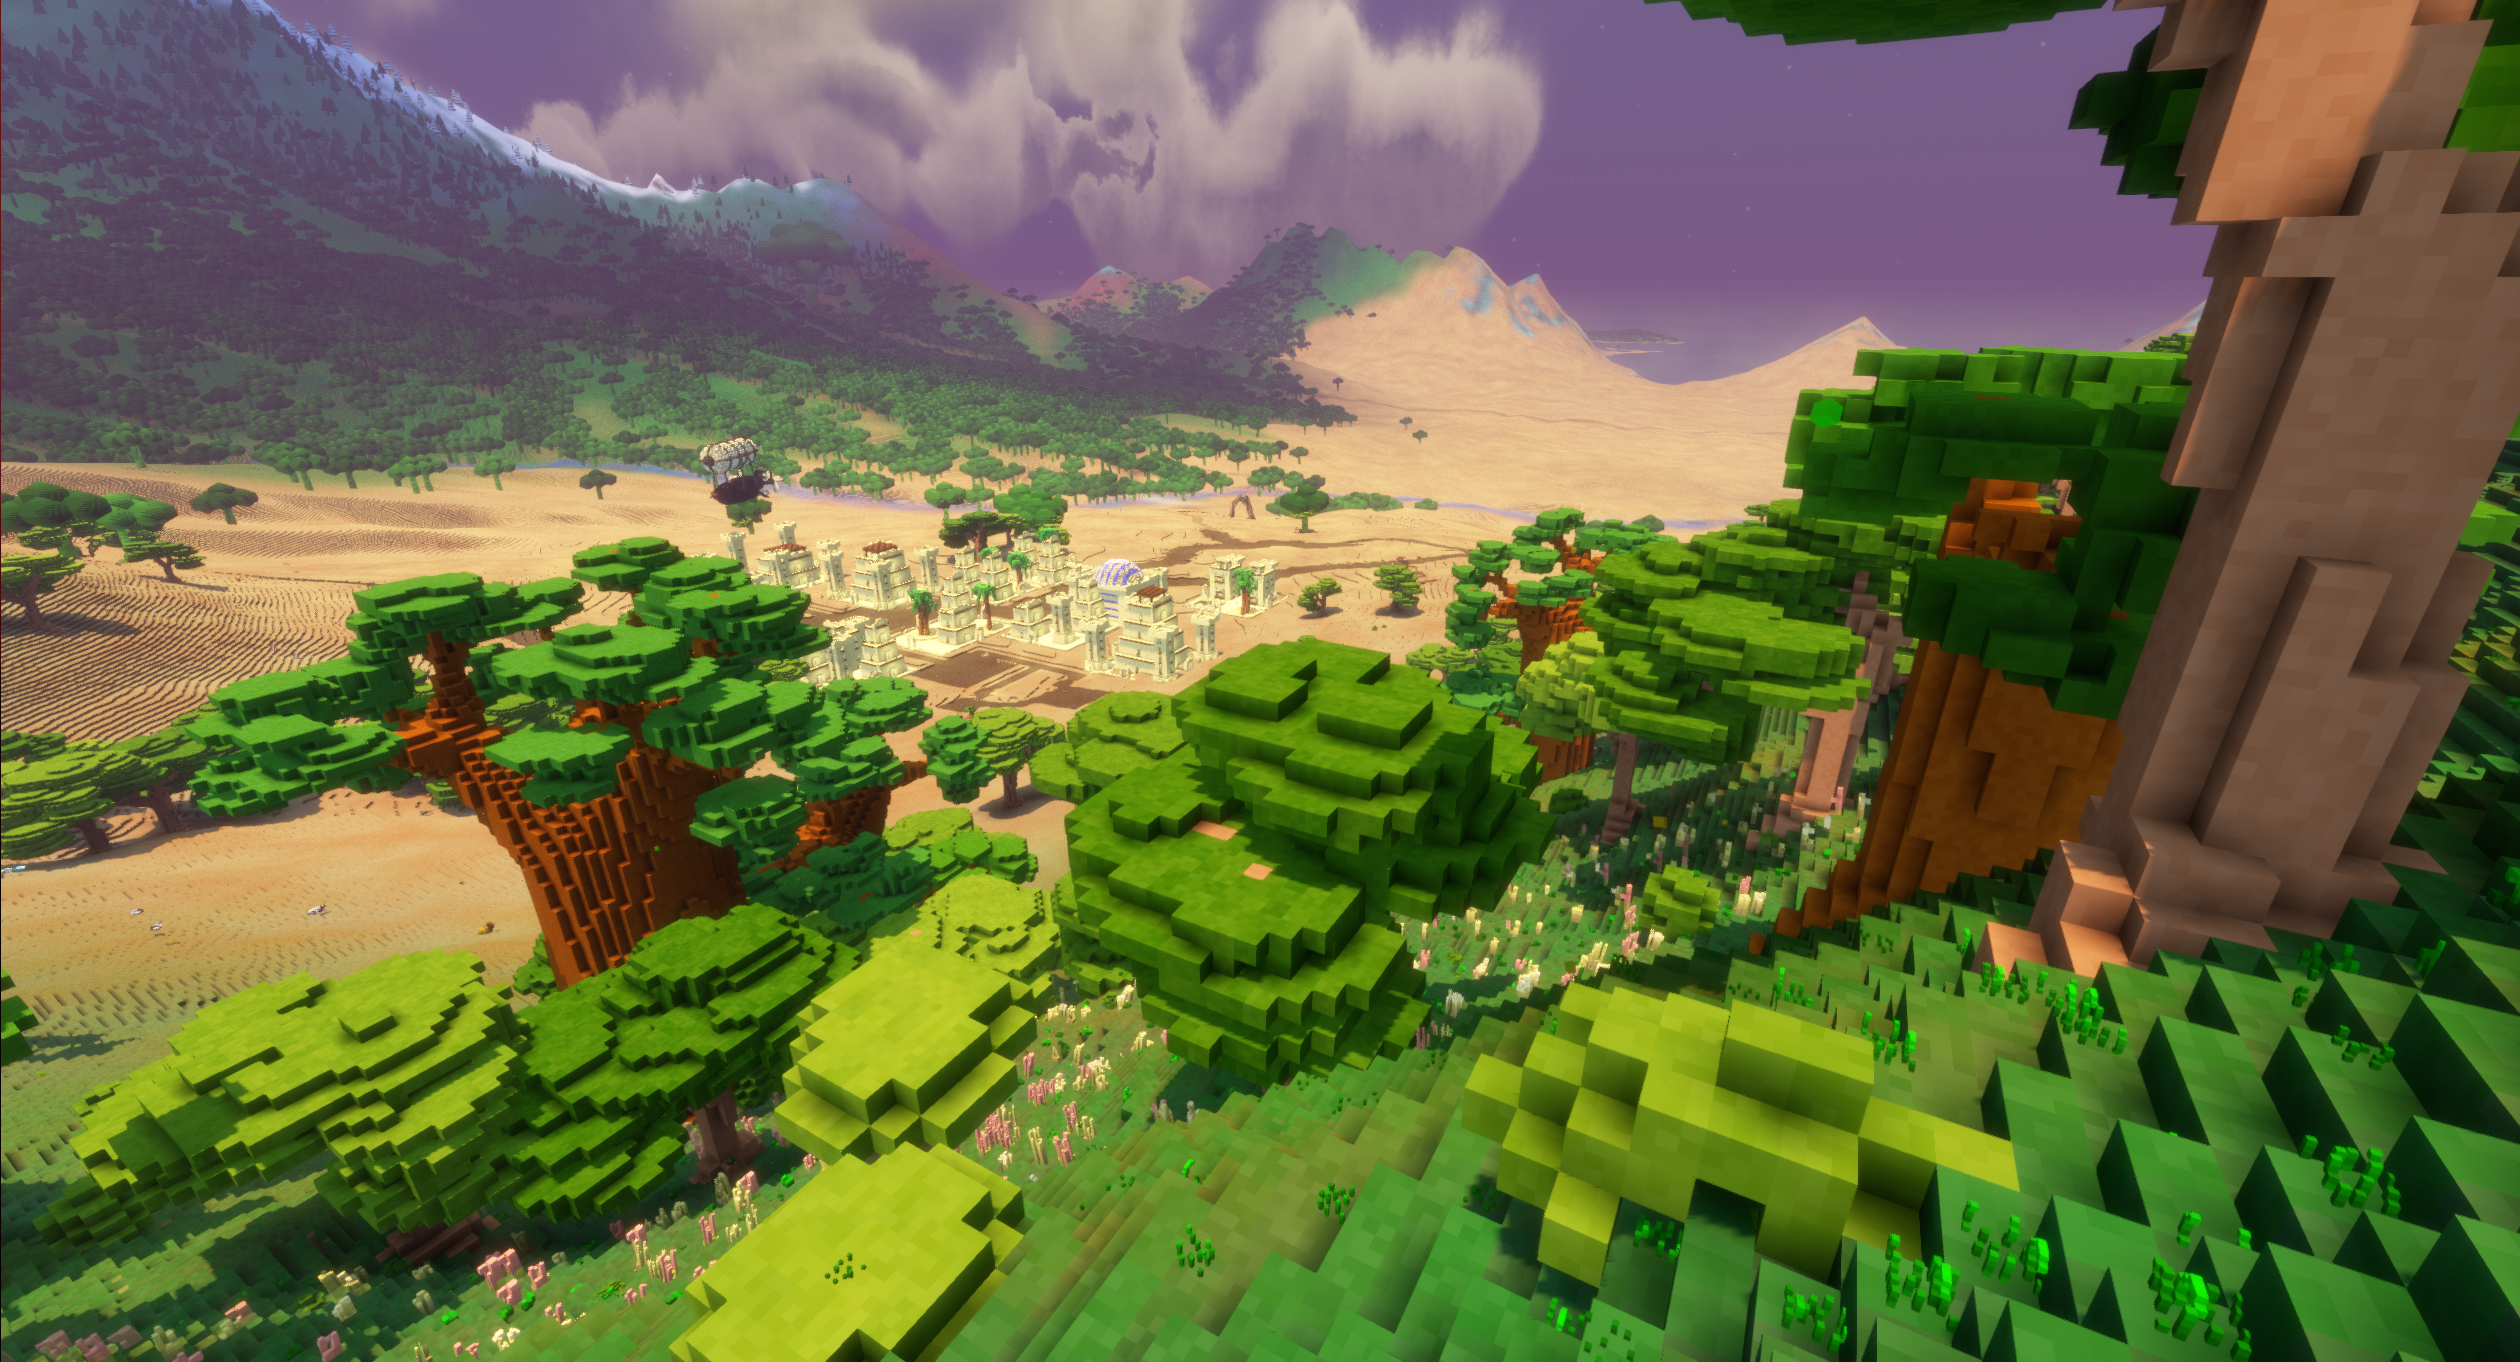
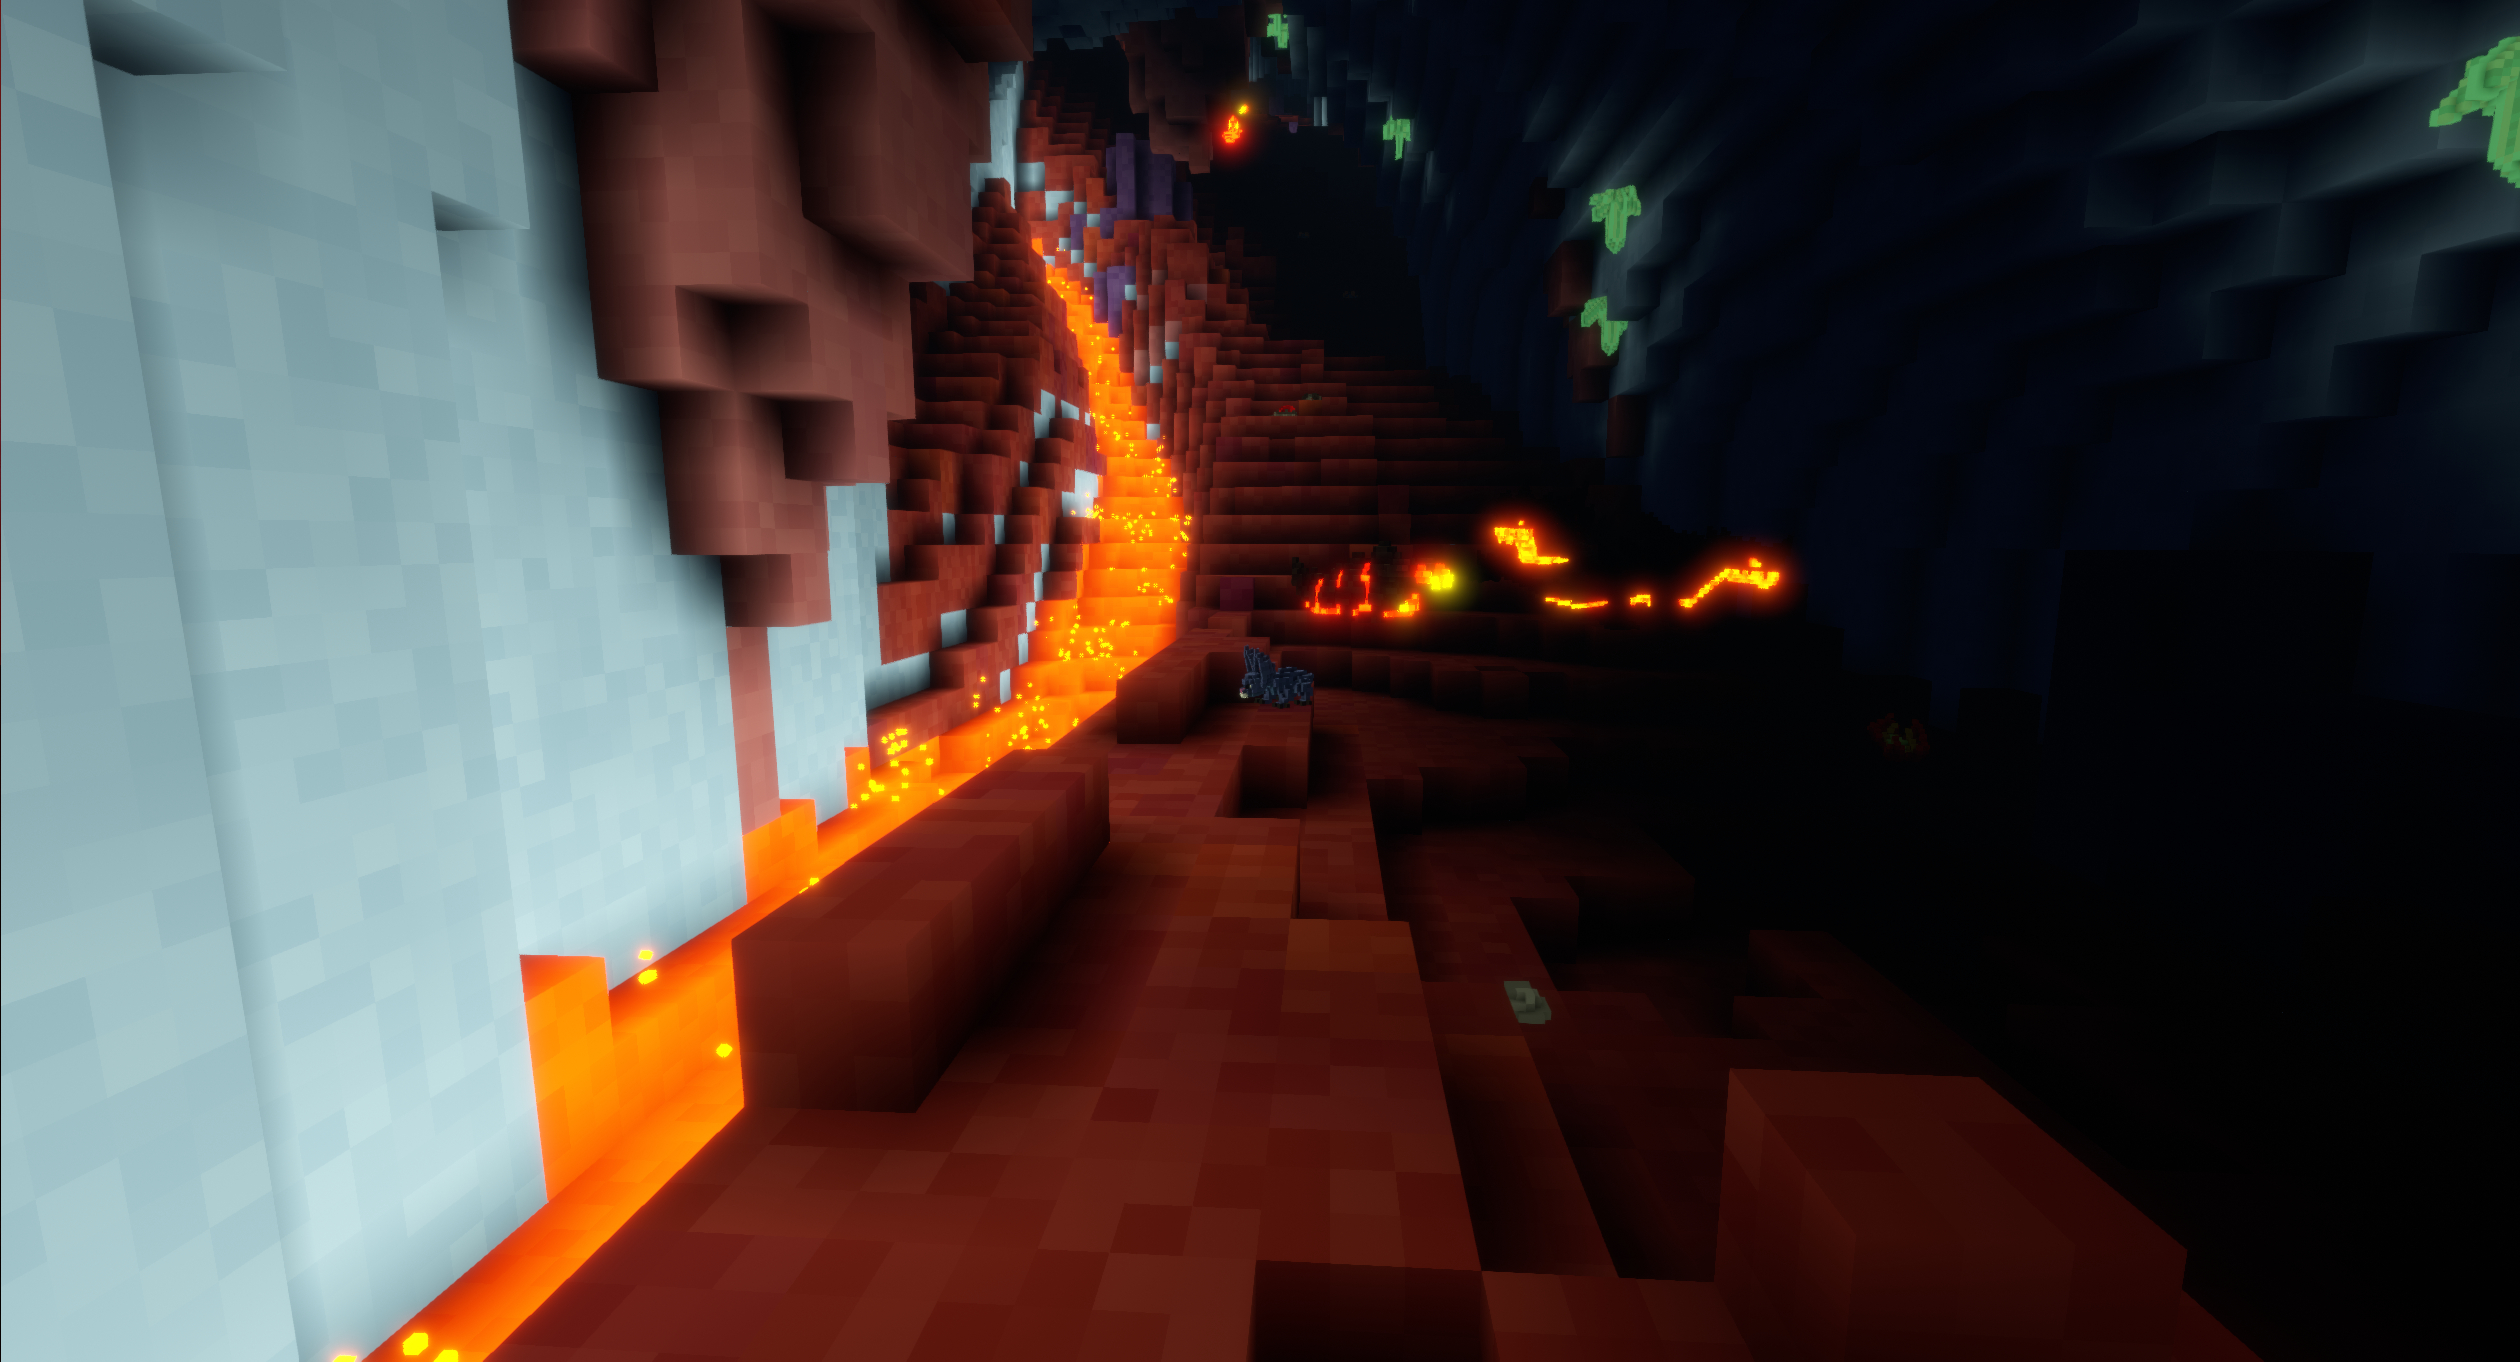
Internals

.jpg)
This section of the book will provide documentation on how inner systems work
Worldgen (WIP)
(this document is constructed from interview with zesterer#3131)
- Geological stage
- Filling stage
- Reshaping stage
Geological stage
- Using noises "generate" properties like altitude, rock strength, humidity and temperature which are used as inputs.¹
- Run erosion algorithm basing on inputs generated by noises.²
- Produced output is an altitude map with a few other simple attributes like humidity (but not much else).³
(It is saved as .bin file in the game's assets)
- Noises can be imagined as random texture. You can see an example of translating noise levels straight into heightmap here click here to open an image
- You can see a nice simple example of erosion algorithm here (you can skip to 3:52) click here to open YouTube video
- You can imagine altitude map as bare map with only "shape" - river valleys, basins, mountain ridges etc.
Filling stage
(Happens when you actually run singleplayer/server)
Using data from Geological stage places lakes and rivers.
Compute tree density, desert dunes...
(e.g. Using "shape" and some metadata it is figuring out if some hole in the ground should be filled with liquid)
The output looks like this:
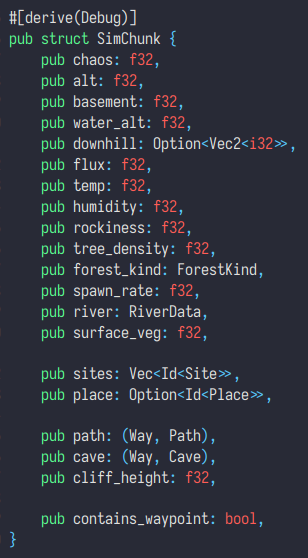
(at this stage, contains_waypoint, path, cave, sites and place are empty)
Reshaping stage
| local, temporary, natural elements
(Exact quote from zesterer is pretty self-explanatory:)
So these are things like cliffs and caves
We layer these on top of the world using a variety of techniques
Exactly how isn't too important
Caves and paths are actually done using the same system, known as the "way" system
It basically just provides a method of connecting up long elements between chunks
Wiring
General system overview
Shallow definitions:
- Circuit component is a backbone of whole system. It stores information about from where and to where data has to be passed.
- Wire is part of Circuit (one circuit can have many wires) it stores data from what entity and under what field name value has to be passed to what entity and field name.
- Wiring component is a "worker" it knows what data it has and what has to be performed when executing it.
- OutputFormula takes inputs (and own config) and produces output.
If something can't be calculated, but given place has to result in some value - it will result in f32 0.
Each wiring component has 3 pieces of information:
- Inputs (data injected by Circuit)
- Outputs (information of how to compute output)
- Actions (information about what should happen if inputs are in given state)
Each wiring tick has 3 stages:
- Compute (take each Wiring component, feed inputs into output formulas, produce outputs)
- Transport (get outputs of previous step and using Circuit pass them around)
- Dispatch (get inputs (note that we are using modified state by transport) and dispatch logic)
Compute
- Take all wiring components and map them
- Calculate each outputs output formula
- Construct outputs with type
HashMap<E, Hashmap<F, V>>where:- E is an
specs::Entitythat holds certain wiring component. - F is a
Stringrepresenting field name. - V is a resulting value of OutputFormula. (at the moment, all results are
f32)
- E is an
Transport
- Take circuits and for each circuit take attached wires *
- Take every wire and for each wire *
- Get
from what entity,from what field,to what entityandto what fieldfrom wire. - Perform something like
to what entity.inputs[to what field] =from what entity[from what field] **
* It is basically "take every wire" in loaded server data
** Keep in mind that we are using product of Compute step as right hand of this simplification.
Dispatch
- For each action in every wiring component
- If wiring action formula output* is more or equal to action threshold...
- Dispatch each effect attached to the wiring action
* Calculated using inputs
Output formulas
Constant
Outputs constant value.
Input
Outputs value of input field under given name.
Logic
Allows composing output formulas. It takes left and right output formulas which are calculated, and then performs logic on them.
Available logic kinds (I refer to left and right output as side):
- Min - return value of lower side.
- Max - return value of higher side.
- Sub - return value of
left - right. - Sum - return value of
left + right. - Mul - return value of
left * right.
Sine wave (not implemented)
Takes server time and returns sine of it.
OnCollide
If physics captures collision for attached entity (touching_entities) returns given value.
OnInteract (not implemented)
If something interacts (e.g. player is "pulling" lever) returns given value.
OnDeath
Returns value * count of entities that died in last tick in given radius.
Actions
Spawn projectile
Spawns projectile using projectile constructor.
Set block collidability (not implemented)
Modifies properties of block on certain coordinates.
Set light
Changes LightEmitter properties of attached entity.